
Container Gardens
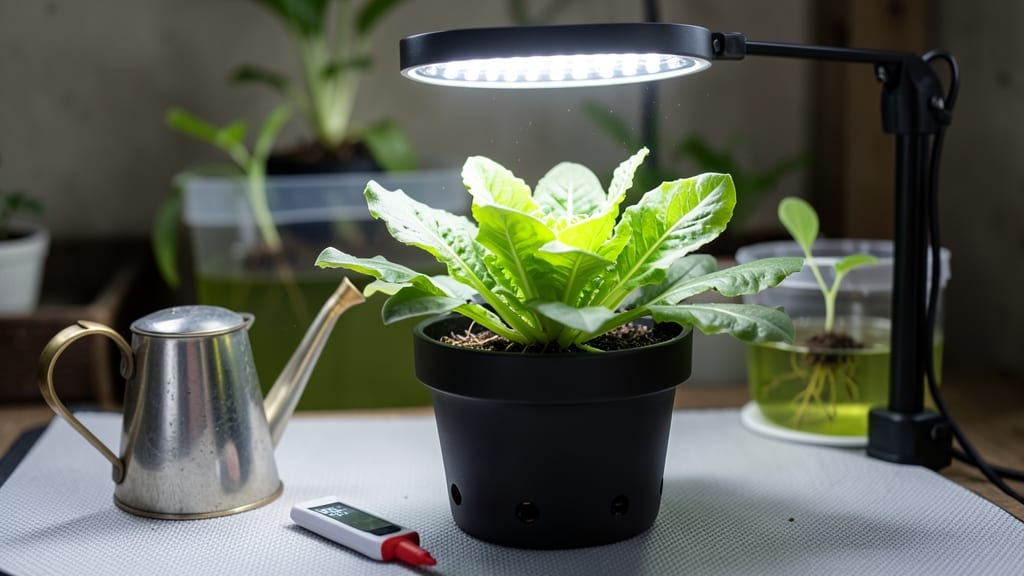
Growing romaine lettuce indoors means fresh, crisp salads in just 6 weeks—no grocery store wilted greens here. 🌱 I’ve grown enough romaine to fill my fridge for months, and the secret isn’t complicated: it’s all about light, water, and patience.
The first time I saw those perfect dark green leaves with crisp stems, I knew I’d never buy romaine again.
You’ll need a shallow container (at least 6 inches deep), well-draining potting mix, and a sunny spot—or a basic grow light if natural light is weak. Romaine thrives in cool temperatures (60-65°F) and needs consistent moisture, but never soggy soil.
Start with seeds or transplants, and within a few weeks, you’ll have lettuce that tastes fresher than anything from the store.
The payoff? Buttery, crisp stems that hold up perfectly in salads, and leaves that stay vibrant longer than store-bought. Harvest outer leaves first to keep the plant producing, and you’ll have a steady supply all season. Even if your space is small, this works—no garden required.
Here’s where it gets interesting: leggy growth or bolting (going to seed) are easy to fix with better light or cooler temps. I’ll walk you through troubleshooting those too, so you don’t end up with bitter lettuce. Let’s get those seeds started!
📚 In This Guide
- What you need
- Instructions
- Tips and common mistakes
- Wrapping up and next steps
What you need
- ● Romaine lettuce seeds: 1 packet (non-GMO, heirloom, or organic for best results). Aim for ~100 seeds (or ~1/4 tsp) for a small harvest.
- ● Growing container: A shallow tray (6–8" deep) with drainage holes or a 5–7" pot per plant. Example: 10" x 20" plastic tray or 5" fabric grow bags.
- ● High-quality potting mix: 2–3 gallons of seed-starting mix (sterile, lightweight, and peat/coir-based). Avoid garden soil!
- ○ Grow lights: 1–2 full-spectrum LED lights (12–15 watts per sq. ft.) or a sun lamp (40W+). Optional: A timer for 12–14 hours/day.
- ● Watering can or spray bottle: With a fine rose nozzle to avoid disturbing seeds.
- ● Plant labels: 5–10 labels (to track varieties if growing multiple types).
- ● Trowel or small hand shovel: For transplanting seedlings (if starting from seed).
- ○ Misting spray bottle: Keeps humidity high for germination (optional but helpful).
- ● Fertilizer: Balanced liquid fertilizer (5-5-5 or 10-10-10) or fish emulsion (diluted to half-strength). Apply every 2–3 weeks.
- ● Humidity dome or plastic wrap: To create a mini greenhouse for seeds (remove after sprouting).
- ● Thermometer/hygrometer: Monitors temperature (65–75°F ideal) and humidity (50–70% for germination).
- ● Pruning scissors: For harvesting outer leaves without damaging the core.
- ● A sunny windowsill (south-facing) or a dedicated indoor space near grow lights.
- ● Patience! Romaine takes 6–8 weeks from seed to harvest, but it’s worth it.
- ● Consistency: Commit to daily light, water, and care checks.
Step-by-step instructions for growing romaine lettuce indoors
Here’s how to grow crisp, homegrown romaine lettuce—no greenhouse required!
🌱 Step 1: Choose the Right Containers and Soil
Start with 4-inch deep containers (like shallow pots or a long tray) to give roots room to spread without getting waterlogged. I like using biodegradable pots because they make transplanting easier later. Fill each container with well-draining potting mix—never garden soil, which compacts and suffocates roots.
Press the soil down gently to remove air pockets, then moisten it until damp but not soggy. A good test: squeeze a handful—it should hold together but not drip. Romaine thrives in loose, airy soil, so avoid heavy mixes. If your mix feels dense, stir in a handful of perlite or vermiculite for extra drainage.
🌱 Step 2: Plant Seeds at the Correct Depth
Sow 2-3 seeds per container, spacing them about 1 inch apart. Press them into the soil just ¼ inch deep—any deeper and they’ll struggle to break through. I use my finger to make tiny indentations first, then drop the seeds in and cover lightly with soil.
Mist the surface with a spray bottle until the soil looks evenly damp. Avoid oversaturating—you’ll see seeds wash away or sink too deep. Place the containers in a warm spot (65-75°F) until sprouts appear in 5-10 days. A seedling heat mat speeds this up, but even a sunny windowsill works.
☀️ Step 3: Provide Bright, Indirect Light
Once seedlings emerge, move them to a south-facing window or under a grow light for 12-14 hours of light daily. Romaine lettuce needs plenty of light to stay crisp and avoid bolting (going to seed prematurely). If leaves stretch toward the light or turn pale, your setup isn’t bright enough—adjust the light or move closer.
Rotate the containers a quarter turn every few days so plants grow evenly. You’ll notice leggy stems if light is insufficient—this is a red flag. Strong seedlings have short, sturdy stems and deep green leaves. If your space is dim, supplement with a full-spectrum LED grow light kept 6 inches above the plants.
💧 Step 4: Water Consistently and Fertilize Lightly
Keep the soil evenly moist—not soggy, not dry. Water when the top inch feels dry to the touch, using room-temperature water to avoid shocking the roots. I water from the bottom (place containers in a tray of water for 10 minutes) to encourage deep root growth and prevent fungal issues.
After 3 weeks, feed the plants with a balanced liquid fertilizer (like 10-10-10) diluted to half strength. Over-fertilizing burns tender lettuce leaves, so less is more. You’ll see new growth within a week—that’s your signal everything’s working. Avoid wetting the leaves when watering to prevent mildew.
✂️ Step 5: Harvest for Crisp Stems and Bold Flavor
Harvest outer leaves when they reach 4-6 inches tall, cutting just above the base with clean scissors. This encourages the plant to keep producing. For a full head of romaine, wait until the inner leaves form a tight, crisp rosette—usually around 6 weeks. You’ll know it’s ready when the stems feel firm and the leaves hold their shape.
To extend the harvest, trim the entire plant 1 inch above the soil after the first cut. With proper care, romaine will regrow and give you 2-3 more harvests before bolting. Store cut leaves in a sealed container in the fridge for up to 5 days, or eat fresh for the crispiest texture.
Tips & tricks for perfect indoor romaine lettuce
These simple tricks will help you grow the crispiest, most flavorful romaine indoors—no gardening experience required.
Container Depth Matters: Those 4-inch deep containers are non-negotiable for romaine. Shallow pots prevent root crowding, which leads to bitter leaves. If you only have deeper containers, add a layer of 2-3 inches of gravel at the bottom for drainage—this mimics outdoor growing conditions and keeps roots healthy.
Seedling Heat Hack: That 65-75°F warm spot is critical for germination, but don't overthink it. A simple DIY solution: place containers on top of your fridge (not inside) or wrap them in a thin towel with a heating pad underneath. The key is consistent warmth—just 5-10 days until sprouts appear, and you're good to go.
Light Rotation Secret: The quarter turn every few days might seem minor, but it prevents lopsided growth. Think of it like rotating a plant under a streetlamp—one side wouldn't get enough light. I set a timer on my phone to remind me every 3 days. If you forget, just check for stems leaning toward the light; that's your cue to reposition.
Fertilizer Timing: That 3-week mark is perfect because it's when roots establish but leaves are still growing fast. I use a spray bottle with diluted fertilizer to avoid soil splash on leaves, which can cause mildew. Pro tip: mix your fertilizer solution in a separate container first—adding it directly to the soil can create concentration pockets that burn roots.
Pro Tips for Growing Romaine Lettuce Indoors
- These simple tricks will help you grow the crispiest, most flavorful romaine indoors—no gardening experience required.
- Container Depth Matters: Those 4-inch deep containers are non-negotiable for romaine. Shallow pots prevent root crowd...
- Seedling Heat Hack: That 65-75°F warm spot is critical for germination, but don't overthink it. A simple DIY solution...
Frequently asked questions
Got questions about growing crisp, homegrown romaine indoors? You’re not alone! Here are answers to the most common concerns—so you can skip the guesswork and dive into your harvest.
How much light does romaine lettuce really need indoors?
Romaine thrives on 6–8 hours of bright, indirect light daily. A south-facing window or a grow light (12–16 hours/day) works best. Without enough light, leaves turn leggy and pale. Pro tip: Rotate your container weekly for even growth!
How long does it take to grow romaine indoors?
From seed to harvest, expect 4–6 weeks for baby leaves or 6–8 weeks for full-sized heads. Speed up growth with warm soil (60–70°F) and consistent moisture. Bonus: Harvest outer leaves first to extend your harvest window!
Why is my romaine lettuce turning bitter or bolting?
Bitter taste or early bolting (flowering) usually means too much heat or light. Keep temps below 75°F and avoid direct sun. Overcrowding or nutrient deficiencies can also trigger bolting. Fix it: Thin seedlings and use a balanced fertilizer (like 5-5-5) every 2–3 weeks.
Can I grow romaine in small spaces, like a windowsill or hydroponics?
Romaine adapts well to 5–10 gallon containers or hydroponic setups. For windowsills, use shallow trays (4–6 inches deep). Hydroponics speeds up growth—just ensure roots stay submerged in nutrient-rich water. Space-saving hack: Try vertical planters or hanging pockets!
Is homegrown romaine more nutritious than store-bought?
Yes! Freshly harvested romaine retains more vitamins (A, K, folate) and antioxidants than store-bought, which can lose nutrients during transport. Plus, you control pesticides—just skip synthetic fertilizers for the cleanest harvest. Win-win: Crunchy, flavorful, and packed with goodness!
Wrapping up and next steps
Growing romaine lettuce indoors isn’t just possible—it’s rewarding! With the right setup, you’ll enjoy crisp, homegrown greens in just six weeks, saving money and adding freshness to your meals. Whether you’re a beginner or a seasoned gardener, this method proves that space isn’t a limit—just get creative!
Ready to take the next step? Start small—try a single container or expand your indoor garden with herbs or microgreens. Share your progress or harvest tips with fellow plant lovers online—you’ve got this! 🌱