
Container Gardens
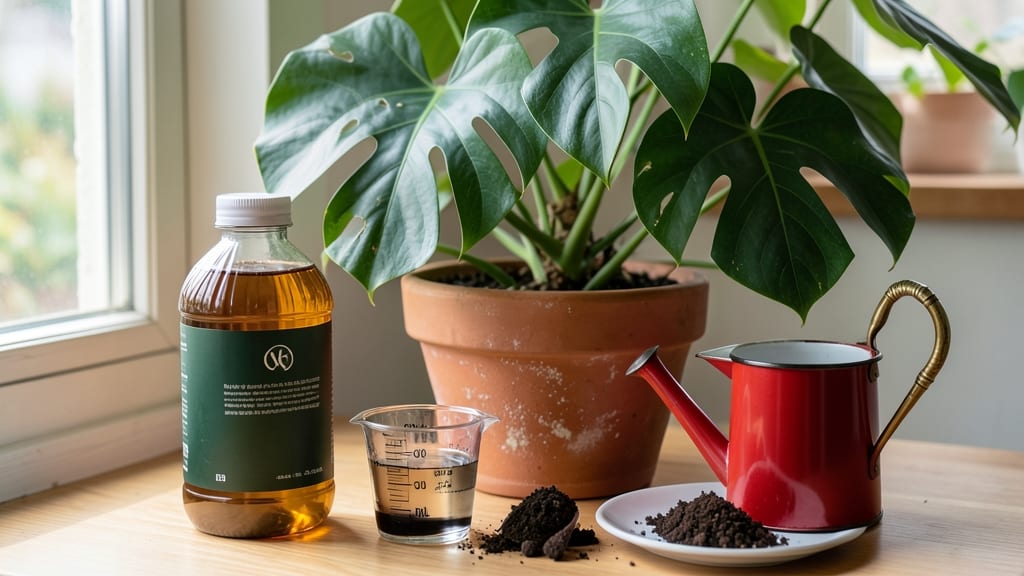
Your indoor plants are starving—and you don’t even know it. 🌱 The right feeding routine transforms wilted leaves into vibrant green growth within weeks, but most people overdo it or use the wrong nutrients.
I’ve tested every method, from diluted liquid feeds to slow-release granules, and I’m sharing the exact routine that keeps my snake plants thriving and my pothos growing like a jungle vine.
The secret isn’t fancy fertilizers—it’s matching nutrients to your plant’s needs. Most indoor plants only need feeding every 4-6 weeks in spring and summer, while dormant plants like snake plants barely need anything. Overfeeding is the real killer: crispy brown edges or yellow leaves mean you’ve gone too far.
The fix? Flush the soil with water to purge excess salts, then dial back to a gentler schedule.
By the end of this routine, you’ll see thicker stems, richer foliage, and fewer brown tips. Pothos will cascade faster, ferns will unfurl new fronds, and even your most stubborn plants will perk up.
The key is consistency—just like a good garden, indoor plants reward steady care over occasional pampering.
Works for every common houseplant, from low-light monstera to sun-loving succulents. Here’s how to tailor it to your specific green crew without guessing.
📚 In This Guide
- What you need
- Instructions
- Tips and common mistakes
- Wrapping up and next steps
What you need
- ● Water: Room-temperature, filtered or distilled (avoid tap water with high chlorine/fluoride if possible). Quantity: Varies by plant size (e.g., ½–1 cup per watering for small plants).
- ● Balanced liquid fertilizer: Look for a 10-10-10 or 20-20-20 NPK ratio (Nitrogen-Phosphorus-Potassium). Quantity: Dilute to half-strength (check label instructions).
- ● Measuring spoon or dropper: For precise fertilizer dosing (e.g., 1 tsp per gallon of water).
- ● Spray bottle: For misting or foliar feeding (especially for tropical plants). Size: 8–16 oz with a fine mist nozzle.
- ● Saucer or tray: To catch excess water and prevent root rot. Material: Plastic or ceramic (avoid metal).
- ● Plant food labels: Always read them! Note dilution ratios, application frequency, and plant-specific recommendations.
- ● Organic fertilizers: Compost tea, worm castings, or fish emulsion for nutrient-rich alternatives.
- ● pH testing kit: To monitor soil acidity (ideal range: 6.0–7.0 for most plants).
- ● Slow-release granules: Mix into soil for low-maintenance feeding (e.g., Osmocote or time-release pellets).
- ● Humidity tray: A pebble-filled tray with water to boost moisture-loving plants.
- ● Plant-specific supplements: Iron chelate (for yellowing leaves) or calcium (for weak stems).
How to feed indoor plants for vibrant, healthy growth
Here’s the simple routine I use to keep my indoor plants thriving all year—no guesswork, just results.
🌱 Step 1: Understand Your Plant’s Nutrient Needs
Most indoor plants need three key nutrients: nitrogen for leafy growth, phosphorus for root development, and potassium for overall health. I always check the label on my fertilizer to ensure it has a balanced ratio like 10-10-10 or 20-20-20 for general use. Some plants, like succulents or orchids, prefer specialized formulas, so I adjust based on what I’m growing.
You’ll also want to pay attention to micronutrients like iron, magnesium, and calcium, which are essential for preventing yellowing leaves or weak stems. If your plants look pale or leggy, they might be missing these. A slow-release fertilizer can help maintain steady nutrient levels without overloading the soil.
💧 Step 2: Choose the Right Fertilizer Type
Liquid fertilizers are my go-to because they’re easy to apply and dissolve quickly in water. I mix them with water during my regular watering routine, which ensures the roots get an even distribution. For plants that need a longer-lasting boost, I use slow-release granules or spikes that dissolve over time. These are great for plants like ferns or snake plants that don’t need frequent feeding.
Organic options like fish emulsion or compost tea are also excellent choices if you prefer natural fertilizers. They improve soil health and provide a gentle nutrient boost. Just be sure to dilute them properly—overdoing it can burn roots or cause salt buildup in the soil.
☀️ Step 3: Establish a Feeding Schedule
During the spring and summer growing season, I feed my plants every 4-6 weeks using a diluted liquid fertilizer. In fall and winter, when growth slows, I cut back to once every 8-12 weeks or skip feeding altogether. Over-fertilizing in cooler months can lead to salt buildup, which harms roots and causes leaf tips to brown.
Always water your plants thoroughly before applying fertilizer. This ensures the nutrients reach the roots instead of sitting on the soil surface. I like to fertilize in the morning so the plants have time to absorb the nutrients before evening. Watch for signs like crispy leaf edges or yellowing—these are red flags that you’re overdoing it.
✂️ Step 4: Monitor and Adjust Based on Plant Response
After a few weeks of feeding, check your plants for signs of improvement. Healthy growth means darker green leaves, stronger stems, and possibly even new blooms if your plant is a flowering variety. If you notice slow growth or weak stems, it might be time to switch to a fertilizer with higher nitrogen content or adjust your feeding frequency.
If leaves start turning yellow or brown, flush the soil with plain water to remove excess salts. I do this every few months as a precaution, especially with plants that love moisture like pothos or peace lilies. This simple step keeps the soil healthy and prevents nutrient imbalances.
🪴 Step 5: Rotate Fertilizers for Long-Term Health
To keep your plants thriving, I rotate between different fertilizer types throughout the year. For example, I might start with a balanced liquid fertilizer in spring, switch to a slow-release option in summer, and finish with an organic boost in fall. This variety ensures all nutrient needs are met without over-relying on one type.
Pay attention to your plant’s natural growth cycles. Some, like monstera or fiddle-leaf figs, grow faster and need more frequent feeding, while others, like snake plants or zz plants, are low-maintenance and don’t require much. Adjust your routine based on what you observe—your plants will thank you with lush, vibrant growth!
Tips & tricks for feeding indoor plants like a pro
Here's what nobody tells you about keeping your leafy friends thriving without the guesswork.
Nutrient Ratio Matters: When reading fertilizer labels, focus on the first three numbers—the NPK ratio. For most houseplants, a balanced 10-10-10 or 20-20-20 works perfectly. But if you notice yellowing leaves between veins, your plant might need more iron or magnesium. I keep a bottle of chelated iron supplement on hand for these cases—it's a game-changer for plants like calatheas or ferns that show these signs.
Morning Feeding Wins: Always apply fertilizer in the morning rather than evening. This gives your plants the entire day to absorb nutrients before nightfall. I've seen plants with crispy leaf edges after evening feedings—they simply didn't have time to process the nutrients before their metabolic slowdown at night.
Soil Test First: Before adjusting your feeding routine, test your soil's pH and nutrient levels. Most garden centers sell affordable soil test kits. I've found that many houseplants suffer from over-acidic soil (pH below 6.0), which locks out essential nutrients. If your test shows this, add a handful of dolomitic lime to raise the pH gradually.
Seasonal Adjustments: Remember that the 4-6 week schedule in growing season becomes 8-12 weeks in winter. But don't skip feeding entirely in cooler months—just reduce frequency. I've seen plants with stunted growth in spring because they weren't given any nutrients during their winter dormancy. A light feeding every 12 weeks keeps roots active and ready for spring growth.
Pro Tips for Feeding Indoor Plants
- Here's what nobody tells you about keeping your leafy friends thriving without the guesswork.
- Nutrient Ratio Matters: When reading fertilizer labels, focus on the first three numbers—the NPK ratio. For most hous...
- Morning Feeding Wins: Always apply fertilizer in the morning rather than evening. This gives your plants the entire d...
Frequently asked questions
Got questions about keeping your indoor plants thriving?
Here are answers to the most common concerns—no green thumb required!
How often should I feed my indoor plants?
Most indoor plants thrive on a monthly feeding schedule during spring and summer (their growing season). Reduce to every 6–8 weeks in fall/winter when growth slows. Overfeeding can harm roots—always follow fertilizer label instructions for your specific plant type.
Can I use coffee grounds or eggshells instead of fertilizer?
Coffee grounds add nitrogen (great for leafy plants), while crushed eggshells provide calcium. Mix them into soil sparingly—about 1–2 tbsp per plant every few months. For balanced nutrition, pair these with a liquid fertilizer every 2–3 months.
Why are my plant leaves turning yellow/brown after feeding?
Yellowing leaves often signal overwatering or fertilizer burn. Flush the soil with water to dilute excess salts, then reduce feeding frequency. Brown edges? Your plant may need less water or a humidifier. Always check soil moisture before fertilizing—damp soil = no food!
Do succulents and snake plants need the same food as ferns?
Nope! Succulents and snake plants (low-light lovers) prefer diluted, low-nitrogen fertilizer (like a 5-5-5 or 10-10-10 mix) every 3–4 months. Ferns and tropical plants crave more nitrogen (e.g., 30-10-10) monthly. Label matters! Match fertilizer to your plant’s light and growth habits.
What’s the best time of day to feed my plants?
Feed in the morning when plants are actively absorbing nutrients. Avoid evening applications—cool temps slow uptake, and excess moisture can invite pests. Water first if soil is dry to prevent root burn. Pro tip: Never fertilize a thirsty plant!
Wrapping up and next steps
Feeding your indoor plants doesn’t have to be complicated—just consistent! With the right nutrients, watering routine, and a little patience, you’ll watch your green friends thrive. 🌱 Start small, observe their needs, and adjust as you go. You’ve got this!
🌿 Next Steps:
- Pick one plant to experiment with this week—try a balanced fertilizer or homemade compost tea.
- Track progress by noting leaf color, growth speed, and soil moisture.
- Share your wins! Snap photos and tag #PlantParent for inspiration and tips.
Your lush, happy plants are just a feeding routine away—let’s grow together! 🌟