
Container Gardens
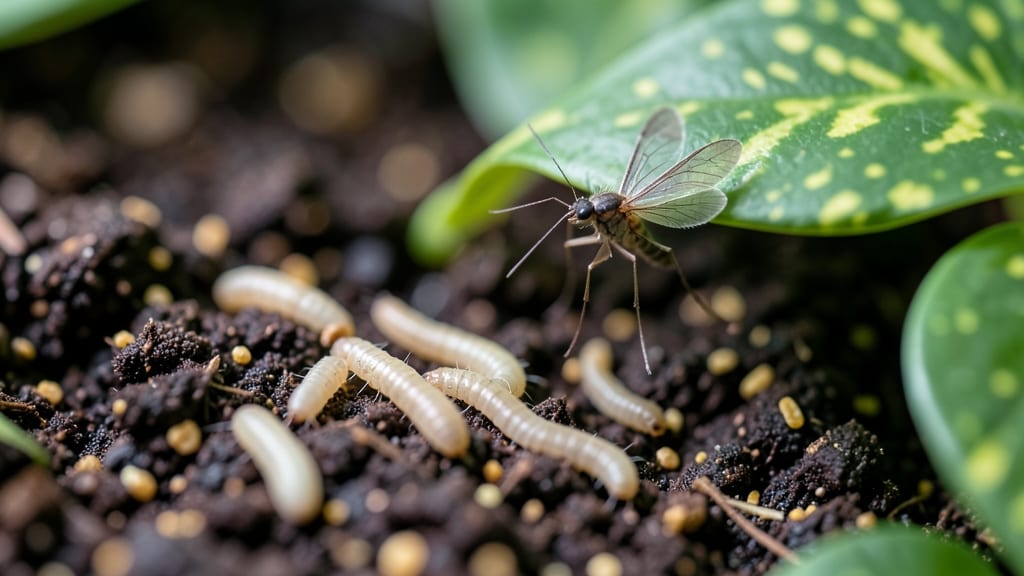
Finding the insects in indoor plant soil can feel like a nightmare—but it’s actually a fixable problem. 🌱 I’ve battled fungus gnats, fruit flies, and even spider mites in my own collection, and I’ve learned the natural ways to keep them under control without harsh chemicals.
The good news? Most of these insects are harmless and easy to manage with simple adjustments. Overwatering is usually the root cause, so cutting back on water and letting the top inch of soil dry out makes a huge difference.
You’ll also want to check for yellowing leaves or sticky residue, which are dead giveaways. Once you identify the pests, natural remedies like sticky traps, beneficial nematodes, or a light dusting of diatomaceous earth can eliminate them in a matter of days.
The key is acting fast—before they multiply and damage your plants. This method works for any indoor plant, from ferns to succulents, and keeps your green space thriving without toxic sprays. Let’s tackle this step by step!
📚 In This Guide
- What you need
- Instructions
- Tips and common mistakes
- Wrapping up and next steps
What you need
- ● Indoor plants (1 or more, depending on infestation size)
- ● Organic potting soil (2–3 bags, ~1–2 cubic feet total, well-draining)
- ● Beneficial nematodes (e.g., Steinernema feltiae or Heterorhabditis bacteriophora—1–2 million per plant)
- ● Neem oil (16 oz bottle) or insecticidal soap (32 oz)
- ● Spray bottle (8 oz, with fine mist nozzle)
- ● Gloves (nitrile or rubber, 1 pair)
- ● Trowel or small shovel (for soil replacement)
- ● New pots or containers (if repotting, 1–2 per plant, with drainage holes)
- ● Watering can (with a gentle spray setting)
- ● Fine-mesh screen or cheesecloth (18" x 18" sheet, for sifting soil)
- ● Diatomaceous earth (food-grade) (1 lb, for barrier treatment)
- ● Ladybugs or lacewing larvae (50–100, for biological control)
- ● Compost or worm castings (1–2 cups, to boost soil health)
- ● Hydrogen peroxide (3%) (16 oz, for sterilizing soil)
- ● Plant-safe fungicide (e.g., copper fungicide, if mold/fungus is present)
- ● LED grow light (for post-treatment plant recovery)
Step-by-step guide to identifying and managing indoor plant soil pests naturally
Here's how to tackle those unwelcome guests in your houseplants—without reaching for harsh chemicals.
🔍 Step 1: Identify the Pests in Your Soil
Start by carefully examining the top inch of soil and the base of your plant's stems. Common indoor soil pests include fungus gnats (tiny black flies), aphids (clustered on leaves), mealybugs (cottony white patches), and scale insects (brown bumps on stems). I like to use a magnifying glass for this step—it helps spot early signs before an infestation takes hold.
Check the undersides of leaves and along leaf veins, too. Some pests, like spider mites, leave behind fine webbing. If you see tiny larvae wriggling in the soil, those are likely fungus gnat larvae. Note the type of pest you find—this will determine the best natural treatment.
🌱 Step 2: Remove Infested Soil and Clean the Pot
Gently remove your plant from its pot and shake off as much soil as possible. Discard the old soil—don’t compost it, as pests can spread. I place the plant in a sink or bucket and rinse the roots under lukewarm water to dislodge any remaining soil and pests. Be gentle to avoid damaging delicate roots.
Wipe down the inside of the pot with a damp cloth or a 50/50 water-vinegar solution to kill any lingering eggs or pests. If the pot is plastic, you can soak it in warm, soapy water for 10 minutes before rinsing thoroughly. This step ensures you’re starting fresh with a clean container.
💧 Step 3: Treat the Roots and Repot with Clean Soil
Fill a bowl with water and a few drops of neem oil or insecticidal soap. Submerge the plant’s roots in this solution for about 10-15 minutes. This helps drown any remaining pests and treats the roots. After soaking, let the roots air-dry for a few minutes before repotting.
Use fresh, sterile potting mix to refill the pot. I like to add a thin layer of sand or perlite to the bottom of the pot first—this improves drainage and makes it harder for pests to thrive. Water the plant lightly after repotting, but avoid overwatering, as soggy soil attracts more pests.
☀️ Step 4: Prevent Future Infestations with Natural Methods
Place a small dish of water with a few drops of dish soap near the plant—this attracts adult fungus gnats, which will drown. For mealybugs or scale, spray the plant with a solution of water, neem oil, and a little bit of mild soap once a week. I also like to dust the soil lightly with diatomaceous earth, which is harmless to plants but deadly to pests.
Reduce overwatering—most indoor pests thrive in damp, soggy soil. Let the top inch of soil dry out between waterings. If you notice pests returning, increase airflow around the plant by moving it to a brighter spot or using a small fan to keep the environment less hospitable to insects.
⏰ Step 5: Monitor and Maintain Pest-Free Soil
Check your plant’s soil and leaves every few days for signs of new pests. Consistency is key—natural treatments work best when applied regularly. If you spot any new activity, repeat the treatment process immediately. Over time, you’ll develop a routine that keeps your indoor garden thriving without chemicals.
Keep a small notebook or digital reminder to track when you last treated your plants. This helps you stay proactive and catch any issues before they become unmanageable. With patience and these natural methods, your indoor plants will stay healthy and pest-free for years.
Tips & tricks for natural indoor plant pest control
Here's what I've learned from treating my own plants—these tricks make all the difference when dealing with soil pests.
Early Detection is Key: In Step 1, when you're examining your plant, focus on the soil surface and leaf undersides first—these are where pests hide. I've caught early infestations by checking these spots every week, especially after repotting. The sooner you spot them, the easier they are to eliminate before they multiply. A small handheld magnifier (about $5 at garden stores) makes this much easier than squinting.
Root Treatment Timing: During Step 3, those 10-15 minutes of root soaking are crucial—don't rush this step! I've found that extending the soak to the full 15 minutes gives the neem oil or insecticidal soap more time to work on stubborn pests. Just make sure to use lukewarm water, as hot water can damage delicate roots. After soaking, I let the roots air-dry for 5 minutes before repotting to prevent any residual moisture from attracting new pests.
Prevention is Simpler Than You Think: For Step 4's prevention methods, I've had the most success with the yellow sticky traps for fungus gnats—place them near your plant's soil surface. The soap-and-water dish works too, but I find the traps catch more gnats because they're specifically designed to attract flying insects. For mealybugs, I spray the undersides of leaves first since that's where they love to hide. Remember, consistency is everything—once a week treatments keep pests from establishing themselves.
Pro Tips for Insects In Indoor Plant Soil
- Here's what I've learned from treating my own plants—these tricks make all the difference when dealing with soil pests.
- Early Detection is Key: In Step 1, when you're examining your plant, focus on the soil surface and leaf undersides fi...
- Root Treatment Timing: During Step 3, those 10-15 minutes of root soaking are crucial—don't rush this step! I've foun...
Frequently asked questions
Got questions about tiny critters in your plant soil?
You're not alone! Here are answers to the most common concerns—plus tips to keep your greens thriving without harsh chemicals.
Why do insects appear in indoor plant soil even if I don’t overwater?
Insects like fungus gnats or springtails thrive in moist soil, but they can also show up due to natural factors like organic debris, poor drainage, or even hitchhiking from new plants. Even slight overwatering or humidity can attract them—so check your pot’s drainage holes and reduce watering if needed!
How long does it take to see results after using natural pest control?
Timing varies! For beneficial nematodes or neem oil, you might spot fewer pests in 1–2 weeks. Diatomaceous earth works faster (24–48 hours) but needs reapplication after watering. Patience is key—consistency beats quick fixes.
Are there chemical-free alternatives to soil drenches?
Try these non-toxic swaps:
- Yellow sticky traps – Catch flying pests like fungus gnats.
- Hydrogen peroxide (3%) – Mix 1 tbsp per quart of water to kill larvae.
- Cinnamon or cayenne pepper – Sprinkle on soil to repel insects naturally.
- Ladybugs or predatory mites – Release them to eat aphids/mites (order online!).
My plant looks stressed—can I still use natural pest control?
Yes! Natural methods are gentler than chemicals, but focus on reviving the plant first:
- Trim yellow/brown leaves to reduce stress.
- Repot in fresh, well-draining soil if roots are soggy.
- Use compost tea (diluted) to boost immunity while treating pests.
Where can I buy beneficial insects or nematodes safely?
Look for reputable suppliers like:
- Garden centers – Ask for Orius insidiosus (minute pirate bugs) or Steinernema feltiae (nematodes).
- Online stores – Brands like Arborjet or Garden Safe ship live beneficials.
- Local beekeepers/farmers – Some sell ladybugs or lacewings in bulk.
Pro tip: Order on a weekday for faster delivery—beneficials arrive alive and need prompt release!
Wrapping up and next steps
Discovering insects in your indoor plant soil doesn’t have to be stressful—it’s often a sign of a thriving, self-regulating ecosystem! 🌱 By embracing natural pest control methods like beneficial insects, companion planting, and organic amendments, you’re not just protecting your plants—you’re fostering a healthier, more sustainable garden. Start small: introduce a few ladybugs or nematodes this week and observe how your plants respond.
Your green thumb is growing, and so is your eco-friendly approach!
🌟 Ready to Take the Next Step?
Dive deeper into DIY pest prevention or explore plant-friendly insectaries to create a balanced indoor jungle. Every little change makes a big difference—your plants (and the planet) will thank you! 💚