
Container Gardens
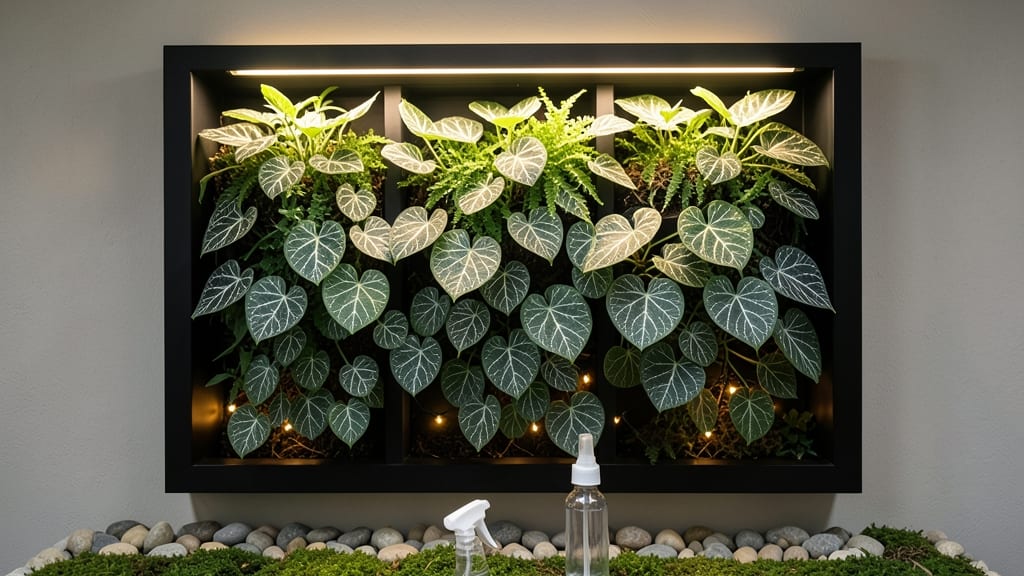
Transforming blank walls into thriving green spaces isn’t just decor—it’s a breath of fresh air. 🌿 Indoor living walls purify your space while lifting your mood, and the best part? You don’t need a greenhouse to pull it off.
My first attempt used a simple wooden frame and thrifted pots, and within weeks, the air smelled cleaner and my stress levels dropped. The secret lies in the right plant mix: ferns for humidity, succulents for resilience, and herbs like mint or basil for practicality.
A basic modular system or even repurposed shelves can hold them, and LED grow lights (even cheap ones) work wonders in dim corners. Maintenance is simpler than you’d think—mist lightly, prune occasionally, and watch your vertical garden thrive.
By summer’s end, you’ll have a lush, air-filtering feature that doubles as art. The plants grow denser, the colors deepen, and the quiet hum of life on your wall becomes the room’s focal point. Perfect for apartments, offices, or any space craving a natural boost.
Start small—even a 2-foot section makes a statement. The key is patience; your living wall will evolve into something truly special over time.
📚 In This Guide
- What you need
- Instructions
- Tips and common mistakes
- Wrapping up and next steps
What you need
- ● Growing Medium: 10–20 lbs of lightweight, well-draining soil mix (e.g., coco coir + perlite or a pre-mixed hydroponic blend). Pro tip: Avoid heavy garden soil—it’ll weigh down your wall!
- ● Plants: 10–30 small, trailing, or compact plants per sq. ft. (e.g., pothos, spider plants, ferns, or succulents). Tip: Choose low-light tolerant species if your space lacks bright sunlight!
- ● Waterproof Backing: 1 sheet of waterproof fabric (e.g., landscape fabric or felt) to line the wall and prevent leaks.
- ● Frame or Structure: Wooden pallets, PVC pipes, or a pre-made modular living wall kit (ensure it’s sturdy and can support moisture!).
- ○ Irrigation System: Drip irrigation line + timer (optional but highly recommended for consistency) or a self-watering reservoir at the base.
- ● Fasteners: Screws, brackets, or L-brackets to secure the frame to the wall.
- ● Drill + drill bits (for mounting)
- ● Measuring tape + level (to ensure even spacing!)
- ● Scissors or utility knife (for cutting fabric/plants)
- ● Spray bottle (for misting plants during setup)
- ● Gloves (to keep hands clean while handling soil!)
- ● A sunny to moderately lit spot (avoid direct harsh sunlight if using delicate plants). 💡 Pro tip: Rotate your wall occasionally for even growth!
- ● Access to a water source (nearby sink or hose for filling reservoirs).
- ● Basic DIY skills (or a friend who loves building things!).
- ● LED grow lights (for low-light areas)
- ● Humidity tray (to increase moisture levels)
- ● Decorative elements (e.g., pebbles, moss, or LED string lights for ambiance)
- ● Plant food (liquid fertilizer for faster growth)
Step-by-Step instructions for building indoor living walls
Here's how I build living walls that thrive indoors—using simple materials and smart techniques.
🪴 Step 1: Choose and Prepare Your Vertical Structure
Start with a sturdy frame designed for vertical gardening, like a pre-made panel system or a DIY wooden grid. I like using 1x2-inch cedar strips spaced 4-6 inches apart—this creates pockets for plants while allowing airflow. Secure the frame to a wall with L-brackets and ensure it's level before attaching anything.
Line the back of the frame with landscape fabric to prevent soil from falling through gaps. This also helps roots grow forward instead of backward. For a 4-foot-tall wall, I cut the fabric to match the frame's dimensions and staple it securely. The fabric should cover the entire back but leave the top edge loose for easy plant insertion later.
🌱 Step 2: Install Irrigation and Drainage Systems
Drainage is critical—without it, roots rot and your wall turns into a swamp. I use 1/4-inch PVC pipes along the bottom of each panel, drilled with 1/8-inch holes every 6 inches. Connect these to a drip irrigation line that runs along the base of the wall. This ensures even water distribution without over-saturating any section.
Place a 2-inch layer of gravel at the bottom of each panel before adding soil. This creates a drainage layer that prevents waterlogging. For a 4-panel wall, I use about 5 gallons of gravel total. Test the system by running water through it—you should see it drain smoothly from the bottom without pooling.
💧 Step 3: Layer Soil and Plant Strategically
Fill each pocket with a lightweight, well-draining potting mix—I blend 60% coconut coir, 30% perlite, and 10% worm castings for moisture retention and aeration. Fill pockets 3/4 full to leave room for roots to expand. For a 4-foot-tall wall, you’ll need about 10 gallons of mix total. Press the soil lightly to eliminate air pockets but don’t compact it.
Plant in layers, starting with deep-rooted plants at the bottom (like ferns or ivy) and shallow-rooted varieties at the top (like fittonia or peperomia). Space plants 4-6 inches apart to allow airflow. Water thoroughly after planting, then let the soil dry slightly before adding the next layer. This prevents root suffocation and encourages stronger growth.
☀️ Step 4: Position for Optimal Light and Humidity
Most living walls need bright, indirect light—think 4-6 feet from a south-facing window or under grow lights for 12-14 hours daily. If using natural light, rotate the wall quarter-turn weekly so plants grow evenly. You’ll notice leaves leaning toward the light? That’s your cue to adjust the position or add a reflective surface behind the wall.
Indoor walls thrive in 50-70% humidity. If your home runs dry, mist the wall daily or place a humidifier nearby. Grouping the wall with other houseplants creates a microclimate that retains moisture naturally. Watch for yellowing leaves—this often signals either overwatering or low humidity, not just light issues.
⏰ Step 5: Maintain with a Consistent Care Routine
Water 2-3 times weekly, checking the top inch of soil—if it’s dry, it’s time to water. Use the drip system for even distribution, but always water until it drains from the bottom. Let excess water collect in a tray beneath the wall to avoid messes. Fertilize monthly with a balanced liquid fertilizer (diluted to half-strength) to keep plants lush without burning roots.
Prune spent or leggy growth regularly to encourage bushier, fuller plants. I trim back overgrown vines in early spring and dead leaves year-round. This keeps the wall looking tidy and prevents pests from hiding in dense foliage. With consistent care, your wall will stay vibrant for years—and the air-cleaning benefits will keep improving!
Tips & tricks for building indoor living walls
These simple strategies will help your vertical garden thrive without the common pitfalls.
Structure Stability: When securing your 1x2-inch cedar strips in Step 1, use L-brackets every 12 inches along the frame—not just at the corners. I learned this the hard way when a 4-foot wall sagged under plant weight. Also, check for wall studs with a stud finder before drilling to avoid damaging drywall. A level is your best friend here—even a slight tilt can cause water to pool in one section.
Drainage System Testing: Before adding soil in Step 2, run water through your 1/4-inch PVC pipes for at least 5 minutes to test the flow. You should see water exiting all 1/8-inch holes evenly. If some holes clog, use a wire to clear them—this prevents uneven moisture distribution later. The 2-inch gravel layer should stay visible after watering; if it disappears, you've used too much soil in the pockets.
Soil Mix Pro Tip: For your 60% coconut coir, 30% perlite, 10% worm castings blend in Step 3, add 1 tablespoon of mycorrhizal fungi per gallon of mix (optional but game-changing). This helps roots establish faster and improves nutrient uptake. Store your mix in a sealed container to prevent moisture loss, and refresh it every 6 months—old mix compacts and loses aeration. Press soil lightly but don't pack it down; think "fluffy cloud" not "concrete."
Light Rotation Hack: In Step 4, mark the wall's position with painter's tape before rotating it. Write "N" on the top edge to track orientation—this helps you remember which side gets morning vs. afternoon light. If you notice plants leaning toward one direction after 2 weeks, it's time to adjust. For grow lights, position them 12-18 inches above the wall's top for even coverage.
Pro Tips for Indoor Living Walls
- These simple strategies will help your vertical garden thrive without the common pitfalls.
- Structure Stability: When securing your 1x2-inch cedar strips in Step 1, use L-brackets every 12 inches along the fra...
- Drainage System Testing: Before adding soil in Step 2, run water through your 1/4-inch PVC pipes for at least 5 minut...
Frequently asked questions
Got questions about indoor living walls?
You’re not alone! Here are answers to the most common queries to help you get started with your own green oasis.
How much sunlight do indoor living walls need?
Most indoor living walls thrive with bright, indirect light (4–6 hours daily). Low-light plants (like pothos or snake plants) work well in dimmer spaces, while sun-lovers (e.g., succulents) need a south-facing window or grow lights. Pro tip: Rotate plants occasionally for even growth!
How long does it take to see results?
Visible growth depends on plant type and care, but you’ll notice new leaves or color changes in 4–8 weeks. Fast growers (e.g., ferns, spider plants) may show progress sooner. Patience is key—think of it as nurturing a slow-blooming friendship!
Are there budget-friendly alternatives to pre-made living walls?
DIY options include:
- Pallet gardens: Repurpose wooden pallets with pockets for plants.
- Hanging planters: Use macramé or plastic pockets on shelves.
- Upcycled containers: Old frames, crates, or even shoeboxes work!
How do I keep pests away from my living wall?
Pests like aphids or spider mites can hitch a ride on new plants. Prevent them with these steps:
- Quarantine new plants for 2 weeks.
- Wipe leaves with neem oil or soapy water.
- Ensure proper drainage to avoid moisture-loving bugs.
What’s the easiest way to troubleshoot yellow leaves?
Yellow leaves usually signal overwatering, underwatering, or nutrient issues. Check:
- Soil: Stick your finger in—if the top 2 inches are dry, water lightly.
- Drainage: Ensure excess water escapes to prevent root rot.
- Light: Adjust placement if leaves near windows turn crispy.
Wrapping up and next steps
Transforming your space with an indoor living wall isn’t just about aesthetics—it’s a breath of fresh air (literally!) that purifies your environment and lifts your spirits.
Whether you’re a plant enthusiast or a beginner, these vertical gardens offer a simple yet powerful way to green up your home while improving air quality and well-being.
Ready to take the next step? Start small—pick a corner, gather your materials, and let your creativity grow! 🌱 With a little patience and care, you’ll soon enjoy a thriving, living masterpiece that’s as rewarding as it is beautiful.