
Container Gardens
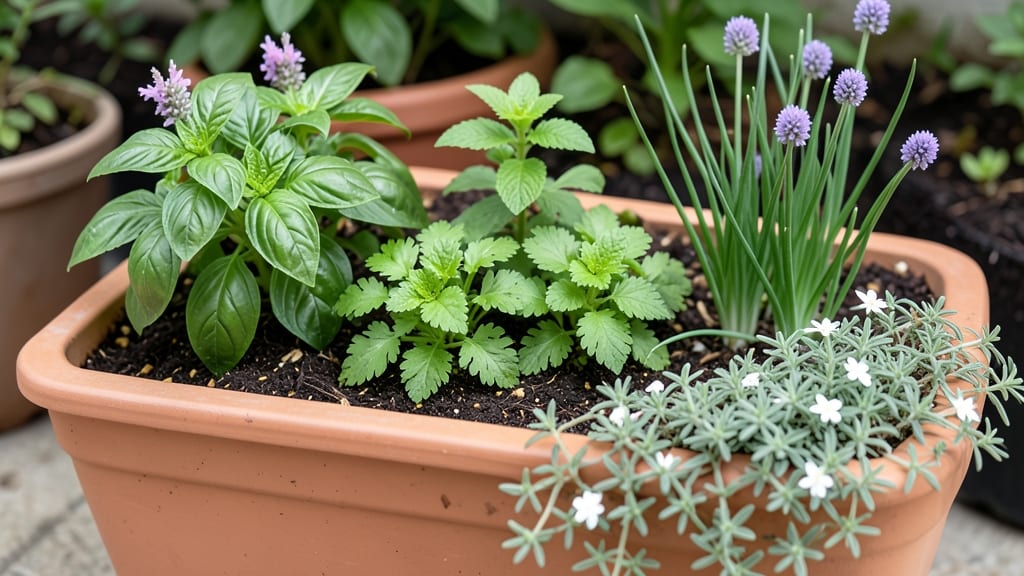
An indoor garden bed turns any room into a thriving mini-farm. 🌱 I designed mine in a sunroom where herbs, lettuce, and peppers grow year-round—no matter what’s happening outside. The trick is choosing the right setup and plants that love indoor conditions.
Start with a raised bed or deep container (at least 6 inches deep) to ensure proper drainage. Fill it with lightweight potting mix and place it near a south-facing window or under grow lights. Compact varieties like bush beans, dwarf tomatoes, and microgreens thrive in tight spaces.
You’ll harvest fresh greens in as little as 3-4 weeks and herbs ready for cooking within a month. The best part? No more trips to the store—just step into your kitchen to grab what you need. Plus, the greenery brightens up any room.
Works for apartments, offices, or even bedrooms with the right light. Here’s how to pick the perfect spot and keep your plants happy all year.
📚 In This Guide
- What you need
- Instructions
- Tips and common mistakes
- Wrapping up and next steps
What you need
- ● Container or Garden Bed: Depth: At least 6–12 inches (deeper for root crops like carrots or potatoes).
- ● Size: Adjustable based on space (e.g., 2’x4’ for herbs, 1’x3’ for leafy greens).
- ● Material: Plastic, fabric grow bags, wood, or metal (ensure drainage holes!).
- ● Growing Medium: 100% potting soil or a mix of 50% potting soil + 50% coconut coir/perlite (for drainage).
- ● Quantity: Enough to fill the container to 1–2 inches below the rim.
- ○ Drainage Layer: 1–2 inches of gravel, hydroponic clay pebbles, or recycled foam pieces (optional but recommended for moisture control).
- ● Seeds or Seedlings: Choose compact, fast-growing varieties (e.g., lettuce, basil, microgreens, cherry tomatoes).
- ● Quantity: Follow seed packet spacing guidelines (e.g., 6–12 inches apart for herbs).
- ● Basic Tools: Trowel or small hand shovel
- ● Measuring cup (for soil amendments)
- ● Spray bottle (for gentle watering)
- ● Grow Lights: LED or fluorescent (12–16 hours/day for optimal growth).
- ● Humidity Dome or Plastic Wrap: Keeps seedlings cozy during germination.
- ● Soil Moisture Meter: Avoids over/under-watering guesswork.
- ● Fertilizer: Slow-release granules or liquid fertilizer (e.g., fish emulsion or compost tea).
- ● Support Structures: Small stakes or cages for vining plants (e.g., cucumbers, peas).
- ● Decorative Touches: Paint, labels, or a stylish watering can to match your space!
Step-by-Step instructions for building an indoor garden bed
Transform any sunny spot into a thriving indoor garden with this simple, space-friendly setup.
🪴 Step 1: Choose and Prepare Your Container
Select a shallow, wide container with drainage holes—think window boxes, long troughs, or even repurposed wooden crates. The bed should be at least 6 inches deep to accommodate root growth, but no deeper than 12 inches for easy maintenance. I like to line the bottom with landscape fabric to prevent soil from washing out while still allowing water to drain freely.
If your container lacks drainage, drill holes along the bottom edge using a 1/4-inch drill bit. Place the container on a saucer or tray to catch excess water. Clean the container thoroughly with a 10% bleach solution and rinse well to remove any residue that could harm plants.
🌱 Step 2: Layer Soil and Amendments for Optimal Drainage
Fill the bottom 2 inches of the container with a mix of perlite or coarse sand to improve drainage and prevent root rot. This layer is critical—if your soil stays soggy, even moisture-loving plants like lettuce will suffer. Next, add a 1-inch layer of compost to provide nutrients without compacting the soil.
Top off with a high-quality potting mix designed for containers. Press it down gently but firmly so it stays in place when you plant. Avoid garden soil—it compacts easily and can introduce pests. Water the soil lightly until it’s evenly moist but not dripping, then let it sit for 10 minutes to settle.
☀️ Step 3: Select and Plant Compact, High-Yield Crops
Choose fast-growing, shallow-rooted plants like leafy greens, herbs, or dwarf varieties of vegetables. I recommend starting with 4-6 plants per 12-inch bed, spaced 4-6 inches apart to allow airflow and prevent disease. Dig small holes just deep enough to bury the roots without folding them.
Gently remove seedlings from their pots and tease apart any tangled roots. Place each plant in its hole, then fill in with soil, pressing lightly around the base to eliminate air pockets. Water immediately after planting to help the soil settle and remove any air gaps around the roots.
💧 Step 4: Position for Light and Maintain Consistent Care
Place your indoor garden bed in the brightest spot available—ideally near a south- or west-facing window where it gets at least 6 hours of direct sunlight daily. If natural light is limited, supplement with a grow light positioned 6-12 inches above the plants for 12-16 hours per day. You’ll know the light is right when plants grow upright and leaves stay a vibrant green.
Water when the top 1 inch of soil feels dry, typically every 2-3 days depending on humidity. Use room-temperature water and avoid wetting the leaves to prevent fungal issues. Fertilize lightly every 4-6 weeks with a balanced liquid fertilizer diluted to half strength.
✂️ Step 5: Prune and Harvest for Continuous Growth
Pinch back leggy growth to encourage bushier plants, and trim yellow or damaged leaves immediately to keep the bed looking tidy. For leafy greens, harvest the outer leaves first, cutting just above a set of healthy leaves to stimulate regrowth. You’ll see new growth within 1-2 weeks if the plant is healthy.
Rotate the bed a quarter turn weekly to ensure even light exposure, which prevents plants from leaning toward the window. With consistent care, your indoor garden bed will produce fresh harvests year-round—no matter how small your space!
Tips & tricks for perfect indoor garden beds
Here's what nobody tells you about creating an indoor garden that actually thrives.
Container Material Matters: Plastic containers retain moisture longer than terracotta, which breathes better but dries out faster. For beginners, I recommend plastic or fabric grow bags—they're lightweight, easy to clean, and maintain consistent moisture levels. If using wood, always line with landscape fabric to prevent rot and extend the container's lifespan.
Drainage Layer Hack: The 2-inch drainage layer in Step 2 is non-negotiable, but here's the secret: mix your perlite or coarse sand with a little horticultural charcoal (about 10%) to prevent clogging over time. This combo improves aeration while keeping roots healthy, especially for moisture-sensitive plants like lettuce or basil.
Light Positioning: That 6-hour sunlight requirement can be tricky indoors. If your window doesn't get enough light, place your bed on a rolling cart—you can easily move it to follow the sun's path throughout the day. For grow lights, position them just 6 inches above the tallest plants and adjust as they grow, keeping them 12 inches max for safety.
Watering Wisdom: The top 1 inch of soil test is foolproof, but here's the pro move: use a moisture meter for consistency. I've found that checking soil moisture in the morning gives you the most accurate reading, especially in humid climates where evaporation varies throughout the day.
Pro Tips for Indoor Garden Bed
- Here's what nobody tells you about creating an indoor garden that actually thrives.
- Container Material Matters: Plastic containers retain moisture longer than terracotta, which breathes better but drie...
- Drainage Layer Hack: The 2-inch drainage layer in Step 2 is non-negotiable, but here's the secret: mix your perlite o...
Frequently asked questions
Got questions about indoor garden beds? You’re not alone!
Here are some of the most common queries—and straightforward answers—to help you grow with confidence, even in small spaces.
What’s the best soil mix for an indoor garden bed?
Use a lightweight, well-draining potting mix designed for containers. Avoid garden soil—it compacts and retains too much moisture. Mix in perlite or vermiculite (10-20%) to improve aeration. For herbs or veggies, add compost or worm castings (5-10%) for nutrients. Pro tip: Sterilize soil by baking it at 200°F (93°C) for 30 minutes to kill pests!
How often should I water my indoor garden bed?
Check moisture daily—stick your finger 1 inch deep. Water when the topsoil feels dry. Overwatering is the #1 killer! Use a self-watering system or place a tray under pots to catch excess. Mist leaves for humidity-loving plants like basil, but avoid soggy soil. Morning watering prevents fungal growth.
Can I use LED grow lights instead of natural sunlight?
LED grow lights are energy-efficient and perfect for indoor gardens. Choose full-spectrum LEDs (4000-6500K) for veggies/herbs. Position lights 6-12 inches above plants and run them 12-16 hours/day. Budget tip: Adjust height as plants grow—closer = more intense light (but don’t burn leaves!).
What are some low-maintenance plants for beginners?
Start with these hardy picks:
- Herbs: Basil, mint, parsley (thrive in bright light, minimal fuss).
- Veggies: Lettuce, spinach, green onions (fast-growing, cut-and-come-again).
- Decorative: Pothos, snake plants, or succulents (survive neglect!).
How do I prevent pests in an indoor garden bed?
Keep pests at bay with these tricks:
- Isolate new plants for 2 weeks to spot hitchhikers.
- Use neem oil or insecticidal soap for soft-bodied bugs.
- Encourage beneficial insects like ladybugs (they eat aphids!).
- Wipe leaves with mild soapy water weekly.
How deep should my indoor garden bed be?
Most plants need 6-12 inches of soil depth for roots. Shallow-rooted herbs (basil, chives) thrive in 6-inch pots, while deeper-rooted veggies (carrots, beets) need 12+ inches. Use fabric grow bags or stackable containers to save space. Window boxes work for greens but avoid root crops.
Wrapping up and next steps
Creating an indoor garden bed is your ticket to fresh, homegrown produce—no matter the season! 🌱 Whether you’re a beginner or a seasoned green thumb, this compact solution proves that space isn’t a limitation. Start small, experiment with greens or herbs, and watch your confidence (and harvest) grow.
Ready to take the next step? Pick your favorite plants, gather your supplies, and dive in—your kitchen (and taste buds) will thank you! 🌿