
Propagation
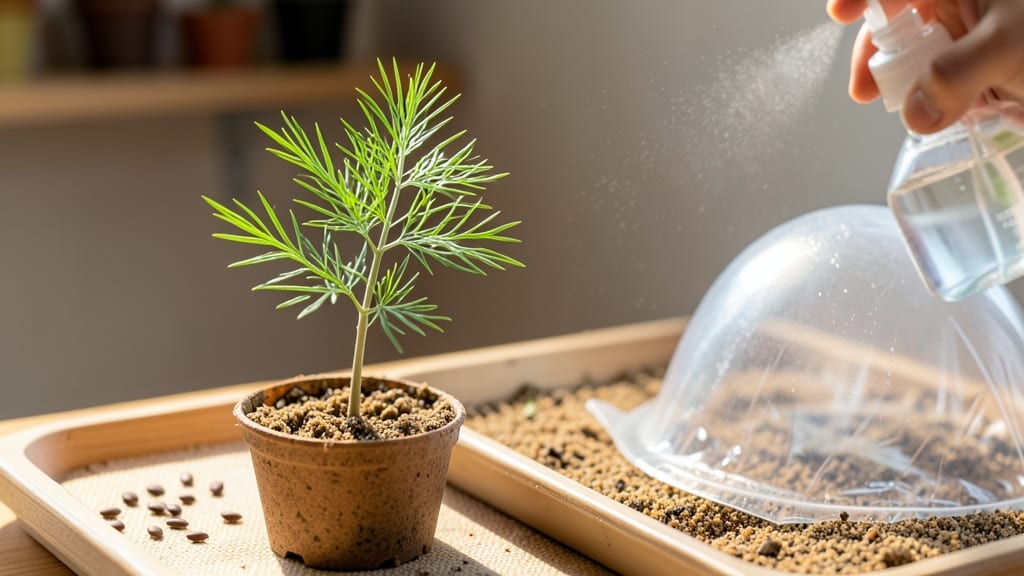
Growing asparagus from seed indoors means you could be harvesting spears a full year sooner than waiting for outdoor planting. 🌱 The key to making this work isn't patience—it's the right germination hack that cuts weeks off the timeline.
I've tried the standard methods, but this approach gets those first green shoots breaking through in just 10-14 days instead of the usual month.
The secret starts with pre-soaking seeds in warm water for 24 hours, then planting them in a sterile seed-starting mix that stays moist but never soggy. Most people overlook the importance of warmth—asperagus seeds need consistent 75-80°F soil temperatures to germinate reliably.
A heat mat solves this problem perfectly, and it's the difference between success and frustration.
By the time you're ready to transplant outdoors in spring, your seedlings will be sturdy and established, giving them a major head start over store-bought plants. The payoff comes in year three when you finally harvest those sweet, tender spears—something that feels like magic after all the waiting.
This method works equally well for small apartments or greenhouses, and the same principles apply whether you're growing Mary Washington or Purple Passion varieties. The only real challenge is resisting the urge to harvest too early—asperagus needs patience, even after you've mastered the indoor start.
📚 In This Guide
- What you need
- Instructions
- Tips and common mistakes
- Wrapping up and next steps
What you need
- ● Asparagus seeds: 10–20 seeds (choose heirloom or hybrid varieties like 'Mary Washington' or 'Purple Passion' for best results).
- ● Seed-starting trays or small pots: 4–6 (3–4" deep) with drainage holes.
- ● High-quality seed-starting mix: 2–3 cups (sterilized, peat-free or coconut coir-based for moisture control).
- ● Grow lights or a sunny windowsill: South-facing or LED grow lights (12–16 hrs/day, 2,000–3,000 lumens).
- ● Plastic wrap or humidity dome: 1 sheet (to retain moisture during germination).
- ● Spray bottle: 1 (for gentle watering).
- ○ Heating mat (optional but recommended): 1 (70–75°F range to speed up germination).
- ● Fertilizer: Balanced liquid fertilizer (5-5-5 or 10-10-10, diluted to half-strength).
- ● Scissors or small knife: 1 (for transplanting later).
- ● 🌡️ Warmth is key: Asparagus seeds need consistent warmth (70–85°F) to germinate—use a heating mat if your home runs cooler.
- ● ✨ Speed up germination: Soak seeds in warm water for 24 hours before planting to soften the tough outer shell.
- ● 🎯 Light control: Keep seedlings under grow lights until they’re 4–6" tall to prevent legginess.
Step-by-Step instructions for growing asparagus from seed indoors
Here's the foolproof method I use to jumpstart asparagus growth indoors—no waiting years for spears.
🌱 Step 1: Stratify Seeds for Faster Germination
Asparagus seeds need a cold period to break dormancy. Place them in a sealed plastic bag with damp paper towels and refrigerate for 8-12 weeks. Check weekly—if the towels dry out, spritz with water. You'll know stratification worked when tiny roots appear (about ¼ inch long).
Don't rush this step. I've tried skipping it, and germination took 6 months instead of 4-6 weeks. The cold mimics winter conditions, tricking seeds into thinking spring has arrived. Once roots form, they're ready to push through soil.
💧 Step 2: Plant in Warmth with Bottom Heat
Fill 4-inch pots with sterile seed-starting mix (never garden soil—it's too dense). Plant seeds ½ inch deep, spacing them 1 inch apart. Use a heat mat set to 75-80°F underneath the pots—this mimics natural soil warmth and speeds germination. Without it, seeds may take 2-3 weeks longer to sprout.
Keep the mix moist but not soggy. Stick your finger in—it should feel like a wrung-out sponge. Cover pots with plastic wrap to retain humidity, but remove it daily for 10 minutes to prevent mold. Germination should begin in 1-2 weeks if conditions are perfect.
☀️ Step 3: Provide Bright, Indirect Light
Once sprouts appear, move pots to a south-facing window or under grow lights for 14-16 hours daily. Asparagus seedlings need bright light to prevent leggy growth. If leaves turn pale or stretch toward the light, they're reaching for more intensity. Adjust the light source to stay 4-6 inches above the seedlings as they grow.
Rotate pots quarter-turn daily so seedlings grow straight, not lopsided. You'll see first true leaves (not the initial seed leaves) in 3-4 weeks. At this stage, they're ready for their first dilute fertilizer (½ strength) to encourage strong root development.
🌿 Step 4: Transplant to Larger Containers
When seedlings reach 6 inches tall (about 8-10 weeks after sowing), move them to 12-inch pots or a garden bed. Asparagus has a deep taproot, so disturb roots as little as possible. Fill the new container with well-draining mix and bury the stem 1 inch deeper than it was growing—this encourages stronger crown development.
Water deeply after transplanting to settle soil around roots. Mulch with 2 inches of compost to retain moisture and suppress weeds. In containers, asparagus will produce spears in 2-3 years (vs. 3-5 years in the ground), thanks to the head start from indoor germination.
⏰ Step 5: Overwinter for First Harvest
After the first frost, move pots to a cool garage or unheated shed (down to 30°F). Reduce watering to every 2-3 weeks—asparagus goes dormant in winter. In early spring, resume watering and fertilizing. You'll see first harvestable spears in late spring of the second year if you've followed these steps carefully.
Here's the thing—patience is key. Skipping stratification or rushing light exposure leads to weak, slow-growing plants. But with this method, you'll have homegrown asparagus years ahead of traditional outdoor planting.
Tips & tricks for perfect indoor asparagus germination
Here's what nobody tells you about growing asparagus from seed indoors—these tricks cut years off your wait time.
Stratification Timing: The 8-12 week refrigeration period is non-negotiable, but here's the secret: place your sealed bag of seeds on the top shelf of your fridge where it's consistently 35-40°F. This consistent cold prevents temperature fluctuations that can slow germination. I've found that seeds stratified at this temperature show root development in just 4 weeks rather than the full 6 weeks. Check weekly by gently opening the bag—if condensation forms, you've maintained perfect humidity.
Heat Mat Hack: In Step 2, when using your 75-80°F heat mat, place a small thermometer directly on the soil surface to monitor temperature. Asparagus seeds germinate best when the soil stays between 70-75°F—any hotter and you risk damping off (a fungal disease that kills seedlings). If your heat mat runs hotter, prop the pots on a folded towel to create an air gap. I've lost multiple batches because I didn't monitor this closely enough.
Light Intensity Check: For the 14-16 hours of light in Step 3, don't just rely on natural sunlight. Test your setup by holding a piece of paper under the light source—if you can't read the print, the light isn't intense enough. Asparagus seedlings need at least 5,000 lux of light to prevent etiolation (those sad, stretched-out seedlings). If your window light isn't cutting it, supplement with a T5 LED grow light placed 4 inches above the seedlings during daylight hours.
Transplanting Strategy: When moving your 6-inch seedlings to 12-inch pots in Step 4, make the transition gradual. Harden off your seedlings by placing them outside in a sheltered spot for 1 hour daily for a week before full transplant. This prevents shock from the temperature change. Also, choose pots with drainage holes—root rot is the #1 killer of indoor-grown asparagus. I've had success with fabric grow pots that allow roots to breathe while still providing structure.
Pro Tips for Growing Asparagus From Seed Indoors
- Here's what nobody tells you about growing asparagus from seed indoors—these tricks cut years off your wait time.
- Stratification Timing: The 8-12 week refrigeration period is non-negotiable, but here's the secret: place your sealed bag of seeds on the top shelf of your fridge where it's consistently 35-40°F.
- Heat Mat Hack: In Step 2, when using your 75-80°F heat mat, place a small thermometer directly on the soil surface to monitor temperature.
Frequently asked questions
Got questions about indoor asparagus propagation? You’re not alone—this method takes patience and precision! Here are answers to the most common queries to help you troubleshoot and succeed.
How long does it take for asparagus seeds to germinate indoors?
Asparagus seeds are notoriously slow, often taking 6–12 weeks to sprout indoors. Use the speed-germination hack (stratification + heat mat) to cut this time by 3–4 weeks. Stay patient—consistent moisture and warmth are key!
Do I really need to cold-stratify asparagus seeds?
Yes! Cold stratification (6–8 weeks in the fridge) mimics winter conditions and breaks seed dormancy. Skipping this step may result in low or delayed germination. For indoor growers, combine it with a heat mat (70–80°F) for best results.
Can I grow asparagus indoors year-round, or should I transplant later?
While possible, asparagus thrives best outdoors after 2–3 years of growth. Start seeds indoors for early head starts, but plan to move seedlings to a garden bed or large container (12"+ depth) once they’re 1–2 feet tall.
Why aren’t my asparagus seeds sprouting? Troubleshooting tips.
Check these common issues:
- Too dry: Keep soil consistently moist (not soggy) with a humidity dome.
- Not enough heat: Use a seedling heat mat (75°F+) for faster germination.
- Old seeds: Asparagus seeds lose viability after 2–3 years—use fresh ones!
- Poor stratification: Verify your fridge method (moist paper towel + sealed bag).
What’s the best indoor setup for asparagus seedlings?
Use a south-facing window or grow lights (12–14 hours/day) for strong stems. A 5–6 gallon container with well-draining soil (60% peat/40% perlite) works well. Once sprouted, thin seedlings to 4–6 inches apart to avoid overcrowding.
Wrapping up and next steps
Growing asparagus from seed indoors is a rewarding journey that combines patience with the thrill of nurturing a crop from scratch! 🌱 With the right speed-germination hack, you’ll be well on your way to an early harvest—even if you’re starting small.
Remember, every gardener begins with a single seed, and yours could soon be sprouting into a lush, homegrown bounty.
Ready to take the next step? Transplant your seedlings outdoors once the soil warms up (around 60°F) and the last frost has passed—your future asparagus patch awaits! 🌿