
Size
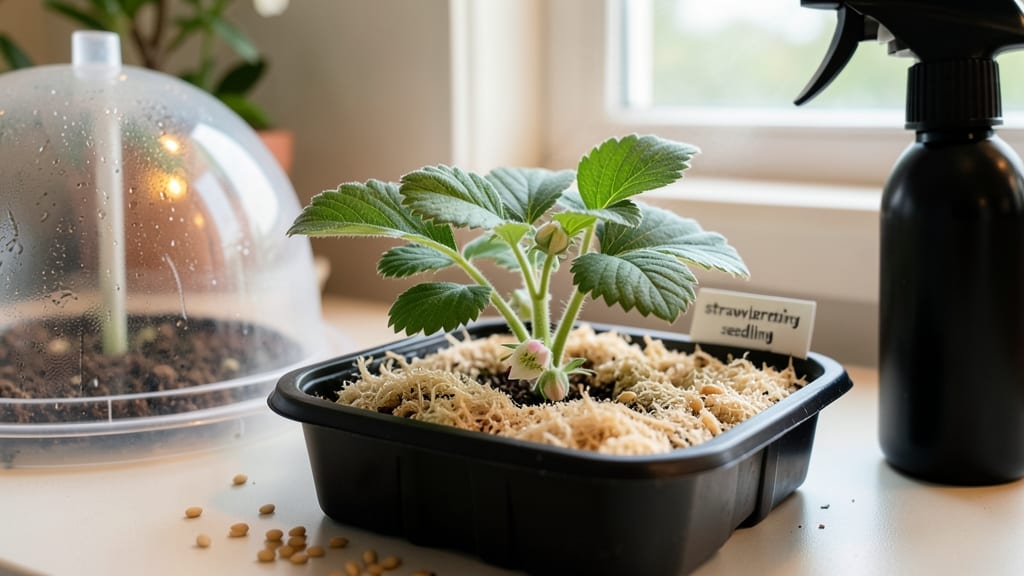
Growing strawberry seeds indoors starts with patience and the right tricks to break their stubborn dormancy. 🌱 I’ve learned that strawberries need a little coaxing—warmth, moisture, and light—to wake up from their winter slumber, but once they do, those first tiny leaves are worth every effort.
The key is mimicking their natural spring conditions in a controlled environment, where you can monitor every detail without Mother Nature’s whims.
You’ll need just a few simple supplies: a shallow tray or seed-starting cells, a high-quality seed-starting mix (not garden soil), and a heat mat or warm spot near a sunny window. Strawberry seeds are microscopic, so sprinkle them lightly on the soil’s surface—no need to bury them.
Keep the tray covered with plastic wrap or a humidity dome until you see sprouts, which can take anywhere from 10 days to 3 weeks, depending on the variety and conditions. Once those first green shoots appear, you’ll be amazed at how quickly they grow with proper care.
Provide 12–14 hours of light daily, either from a south-facing window or a grow light, and keep the soil consistently moist but never soggy.
Within 6–8 weeks, you’ll have sturdy seedlings ready to transplant into larger pots or the garden—though they’ll still need another season to mature and produce fruit.
The real magic happens when you troubleshoot the common hiccups: slow germination (try a heat mat), leggy seedlings (boost light immediately), or mold (reduce moisture). With these tricks, you’ll turn those tiny trays into a thriving strawberry nursery, setting yourself up for a bountiful harvest next year.
📚 In This Guide
- What you need
- Instructions
- Tips and common mistakes
- Wrapping up and next steps
What you need
- ● Strawberry seeds: Fresh, high-quality seeds (1–2 per cell in a seed-starting tray). Look for varieties like Alpine or Chandler for compact indoor growth.
- ● Seed-starting tray: 72-cell or 128-cell tray (3–4 inches deep) with drainage holes. Clear lids or domes help retain humidity.
- ● Seed-starting mix: Lightweight, sterile mix (e.g., Pro-Mix BX or coco coir). Avoid garden soil—it’s too dense!
- ● Grow lights: LED or fluorescent lights (12–16 hours/day). A full-spectrum bulb (6000K–6600K) mimics sunlight.
- ● Spray bottle: Fine-mist nozzle for gentle watering (avoid over-saturating seeds).
- ○ Heat mat (optional but helpful): Germinating pad set to 70–75°F speeds up sprouting.
- ● Humidity dome or plastic wrap: Keeps moisture locked in during germination.
- ● Seedling heaters: Clip-on units for precise warmth if your space runs cool.
- ● Fertilizer: Diluted fish emulsion or seaweed extract (1/4 strength) after 2 weeks.
- ● Small fans: Gentle airflow prevents damping-off disease (once seedlings emerge).
- ● Labeling tags: To track varieties and planting dates.
- ● Humidity tray: A shallow tray with pebbles + water to boost moisture levels.
Step-by-Step instructions for growing strawberry seeds indoors
Here's how I get those stubborn strawberry seeds to sprout reliably—no fancy equipment needed, just patience and the right tricks.
🌱 Step 1: Prep Seeds for Faster Germination
Strawberry seeds need a little help breaking dormancy. Place them in a small bowl, cover with lukewarm water, and let them soak for 24-48 hours. This softens the seed coat and speeds up germination. I like to swirl the bowl gently every few hours to keep seeds moving—this prevents mold from forming in one spot.
After soaking, drain the water and spread seeds on a paper towel. Fold the towel to cover them lightly, then place it in a ziplock bag with a tiny hole for airflow. Keep the bag in a warm spot (70-75°F)—like on top of the fridge—until you see tiny sprouts peeking through. This usually takes 5-7 days, but don’t rush it. Patience here means stronger seedlings later.
🪴 Step 2: Set Up Trays and Soil for Tiny Roots
Fill your small seed trays with sterile seed-starting mix (not garden soil—it’s too dense). I press the mix down lightly so it’s firm but not packed, then moisten it until it feels like a slightly damp sponge. Avoid overwatering; soggy soil smothers seeds before they even sprout.
Use a toothpick to make tiny holes in the soil, about ¼ inch deep. Place each pre-sprouted seed gently into a hole—don’t bury them too deep, or they’ll struggle to reach the light. Cover the tray with a clear plastic dome or wrap it in plastic wrap to trap warmth and moisture. This creates a mini greenhouse effect that strawberries love.
💧 Step 3: Keep Humidity High Until Sprouts Appear
Place the trays in bright, indirect light (no direct sun yet—those little seedlings burn easily). Check the soil daily, misting it lightly with water if the surface feels dry. The dome should stay foggy inside; if it clears, your seedlings aren’t getting enough moisture. I prop the dome up slightly on the third day to let fresh air circulate—this prevents mold.
Germination happens fast once started. You’ll see tiny green hooks (the first leaves) in 7-14 days. As soon as you spot them, remove the dome completely. Now’s the time to move the trays under grow lights if your home lacks bright windows. Strawberries need 14-16 hours of light daily to grow strong, or they’ll stretch weak and leggy.
☀️ Step 4: Thin and Strengthen Seedlings
When seedlings have 2-3 true leaves (not the first tiny ones), it’s time to thin. Use scissors to snip the weaker plants at soil level, leaving the strongest one per cell. This might feel cruel, but crowded seedlings compete for nutrients and grow poorly. After thinning, water gently at the base—never from above, or you’ll wash away soil.
Once seedlings are 3-4 inches tall, transplant them into small individual pots (2-3 inches deep) with fresh potting mix. Handle them by the leaves, never the stems, to avoid damage. Keep them in the same bright, warm spot and water when the top inch of soil feels dry. Overwatering now causes root rot, so let the soil dry slightly between waterings.
⏰ Step 5: Harden Off Before Outdoor Life
About 4-6 weeks after germination, your strawberries are ready for the great outdoors. Start by placing them outside in a shaded, sheltered spot for 1-2 hours the first day. Gradually increase their time outside over 10-14 days, moving them to sunnier spots each time. This slow transition teaches them to handle wind, sun, and temperature swings.
Watch for wilting or yellow leaves—signs they’re not ready. Once they’re thriving outside, you can plant them in your garden or containers. Strawberries grown from seed take longer to fruit than runners, but the payoff is worth it: unique varieties and disease-resistant plants you won’t find in stores.
Tips & tricks for growing strawberry seeds indoors
These simple tricks will help you turn those tiny strawberry seeds into thriving plants without the guesswork.
Soaking Strategy: In Step 1, use room temperature water (not hot) for soaking seeds. Warm water speeds up germination, but hot water can damage the delicate seed coats. I also add a drop of hydrogen peroxide (3%) to the soaking water—it prevents mold without harming seeds. Swirl the bowl every 4-6 hours to keep oxygen flowing to all seeds.
Temperature Control: Maintaining that 70-75°F warmth is crucial during the 24-48 hour soak and the 5-7 day sprouting phase. If your kitchen runs cooler, place the ziplock bag on top of your fridge or near a sunny window. Never use a heat source like a lamp—consistent warmth is key, not extreme heat. A simple thermometer near your setup helps monitor this.
Lighting Secrets: For Step 3, if you don't have grow lights, position trays near a south-facing window where they get bright indirect light for 14-16 hours daily. Rotate trays quarter-turn daily so seedlings grow straight. I notice seedlings stretch toward light sources—this is called etiolation—and they become weak and leggy. If this happens, move them closer to the light immediately.
Transplanting Hack: When moving seedlings to individual pots in Step 4, water the soil in the trays thoroughly first. This helps loosen roots so they slide out easily without breaking. I use a butter knife to gently loosen the soil around each seedling before lifting—this reduces transplant shock significantly. Keep the top inch of soil dry between waterings to prevent root rot in their new pots.
Pro Tips for Grow Strawberry Seeds Indoors
- These simple tricks will help you turn those tiny strawberry seeds into thriving plants without the guesswork.
- Soaking Strategy: In Step 1, use room temperature water (not hot) for soaking seeds. Warm water speeds up germination...
- Temperature Control: Maintaining that 70-75°F warmth is crucial during the 24-48 hour soak and the 5-7 day sprouting ...
Frequently asked questions
Got questions about growing strawberry seeds indoors? You’re not alone—here are the answers to the most common ones to help you succeed!
How long does it take for strawberry seeds to germinate indoors?
With the right speed-germination tricks (like soaking seeds in warm water for 24 hours or using a heat mat), you’ll see sprouts in 7–14 days. Without these shortcuts, germination can take 3–6 weeks. Patience is key—keep the soil moist and warm!
Can I grow strawberry seeds indoors in winter?
Indoor growing is perfect for winter. Use a grow light (12–16 hours/day) and maintain temperatures between 65–75°F (18–24°C). Just avoid drafts or cold windowsills—strawberries hate chilly feet!
What if my strawberry seeds won’t sprout?
Try these fixes:
- Check seed viability: Soak a few seeds in water—if they sink, they’re likely good. Floaters may be old or dead.
- Adjust moisture: Keep soil damp (not soggy) and use a humidity dome or plastic wrap.
- Boost warmth: Place trays on a seedling heat mat or near a sunny window.
Will indoor strawberries taste the same as store-bought?
Yes—but with a bigger flavor punch! Homegrown strawberries (even from seeds) are sweeter, juicier, and packed with more nutrients than commercial varieties. Plus, you’ll love the satisfaction of harvesting your own tiny, delicious berries!
When can I transplant indoor strawberry seedlings outside?
Wait until after the last frost (spring) and when seedlings have 3–4 true leaves. Harden them off for 1–2 weeks by gradually exposing them to outdoor conditions. Plant in well-draining soil with partial sun—avoid full shade!
Wrapping up and next steps
Growing strawberry seeds indoors is a rewarding journey that combines patience, care, and a little creativity!
With the right speed-germination tricks and tiny trays, you’ve got everything you need to nurture those tiny seeds into thriving plants. 🌱 Whether you’re a beginner or a seasoned gardener, your effort will soon be rewarded with sweet, homegrown strawberries—and maybe even a few surprises along the way!
Now that you’re armed with knowledge, take the next step: start your seeds today! Grab your supplies, follow the steps, and watch your green thumb grow stronger with every sprouting seed. Happy growing! 🌟