
Watering
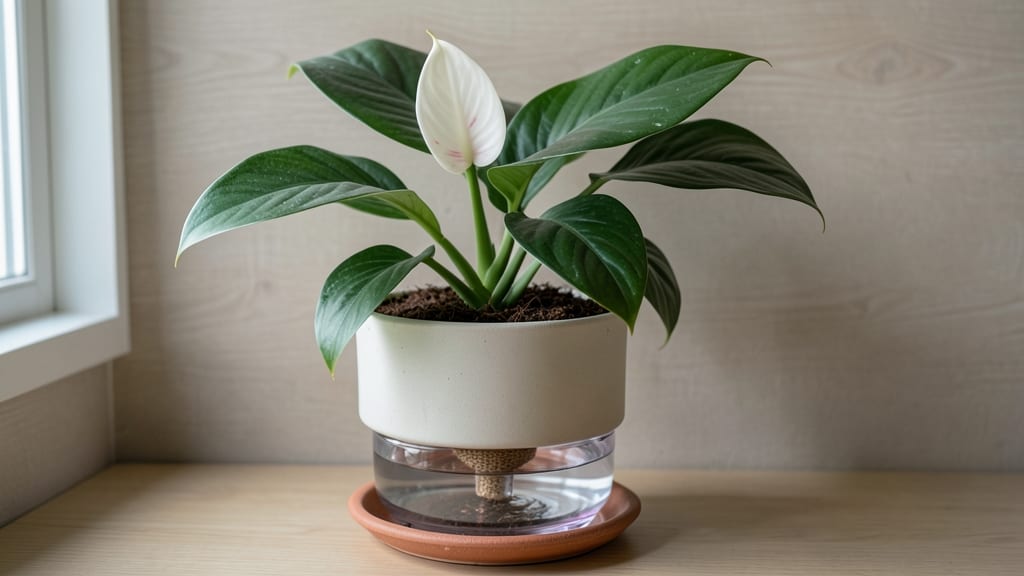
Self-watering indoor pots save me from the guilt of killing plants every time I forget to water. 🌱 The secret lies in a simple reservoir system that keeps roots consistently moist without drowning them—perfect for herbs, lettuce, or even small peppers that thrive indoors.
You’ll need just a few supplies: a self-watering container (or a DIY setup with a nursery pot inside a decorative one), quality potting mix, and your chosen plants.
The reservoir holds water at the roots’ level, so you only need to refill every 1-2 weeks, depending on your space’s humidity. What you get is lush, productive greenery that stays vibrant all year, even when you travel.
Basil grows twice as fast, herbs stay fragrant, and you’ll finally break the cycle of wilting leaves and sad, droopy plants. This method works for sunrooms, kitchens, or offices—anywhere with indirect light. Let’s set yours up for success!
📚 In This Guide
- What you need
- Instructions
- Tips and common mistakes
- Wrapping up and next steps
What you need
- ● Self-watering pot or planter (choose one with a reservoir, wicking system, or built-in watering mechanism; sizes vary—pick based on your plant’s needs).
- ● Potting soil (well-draining, moisture-retentive mix; 2-3 gallons per medium-sized pot).
- ● Your indoor plant(s) (ensure it’s suitable for indoor conditions—think ferns, pothos, or snake plants!).
- ● Water (room-temperature, preferably filtered or distilled to avoid mineral buildup).
- ● Measuring cup or watering can with a spout (for precise watering of the reservoir).
- ● Trowel or small shovel (for transferring soil and plants smoothly).
- ● Gloves (to keep hands clean while handling soil or prickly plants).
- ● Plant saucer or tray (to catch overflow and protect surfaces).
- ○ Watering indicator or moisture meter (optional but helpful for monitoring reservoir levels).
- ● Decorative stones or pebbles (for aesthetic appeal and extra drainage in the saucer).
- ○ Fertilizer (liquid or slow-release) (optional; dilute to half-strength for self-watering systems).
Step-by-Step instructions for setting up self-watering indoor pots
Here’s how to transform ordinary pots into low-maintenance, self-watering systems that keep plants happy all year.
🪴 Step 1: Select the Right Containers and Tools
Start with pots that have reservoirs—either built-in or DIY-style—where water sits below the soil. I like 6-8 inch pots with a removable bottom tray (like those plastic nursery pots) because they’re affordable and easy to clean. If your pots don’t have reservoirs, drill 2-3 small holes in the bottom for drainage and place them inside larger decorative trays filled with 1-2 inches of water. This creates a passive wick system.
Grab a measuring cup and pencil to mark water levels—you’ll want the soil surface to stay 1-2 inches above the waterline at all times. Too much water sitting directly against roots causes rot, while too little means the plant won’t drink enough. Test your setup by filling the reservoir and checking if the soil above stays damp but not soggy for 24 hours. If it dries out too fast, your pot’s wicking action isn’t strong enough.
💧 Step 2: Layer the Pot for Proper Water Flow
Line the bottom of your pot with 1-2 inches of gravel or pebbles—this keeps roots from sitting in standing water while allowing moisture to wick upward. I use small river rocks because they’re cheap and stay put. Pour in enough to cover the drainage holes, then add a layer of landscape fabric or coffee filters to prevent soil from washing down into the reservoir. This step is critical: without it, your soil will clog the wicking system and stop working.
Next, fill the pot halfway with your moisture-retentive potting mix (avoid garden soil—it compacts and blocks water flow). Press gently but don’t pack it down. The goal is to leave space for roots to grow while still allowing water to move freely. If your mix feels dry, lightly mist it with water until it’s damp like a wrung-out sponge. This primes the soil to absorb water from the reservoir immediately.
☀️ Step 3: Plant and Set Up the Watering System
Dig a hole twice as wide as the plant’s root ball and place your plant inside, backfilling with the remaining potting mix. Gently firm the soil around the roots but leave a ½-inch gap between the soil surface and the pot’s rim—this prevents overflow when you water. For seedlings or small plants, I often bury the stem slightly deeper to encourage stability, but avoid covering the crown (the area where stems meet roots).
Fill the reservoir with room-temperature water until it reaches just below the soil line (about 1-2 inches from the top). Watch the soil surface—it should darken slightly as it absorbs moisture. If it stays dry after 30 minutes, your wicking action isn’t working. In that case, add more gravel or a wicking mat to improve moisture transfer. Once set up, most plants only need top-ups every 1-2 weeks, depending on light and temperature.
🌿 Step 4: Monitor and Adjust for Plant-Specific Needs
Check your plant’s soil once a week by sticking your finger 1 inch deep. If it feels dry, add water to the reservoir until the soil surface looks evenly moist but not dripping. Over time, you’ll notice some plants (like succulents) barely use the reservoir, while others (like ferns) drink it down quickly. Adjust by reducing the water level for thirsty plants or adding a wicking mat for slow drinkers.
Here’s the thing—self-watering pots aren’t set-and-forget. While they reduce maintenance, you still need to inspect for algae in the reservoir (a sign of stagnant water) and clean the system every 2-3 months. Dump old water, rinse the pot, and refresh the gravel layer. This prevents mineral buildup and root rot. If your plant starts yellowing or wilting despite a full reservoir, the roots might be blocked—repot with fresh mix to restore flow.
Tips & tricks for perfect self-watering indoor pots
These simple adjustments will help you turn any pot into a thriving, low-maintenance plant system that actually works.
Wicking Action Check: The 24-hour test in Step 1 is your best friend—if your soil dries out faster than that, you need to improve moisture transfer. Try adding a wicking mat (like a folded cotton towel) between the gravel and soil layers. This creates a direct moisture bridge that works even better than just relying on capillary action from the gravel alone. I’ve found this makes a huge difference for thirsty plants like ferns or calatheas.
Gravel Size Matters: In Step 2, don't just grab any pebbles—opt for small river rocks (¼ to ½ inch diameter). Larger gravel creates bigger gaps that allow soil to fall through, while tiny pebbles can compact and reduce airflow. The ideal size creates just enough space for roots to breathe while still maintaining good wicking contact. Pro tip: Rinse your gravel before using to remove any dust that could clog the wicking system.
Plant Selection Strategy: Not all plants thrive equally in self-watering setups. In Step 3, prioritize plants that naturally prefer consistent moisture like pothos, spider plants, or snake plants. These adapt well to the steady water supply. For plants that need drier conditions (like succulents), reduce the water level in the reservoir to just ½ inch below the soil line and monitor more frequently. The key is matching your plant’s natural water needs to your system’s capabilities.
Cleaning Secret: When you clean your system every 2-3 months in Step 4, don’t just dump the water—give the entire pot a vinegar rinse (1 part white vinegar to 3 parts water). This removes mineral deposits and algae without harming your plants. Let it dry completely before reassembling. I’ve seen systems that looked perfectly clean on the outside but had stubborn mineral buildup in the reservoir—this simple step prevents that from happening.
Pro Tips for Self Watering Indoor Pots
- These simple adjustments will help you turn any pot into a thriving, low-maintenance plant system that actually works.
- Wicking Action Check: The 24-hour test in Step 1 is your best friend—if your soil dries out faster than that, you nee...
- Gravel Size Matters: In Step 2, don't just grab any pebbles—opt for small river rocks (¼ to ½ inch diameter). Larger ...
Frequently asked questions
Got questions about self-watering indoor pots?
You’re not alone! Here are answers to the most common concerns—so you can keep your plants happy with minimal effort.
How often do I need to refill the water reservoir?
Most self-watering pots only need a top-up every 1-2 weeks, depending on plant type, pot size, and humidity. Check the water level when it’s about 1 inch above the soil—top off before it gets too low. Overwatering is rare, but underfilling can stress roots.
Will my plants grow faster in a self-watering pot?
Not necessarily faster, but they’ll thrive more consistently! The key benefit is steady moisture, reducing stress from dry spells. Plants like herbs, succulents, and ferns love the stability, while drought-tolerant varieties (e.g., snake plants) may need less frequent watering than usual.
Can I use any plant in a self-watering pot?
Most houseplants adapt well, but succulents and cacti need a twist: use a pot with minimal water retention (or drain excess manually). Avoid waterlogged-loving plants (like peace lilies) unless you monitor closely. Pro tip: Start with moisture-loving plants like pothos or ferns for best results!
What if my plant’s leaves turn yellow or wilt?
Yellow leaves often signal overwatering (check for soggy soil) or root rot. Wilting can mean underwatering or clogged wicks. Try these fixes:
- Let soil dry slightly between waterings.
- Clean or replace the wick if it’s blocked.
- Repot in fresh, well-draining soil if roots smell foul.
Are self-watering pots worth the investment?
Absolutely! If you travel often, forget watering, or struggle with plant care, the convenience and peace of mind outweigh the cost. For <$30–$50, you’ll save time, water, and plants. Bonus: Many pots double as stylish decor—win-win!
Still unsure? Try a small pot first to test how your plants respond!
Wrapping up and next steps
Transforming your indoor gardening into a low-maintenance joy is easier than ever with self-watering indoor pots! 🌱 These clever systems keep your plants hydrated, healthy, and happy—even when life gets busy.
Whether you’re a seasoned green thumb or a beginner, this hassle-free approach ensures your plants thrive year-round with minimal effort.
Ready to take the next step? Start by choosing the perfect self-watering pot for your space and plants, then watch your garden flourish—no guesswork, no overwatering, just pure, effortless growth. Happy planting! 🌿