
Container Gardens
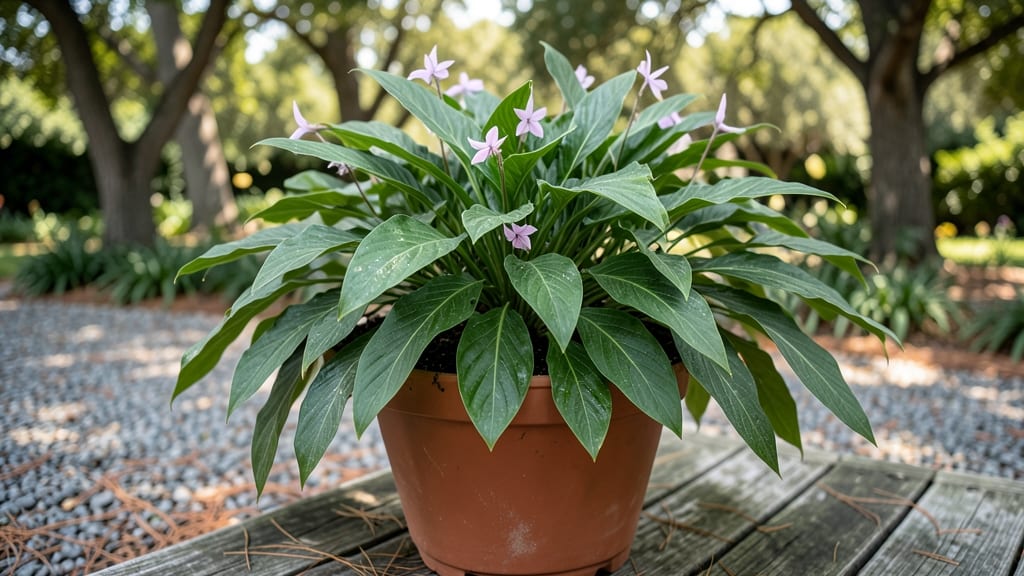
Sixteen-inch pots solve the biggest indoor plant problem: balancing root space with stability. 🌿 I’ve used these for olive trees and fiddle-leaf figs, and they’re the sweet spot for plants that outgrow small containers but don’t need full-size trees. The right pot prevents root-bound stress while keeping your plant upright—no more toppling fiddle-leaf figs or stunted growth.
Clay pots excel at wicking moisture (great for thirsty plants like monstera), while plastic holds humidity better for tropicals like calatheas. Drainage holes are non-negotiable—even for moisture-loving plants, stagnant water kills roots faster than you’d think.
I’ve seen beginners drown plants in these pots because they assume bigger means more water. The fix? Stick your finger in the soil before watering.
You’ll notice stronger stems, deeper root systems, and fewer repotting emergencies. A 16-inch pot gives 3-5 years of growth before needing an upgrade, and the stability means you can finally place that heavy money tree where it belongs—no more wobbly displays.
The trade-off? Larger pots dry slower, so adjust your watering schedule accordingly.
For small trees or oversized houseplants, this size is the perfect compromise between aesthetics and plant health. Skip the cheap plastic—opt for durable materials that match your plant’s needs. The result? A thriving plant that stays put, grows steadily, and looks intentional in any room.
📚 In This Guide
- What you need
- Instructions
- Tips and common mistakes
- Wrapping up and next steps
What you need
- ● 16-inch nursery pot (1 unit) – Choose terracotta, ceramic, or fabric for breathability. Ensure it has drainage holes (4+ recommended).
- ● Gravel or pebbles (1–2 lbs) – ¼-inch to ½-inch size for the drainage layer.
- ● Cactus/succulent mix or well-draining potting soil (1–2 bags, ~2–3 cubic feet) – Avoid heavy garden soil.
- ○ Perlite or pumice (optional but recommended) – 1 part to improve aeration (mix with soil).
- ● Garden trowel or small shovel (1) – For digging and layering.
- ● Measuring cup or ruler (1) – To gauge drainage layer thickness (1–2 inches).
- ● Saucer or tray (1) – To catch excess water (larger than the pot’s base).
- ○ Plant support (optional) – Moss pole, bamboo stake, or coconut coir for vining plants.
- ● Watering can with a fine rose (1) – For gentle hydration.
- ● 🌡️ Test drainage: Fill the pot with water, then tip it—water should drain within 10–15 minutes.
- ● ✨ Upgrade soil: Mix 30% perlite into soil for air pockets (great for tropical plants!).
- ● 🎯 Pot placement: Ensure the pot sits on feet or a stand to prevent root rot from moisture buildup.
Step-by-step guide to selecting and using 16-Inch pots for indoor plants
Here's how to choose and set up your 16-inch pots for maximum plant health and drainage.
🪴 Step 1: Choose the Right 16-Inch Pot Material
Select a 16-inch pot made from unglazed terra cotta or heavy-duty plastic for optimal results. Terra cotta breathes, allowing excess moisture to evaporate through the walls, which prevents root rot—a common issue with indoor plants. If you prefer plastic, opt for thick-walled, UV-resistant varieties to maintain structural integrity and block harmful light degradation.
Check for multiple drainage holes at the bottom—at least four holes spaced evenly. If your pot lacks sufficient drainage, drill additional holes yourself using a 1-inch masonry bit. Place a mesh screen or broken pottery shard over each hole to prevent soil from washing out while still allowing water to escape freely.
🌱 Step 2: Prepare the Pot for Planting
Fill the 16-inch pot with high-quality potting mix (avoid garden soil—it compacts and suffocates roots). I like to add one part perlite or pumice to three parts potting mix for improved aeration. Moisten the mix with lukewarm water until it’s damp but not soggy—think of a wrung-out sponge. Tap the pot gently on the table to settle the soil without compacting it.
Leave 1-2 inches of space between the soil surface and the pot’s rim. This gap prevents water from spilling over during irrigation and allows room for future mulch or decorative elements. If you’re planting a large specimen, create a small planting hole in the center—just deep enough to accommodate the root ball without bending the stems.
💧 Step 3: Plant and Water for Optimal Drainage
Place your plant in the pot, ensuring the root ball sits at the same depth it was in its previous container. Gently backfill with additional potting mix, pressing lightly to eliminate air pockets. Avoid packing the soil too firmly, as this restricts root growth. Water the plant deeply until water runs freely from the drainage holes—this ensures the entire root system is hydrated.
After watering, let the pot sit for 10-15 minutes to drain completely. Empty any excess water from the saucer underneath to prevent the roots from sitting in standing water. Indoor plants in large pots like these dry out slower, so water only when the top 2 inches of soil feel dry to the touch. Overwatering is the fastest way to kill a plant in a 16-inch pot.
☀️ Step 4: Position for Light and Airflow
Place your 16-inch pot in a location with bright, indirect light—think east or west-facing windows—unless your plant thrives in full sun, like a snake plant or jade. Rotate the pot a quarter turn every 2-3 weeks to encourage even growth and prevent the plant from leaning toward the light. If your space lacks natural light, supplement with a full-spectrum LED grow light positioned 12-18 inches above the plant.
Ensure the area has good airflow—open windows or use a small fan on low speed to mimic outdoor conditions. This prevents fungal diseases and strengthens the plant’s stems. Avoid placing the pot near heating or cooling vents, as sudden temperature fluctuations stress the plant. Ideal indoor temperatures for most tropical plants hover around 65-75°F during the day and 60-68°F at night.
✂️ Step 5: Maintain and Monitor for Long-Term Success
Fertilize your plant every 4-6 weeks during the growing season (spring and summer) using a balanced, water-soluble fertilizer diluted to half strength. Large pots like these hold more soil, so the nutrients leach out faster. Reduce fertilization in fall and winter when growth slows. Always water before fertilizing to prevent root burn.
Monitor the plant’s leaves and stems for signs of stress—yellowing leaves often indicate overwatering, while crispy edges signal underwatering. If you notice white crusty deposits on the soil surface, it’s time to flush the soil by watering thoroughly with plain water to remove excess salts. Prune leggy or yellowing growth with clean, sharp scissors to encourage bushier, healthier development.
Tips & tricks for perfect 16-Inch indoor plant pots
To make your 16-inch pots truly perfect for indoor plants, here are the key details that'll keep your greenery thriving.
Material Matters: For terra cotta pots, soak them in water for 10-15 minutes before planting to prevent them from drawing moisture from the soil too quickly. This initial hydration helps balance the pot's natural drying properties. If using plastic, ensure the pot is completely dry before filling with soil to avoid mold growth at the base.
Drainage Depth: When drilling additional holes, aim for a 1-inch masonry bit and space them at least 3 inches apart along the bottom edge. This creates a more even water distribution pattern than just four holes in the center. The mesh screen or broken pottery shard should cover all holes completely to prevent soil loss while maintaining drainage.
Soil Preparation: The 1:3 ratio of perlite or pumice to potting mix creates ideal aeration, but don't skip the lukewarm water step. Cold water can shock plant roots, while water that's too hot may kill beneficial soil microbes. Test the temperature by dripping it on your wrist—it should feel pleasantly warm, not hot.
Light Rotation: The quarter turn every 2-3 weeks recommendation works wonders, but here's the secret: pair it with a visual cue. Place a small sticker or mark on the pot's exterior to track rotation progress. This ensures consistent light exposure without over-rotating, which can stress the plant.
Pro Tips for 16 Inch Pots For Indoor Plants
- To make your 16-inch pots truly perfect for indoor plants, here are the key details that'll keep your greenery thriving.
- Material Matters: For terra cotta pots, soak them in water for 10-15 minutes before planting to prevent them from dra...
- Drainage Depth: When drilling additional holes, aim for a 1-inch masonry bit and space them at least 3 inches apart a...
Frequently asked questions
What’s the best material for a 16-inch pot to prevent root rot?
Avoid plastic if drainage is poor—opt for terracotta, ceramic, or fiberglass instead. These materials wick moisture, reducing rot risk. For heavy plants, glazed ceramic adds durability. Pro tip: Always pair with a saucer and drainage holes!
How often should I repot my plant into a 16-inch container?
Repot every 1–2 years if roots circle the current pot. For mature plants, a 16-inch pot may last 3–5 years with fresh soil. Signs it’s time? Roots growing out of drainage holes or soil drying too fast. Spring or early summer is ideal for minimal stress.
Can I use a 16-inch pot for succulents or do they need something smaller?
Succulents thrive in shallow, wide pots (like 10–12 inches) to prevent overwatering. A 16-inch pot works for large varieties like snake plants or aloe, but use fast-draining soil and terracotta to avoid soggy roots. Overpotting = root rot risk!
What’s the cheapest way to DIY a 16-inch pot with good drainage?
Upcycle a plastic storage bin (drill holes in the bottom) or use a colander lined with landscape fabric. For a stylish fix, paint a thrifted ceramic pot with non-toxic acrylic. Pair with perforated nursery pots for budget-friendly drainage. Just ensure holes are ¼-inch wide!
Why are my plant’s leaves turning yellow after moving to a 16-inch pot?
Yellow leaves often signal overwatering or poor drainage. Check for:
- Compacted soil (fluff roots gently)
- No drainage holes (repot ASAP)
- Over-fertilizing (flush soil with water)
Wrapping up and next steps
Choosing the right 16-inch pots for your indoor plants isn’t just about aesthetics—it’s about creating a thriving, healthy environment for your green companions! 🌱 With proper drainage, the right soil mix, and a little love, you’ll watch your plants flourish in style.
Now that you’re armed with the perfect setup, it’s time to get growing—start by selecting your favorite plant and let your new container garden shine!
Next step: Pick your plant, fill that pot, and enjoy the satisfaction of nurturing a space that’s both beautiful and functional. Happy planting! 🌿✨