
Tools
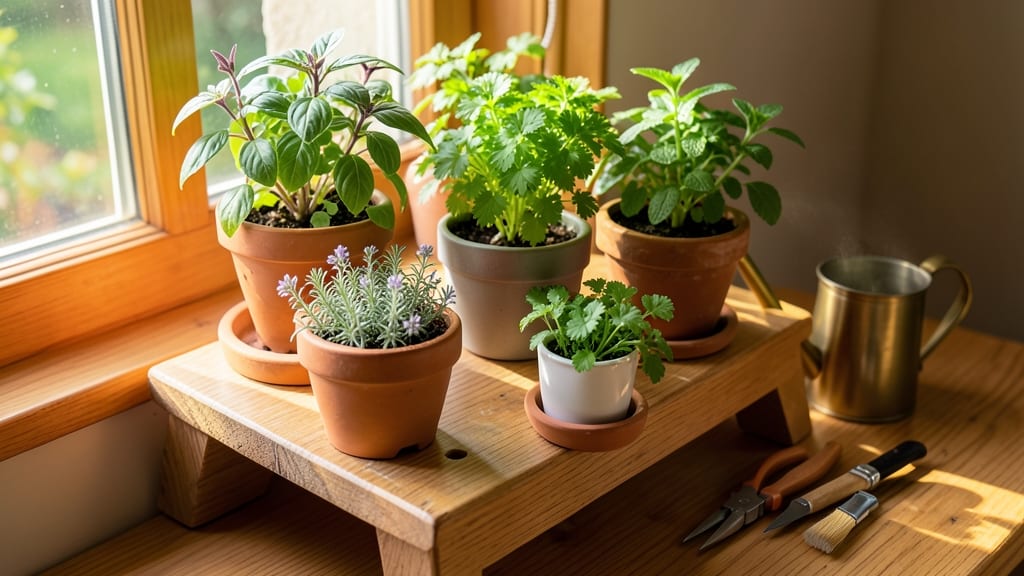
An indoor window herb garden brings fresh flavors to your kitchen—no yard required. 🌿 The right setup turns a sunny windowsill into a productive mini-garden where basil, parsley, and thyme grow year-round without fuss. I’ve tested countless setups, and this sunlight-maximizing approach works even in apartments with limited natural light.
Start with 3-5 herbs that thrive indoors: basil, chives, mint, parsley, or thyme. Use 6-inch pots with drainage holes and lightweight potting mix designed for containers.
A south- or west-facing window gets the most light, but if that’s not an option, a grow light on a timer (12-16 hours/day) keeps plants happy. Overwatering is the #1 killer—let the top inch of soil dry out between waterings.
Within 4-6 weeks, you’ll harvest your first leaves, and the aroma alone makes it worth it. Herbs stay productive for 6+ months with proper care, saving you money and cutting grocery trips.
The key? Consistency—light, water, and a little pruning keep them lush and flavorful. Even if you’ve killed plants before, this setup is foolproof for beginners.
Troubleshoot pests with neem oil spray (mix 1 tsp with 1 quart water) or insecticidal soap, and rotate pots weekly for even growth. Swap out herbs seasonally—try cilantro in spring or dill in summer. Once you master this, you’ll never buy wilted store herbs again.
📚 In This Guide
- What you need
- Instructions
- Tips and common mistakes
- Wrapping up and next steps
What you need
- ● Herb seeds or starter plants: Choose fast-growing varieties like basil, parsley, chives, or mint (3–5 plants for a small setup).
- ● Containers: 3–6 small pots (4–6 inches deep) with drainage holes or
- ● A window herb garden kit (with built-in trays and reservoirs).
- ● Potting mix: Lightweight, well-draining organic soil blend (1–2 bags, depending on container size).
- ● Drainage trays or saucers: To catch excess water (1 per pot or included in kits).
- ● Spray bottle: For gentle watering (8–16 oz).
- ○ Fertilizer: Balanced liquid fertilizer (optional but helpful for fast growth).
- ● Grow lights: LED full-spectrum bulbs (for windows with <5 hours of sunlight/day).
- ● Self-watering system: Wick-based or capillary mats for low-maintenance care.
- ● Humidity domes: Clear plastic covers to retain moisture while seedlings establish.
- ● Herb labels: Chalkboard tags or toothpicks to track varieties.
- ● Pruning shears: Small, sharp scissors for harvesting and shaping.
Step-by-step instructions for designing an indoor window herb garden
Here's how to create a thriving window garden that maximizes light and delivers fresh herbs all year.
🪴 Step 1: Select and Prepare Containers for Optimal Drainage
Choose 4-6 inch diameter pots with drainage holes—herbs hate soggy roots. I prefer terra cotta because it breathes, but plastic works too if you drill extra holes. Place a 1-inch layer of gravel at the bottom of each pot before adding soil. This ensures excess water drains away from delicate roots while keeping the herb anchored.
Real talk: If your pots lack holes, add them yourself with a drill. No drainage means root rot within weeks. I always test drainage by filling the pot halfway with water—if it takes more than 5 minutes to drain completely, your setup needs adjustment.
🌱 Step 2: Layer Soil and Plant Herbs at Proper Depths
Fill pots with high-quality potting mix (never garden soil) up to 1 inch below the rim. Press lightly to remove air pockets but don't compact—herb roots need loose soil to spread. For each plant, dig a hole twice as wide as the root ball but only as deep as the container's original soil line. This prevents burying stems, which causes rot.
Place your herb starts gently into the holes, then backfill with soil while holding the plant steady. Tap the pot lightly to settle soil around roots. Water immediately until moisture runs from the drainage holes—this removes air pockets and helps roots establish contact with soil.
☀️ Step 3: Position for Maximum Sunlight Exposure
South-facing windows provide 6+ hours of direct light, ideal for basil, thyme, and oregano. If your only window faces north, choose shade-tolerant herbs like parsley or chives instead. Rotate pots quarter-turn daily to prevent leaning—you'll see stems grow straight within a week.
Here's the thing: Even bright windows can't support all herbs. If leaves yellow between veins, your plants need more light. Move them closer to the glass or supplement with a grow light for 14-16 hours daily. Herbs like rosemary and sage tolerate slightly cooler windows, while basil wilts without warmth.
💧 Step 4: Establish a Watering Routine Based on Soil Moisture
Water when the top inch of soil feels dry—stick your finger in to check. Overwatering kills herbs faster than underwatering. I use a spray bottle for delicate herbs like cilantro and a watering can with a narrow spout for heartier varieties. Always water at the base, never from above, to prevent fungal diseases.
Mist leaves occasionally to boost humidity, especially in dry winter air. You'll notice herbs like basil perk up immediately after misting. For containers without saucers, place them on pebble trays to catch drainage and recycle moisture back into the air.
✂️ Step 5: Prune and Harvest for Continuous Growth
Pinch back new growth to encourage bushier plants. For basil, snip the top set of leaves when the plant reaches 6 inches tall—this triggers branching. Harvest regularly to prevent flowering, which makes leaves bitter. Always cut just above a leaf node so new growth can emerge from that point.
Don't harvest more than one-third of the plant at once. I harvest basil leaves in the morning when oils are most concentrated. Store pruned herbs in a glass of water on the windowsill for up to 5 days—they'll regrow like cut flowers.
Tips & tricks for perfect indoor window herb garden
Here's what nobody tells you about keeping your window herbs thriving—these are the secrets that'll make your kitchen garden flourish.
Container Material Matters: Terra cotta pots are my go-to because they wick away moisture, which prevents root rot in those critical first 5 minutes after watering. If you use plastic, drill extra drainage holes—herbs can't tolerate soggy roots for long. Pro tip: Place your pots on a tray with pebbles and water to create a self-watering system that maintains consistent moisture without overwatering.
The Soil Depth Secret: When planting, remember that herb roots need room to breathe. The 1-inch space below the rim isn't just for aesthetics—it prevents soil from spilling when you water. I always press the soil lightly after planting to remove air pockets, then give it a thorough watering until moisture runs from the drainage holes. This ensures roots make immediate contact with soil, which is crucial for establishing healthy growth.
Light Optimization Hack: If your window doesn't get enough natural light, supplement with a grow light placed 6-12 inches above the plants for 14-16 hours daily. I've found that LED grow lights are most efficient—they're cool to the touch and won't scorch delicate herb leaves. For maximum effectiveness, position the light so it covers the plants evenly, and rotate your pots daily to prevent leaning.
Pruning for Productivity: Don't wait until your herbs are overgrown to prune. Regularly pinch back new growth to encourage bushier plants, and always cut just above a leaf node. This simple technique stimulates branching and keeps your herbs producing fresh leaves for weeks. For basil, I start pruning when the plant reaches 6 inches tall—this triggers that lush, restaurant-quality growth we all want.
Pro Tips for Indoor Window Herb Garden
- Here's what nobody tells you about keeping your window herbs thriving—these are the secrets that'll make your kitchen garden flourish.
- Container Material Matters: Terra cotta pots are my go-to because they wick away moisture, which prevents root rot in those critical first 5 minutes after watering.
- The Soil Depth Secret: When planting, remember that herb roots need room to breathe.
Frequently asked questions
Got questions about starting your own indoor window herb garden? You’re not alone! Here are answers to the most common queries to help you grow fresh flavors with confidence.
What’s the best window for an indoor herb garden?
South-facing windows get the most sunlight (6+ hours daily), but west or east-facing spots work too. Avoid north-facing windows—they’re too dim for most herbs. If natural light is limited, supplement with a grow light (12–16 hours/day).
How long does it take for herbs to grow indoors?
Herbs like basil, parsley, and cilantro sprout in 7–14 days and are ready to harvest in 4–6 weeks. Rosemary and thyme grow slower (8–12 weeks). Patience pays off—consistent light and watering speed up the process!
How often should I water my indoor herbs?
Check soil moisture weekly—stick your finger 1 inch deep. Water when dry (usually every 5–7 days). Overwatering is the #1 killer! Use pots with drainage holes and avoid saucers that trap excess water.
Can I grow herbs indoors without sunlight?
Yes! If your space lacks windows, use a LED grow light (full-spectrum bulbs work best). Place it 6–12 inches above plants and run it for 12–16 hours daily. Herbs like mint and chives tolerate lower light better than others.
Why are my herbs turning yellow or wilted?
Yellow leaves often mean overwatering or nutrient deficiency. Wilting? Check for underwatering or root rot (foul smell = toss the plant). Adjust care: trim dead leaves, repot if roots are crowded, and ensure proper drainage.
Wrapping up and next steps
Creating an indoor window herb garden is a game-changer for fresh flavors, year-round savings, and a touch of green joy! With the right setup—sunlight, containers, and a dash of care—you’ll enjoy homegrown herbs in no time.
Whether you’re a seasoned gardener or a curious beginner, this kit makes it effortless to grow basil, mint, or parsley right on your windowsill.
Ready to take the next step? Start small—pick one herb, assemble your kit, and watch your culinary adventures (and snack time!) transform. 🌱✨ Your kitchen—and taste buds—will thank you!