
Tools
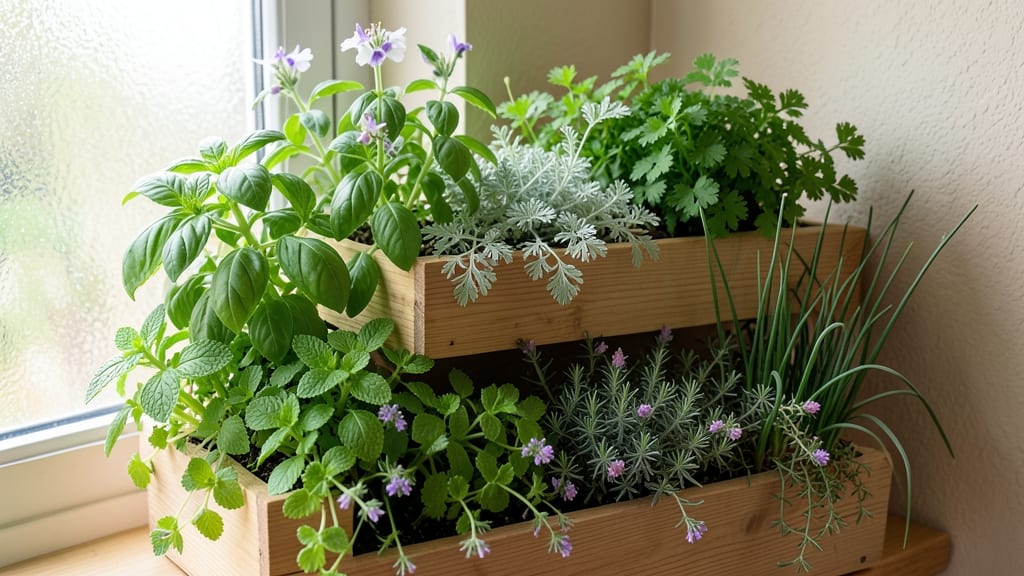
Transforming your empty wall into a thriving indoor vertical garden is the ultimate space-saver for herbs and greens. ✨ I've turned my tiny apartment balcony into a lush green wall that produces fresh basil, mint, and leafy greens year-round—no matter how little sunlight my space gets.
The magic lies in choosing the right plants and setup. You'll need a sturdy vertical planter (or DIY one with pallets and fabric), lightweight potting mix, and a watering system that won't drown your plants.
My favorite combo is a self-watering felt pocket system that keeps roots happy without daily attention. By mid-summer, you'll be harvesting crisp lettuce, fragrant herbs, and even edible flowers right from your wall. The best part?
It doubles as living art—bright green foliage that brightens any room while giving you fresh ingredients at your fingertips. Works for any apartment, dorm room, or small kitchen. Here's how to make it happen without breaking the bank or taking up floor space!
📚 In This Guide
- What you need
- Instructions
- Tips and common mistakes
- Wrapping up and next steps
What you need
- ● Vertical garden panel or frame: Pre-made kit (e.g., fabric pockets, modular panels) or DIY materials like cedar planks (1x6 or 1x8, 4–6 ft long) or PVC pipes (4–6 ft, 4–6 inches in diameter).
- ● Growing medium: Coir or coconut fiber mix (3–5 cubic feet, retains moisture well).
- ● Potting soil (lightweight, well-draining blend—avoid heavy garden soil).
- ● Perlite or vermiculite (1–2 cups, for aeration).
- ● Plants: Seedlings or cuttings of herbs (basil, mint, thyme, parsley) or leafy greens (lettuce, spinach, kale) (6–12 plants, depending on panel size).
- ○ Watering system (optional but recommended): Drip irrigation kit (with timer, ~$20–$40).
- ● Spray bottle (for spot-watering).
- ● Fertilizer: Balanced liquid fertilizer (5-5-5 or 10-10-10) or organic compost tea.
- ● Mounting hardware: Wall anchors or screws (for studs or drywall).
- ● L-brackets or heavy-duty hooks (if freestanding).
- ● Measuring tape and level (for precise installation).
- ● Drill or screwdriver (for mounting).
- ● Scissors or utility knife (for cutting fabric pockets or coir mats).
- ● Trowel or small shovel (for planting).
- ● Spray bottle (for misting seedlings).
- ● Light source: South-facing window (6+ hours of sunlight) or grow lights (LED, 12–16 hrs/day).
- ● Space: Wall or freestanding area with 2–4 ft width and 4–6 ft height.
- ● Drainage: Ensure your wall has a drip tray or shallow pan underneath to catch runoff.
- ● Time commitment: 10–15 mins/day for watering, pruning, and monitoring.
- ● Self-watering reservoir (attaches to the bottom of panels).
- ● Humidity tray (with pebbles and water for added moisture).
- ● Decorative elements (fairy lights, mosaic tiles, or chalkboard paint for a stylish touch!).
- ● Plant labels (to track varieties and harvest times).
Step-by-Step instructions for building an indoor vertical wall garden
Here's how to create a thriving, space-saving herb and greens garden that fits almost anywhere.
🪴 Step 1: Assemble Your Vertical Garden Structure
Start with a sturdy wall-mounted planter system designed for vertical growing. I like the modular pocket-style designs because they're easy to assemble and allow for individual plant care. Secure the frame to the wall using heavy-duty brackets—make sure it can support 10-15 pounds of soil and plants when fully watered.
Check that each pocket or compartment has drainage holes at the bottom. If not, drill ¼-inch holes in a staggered pattern to prevent soil from washing out while allowing excess water to drain. Place a small piece of mesh over each hole to keep soil in place while maintaining drainage.
🌱 Step 2: Prepare and Fill the Growing Pockets
Fill each pocket with high-quality potting mix designed for containers. I avoid garden soil—it compacts easily and drains poorly in vertical setups. Add a slow-release fertilizer to the mix for steady nutrition. Fill each pocket to about ¾ full, leaving ½ inch of space at the top for watering.
Press the soil down gently but firmly to eliminate air pockets. You want it snug enough to support plants but still loose enough for roots to spread. Water the soil thoroughly until it's evenly moist but not soggy. This initial watering helps settle the soil and removes any air gaps that could dry out roots.
☀️ Step 3: Plant Your Herbs and Greens
Choose plants suited for vertical growing, like basil, mint, parsley, or leafy greens such as lettuce and spinach. For seedlings, dig a small hole in each pocket and place the plant so the top of the root ball sits ½ inch below the soil surface. Gently firm the soil around the roots to secure them.
If starting from seed, sow 2-3 seeds per pocket at the depth recommended on the packet, usually ¼ to ½ inch deep. Cover lightly with soil and mist gently with water. Keep the soil consistently moist until germination, which typically takes 7-14 days, depending on the plant.
💧 Step 4: Water and Maintain Proper Light
Water your vertical garden from the top, allowing the water to flow through each pocket and out the drainage holes. This ensures even moisture distribution. I water when the top inch of soil feels dry to the touch, usually every 2-3 days, but adjust based on your humidity and light conditions.
Place your vertical garden in the brightest spot available—most herbs and greens need 4-6 hours of direct sunlight daily. If natural light is limited, supplement with a grow light positioned 6-12 inches away. Watch for signs of leggy growth (long, thin stems with sparse leaves)—this means your plants need more light.
✂️ Step 5: Prune and Harvest Regularly
Pinch back the tips of new growth to encourage bushier plants. For herbs like basil, this means snipping just above a set of leaves when the plant reaches 6 inches tall. For leafy greens, harvest outer leaves first, leaving the inner growth to continue producing.
Regular harvesting keeps your plants productive and prevents them from becoming overcrowded. I harvest herbs when they reach 3-4 inches tall and greens when leaves are 4-6 inches long. This encourages continuous growth and prevents bolting, especially in cooler weather.
Tips & tricks for perfect indoor vertical wall gardens
Here's what nobody tells you about keeping your vertical garden thriving without the guesswork.
Drainage is Everything: In Step 1, those ¼-inch drainage holes are non-negotiable. If your planter doesn't have them, drill them yourself—uneven water distribution is the #1 reason vertical gardens fail. I also recommend placing a small piece of mesh over each hole to keep soil from washing out while still allowing water to flow freely. This prevents soggy roots that can lead to rot, especially in the lower pockets where water tends to pool.
Soil Settling Secret: After filling your pockets in Step 2 with that ¾-full potting mix, don't skip the thorough watering step. This initial soaking helps the soil settle properly, eliminating air pockets that could dry out roots. I've seen gardens fail because the soil was too loose—press it gently but firmly to create a stable base while still allowing roots to spread. The ½-inch space at the top is crucial for watering without overflow.
Light Strategy for Small Spaces: The 4-6 hours of sunlight mentioned in Step 4 is your golden window, but don't stress if you can't hit that every day. If natural light is limited, position your grow light just 6-12 inches away—closer for seedlings, farther for mature plants. Watch for leggy growth (those long, thin stems) as your early warning sign. This means your plants are stretching for more light, and it's time to adjust either the light distance or duration. A simple timer for 12-14 hours of light daily works wonders.
Harvesting Hack: When harvesting in Step 5, always cut just above a set of leaves rather than pulling whole stems. This encourages bushier growth and prevents shock to the plant. For herbs like basil, I wait until they reach 3-4 inches tall—this gives enough leaf surface for photosynthesis while keeping the plant manageable. For greens, harvest outer leaves first to maintain the plant's energy production while still getting fresh greens from the center.
Pro Tips for Indoor Vertical Wall Garden
- Here's what nobody tells you about keeping your vertical garden thriving without the guesswork.
- Drainage is Everything: In Step 1, those ¼-inch drainage holes are non-negotiable. If your planter doesn't have them,...
- Soil Settling Secret: After filling your pockets in Step 2 with that ¾-full potting mix, don't skip the thorough wate...
Frequently asked questions
Got questions about setting up your own indoor vertical wall garden? You’re not alone! Here are some of the most common queries—and their straightforward answers—to help you grow confidently, whether you're a beginner or a seasoned green thumb.
How much sunlight do indoor vertical gardens really need?
Most leafy greens and herbs thrive with 4–6 hours of bright, indirect light daily. If natural light is limited, supplement with a full-spectrum LED grow light (12–16 hours/day). South-facing windows or grow lights near a kitchen window work best for most setups. Pro tip: Rotate plants weekly for even growth!
What’s the easiest way to start without a lot of experience?
Begin with low-maintenance plants like basil, mint, or lettuce—they’re forgiving for beginners. Use a pre-assembled vertical planter system (like wall pockets or hydroponic kits) and follow the included care guide. Start small (e.g., a 2-foot wall) to test your setup before scaling up. Remember: Overwatering is the #1 rookie mistake!
Can I use an indoor vertical garden in a dark apartment?
Artificial lighting is your best friend in low-light spaces. Opt for LED grow bulbs (like Philips Hue or SANSI) and place them 6–12 inches above plants
. Leafy greens (spinach, kale) and herbs (parsley, cilantro) grow well under lights, while fruiting plants (tomatoes, peppers) may need extra care. Bonus: Blue and red spectrum lights boost growth!
How often should I water my vertical wall garden?
Check moisture every 2–3 days—stick your finger 1 inch into the soil. Water until it drains through the bottom (if your system has it). Overwatering = root rot, so let the topsoil dry slightly between waterings. Self-watering systems (like wicking beds) reduce hassle but still need weekly checks. Hot tip: Mist leaves in dry climates to mimic humidity!
What do I do if my plants look sad or stop growing?
First, diagnose the issue:
Yellow leaves? Overwatering or nutrient deficiency (try diluted fish emulsion).
Leggy or weak stems? Needs more light (move closer to a window or adjust grow lights).
Brown tips? Low humidity or fluoride in tap water (use filtered water).
Pests (spider mites, aphids)? Wipe leaves with soapy water or spray neem oil.
Reset tip: Trim damaged leaves and adjust care—plants are resilient!
Wrapping up and next steps
An indoor vertical wall garden is more than just a trend—it’s a game-changer for urban dwellers and plant lovers alike! 🌱 Whether you’re working with limited space, varying sunlight, or just craving fresh herbs and greens, this setup brings nature indoors while keeping your kitchen (or home) vibrant and functional.
With the right materials and a little creativity, you can grow lush, edible plants year-round—no green thumb required!
Ready to take the next step? Start small with a single wall panel or expand your setup as you gain confidence. Plant your first seeds today and watch your green oasis thrive—your future self (and taste buds) will thank you!