
Container Gardens
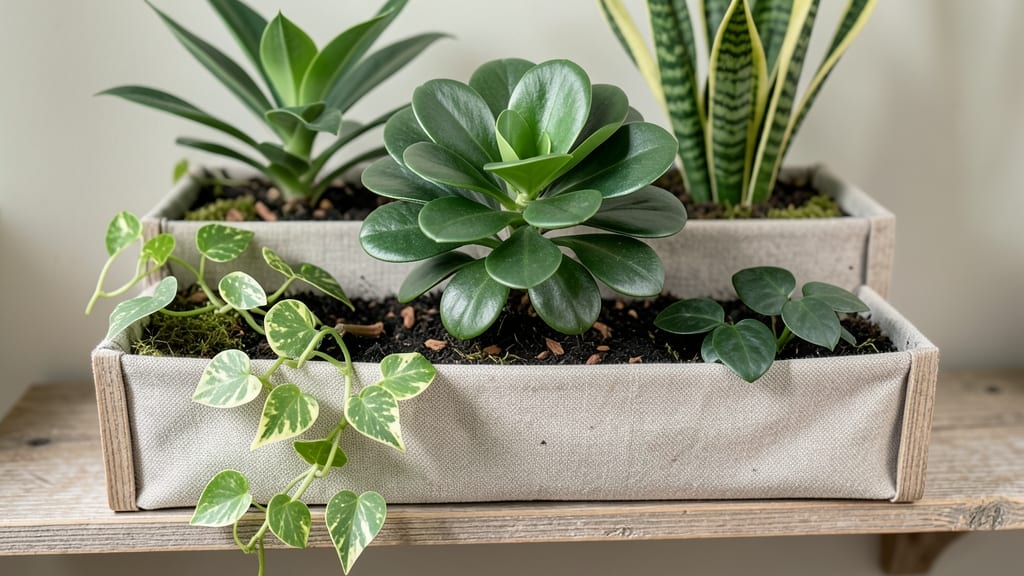
Creating an indoor plant bed that thrives in low light and tight spaces is simpler than you think—and it transforms any room into a lush green sanctuary. 🌿 I’ve designed these plant beds for apartments, offices, and sun-starved corners, using lightweight containers and moisture-loving plants that don’t demand constant care.
The key? Matching the right plants to your lighting conditions and keeping the soil consistently damp (but not soggy).
Start with a shallow, long container—think galvanized troughs or repurposed wooden boxes—to maximize space without overwhelming small rooms. Fill it with a well-draining potting mix (add perlite or orchid bark for aeration) and choose plants like pothos, spider plants, or ferns that tolerate lower light.
For added drama, layer in trailing plants like string of pearls or creeping jenny to create a cascading effect. A small grow light or placement near an east-facing window can extend the life of your greenery.
What you’ll end up with is a self-sustaining plant bed that filters indoor air, adds texture to your space, and requires just 10 minutes of care a week. The plants will grow fuller, the soil will stay balanced, and you’ll finally have that Instagram-worthy corner you’ve been dreaming of.
The best part? It’s foolproof for beginners and adaptable to any room.
Pro tip: Group plants with similar water needs together to simplify maintenance, and rotate the bed occasionally to ensure even light exposure. Avoid overcrowding—leave 2–3 inches between plants for airflow.
This setup works year-round, whether you’re dealing with winter’s dim light or summer’s occasional heatwave. Ready to bring the outdoors in?
📚 In This Guide
- What you need
- Instructions
- Tips and common mistakes
- Wrapping up and next steps
What you need
- ● Container: A shallow, wide tray or bed (e.g., wooden crate, plastic bin, or repurposed shelf) with drainage holes. Size: At least 6–12 inches deep and wide enough for your plants (e.g., 12"x18" for 3–5 small plants).
- ● Drainage Layer: Small pebbles, gravel, or broken pottery shards (1–2 inches thick) to prevent root rot.
- ● Potting Mix: Lightweight, well-draining soil blend (e.g., cactus/succulent mix or a 50/50 peat-perlite combo). Quantity: Enough to fill the container 2/3 full after drainage layer.
- ● Plants: 3–5 slow-growing, shallow-rooted varieties (e.g., sedum, peperomia, or fittonia). Tip: Choose plants with similar watering needs!
- ● Basic Tools: Trowel or small shovel
- ● Watering can with a fine rose (for gentle watering)
- ● Measuring tape or ruler (to ensure even spacing)
- ● Decorative mulch (e.g., moss, bark chips, or colored pebbles) to top the soil.
- ● LED grow lights (if your space lacks natural light).
- ● Self-watering reservoir (for low-maintenance setups).
- ● Label tags or chalkboard labels for plant names.
Step-by-Step guide to building your indoor plant bed
Transform any corner into a thriving green space with this simple, space-saving design.
🪴 Step 1: Choose and Prepare Your Base Container
Start with a shallow, rectangular container at least 12 inches wide and 2 feet long—this gives roots room to spread while keeping the bed manageable. I like using wooden crates, repurposed shelves, or even a long plastic storage bin with drainage holes drilled in the bottom. Line the base with landscape fabric to prevent soil from falling out while allowing water to drain freely.
If your container lacks drainage, add a 1-inch layer of small pebbles or broken pottery before the fabric. This ensures excess water escapes, preventing root rot. The key here is balance—you want enough drainage to avoid soggy soil, but not so much that moisture evaporates too quickly. Test by filling the container with water and checking that it drains within 5-10 minutes. If it pools, add more drainage material.
🌱 Step 2: Layer Soil and Amendments for Healthy Growth
Fill the container ¾ full with a lightweight potting mix—avoid garden soil, which compacts and suffocates roots. I blend ½ potting mix with ½ coconut coir or perlite to improve aeration. This mix stays loose and drains well, which is critical for indoor plants that don’t get natural rain cycles.
Sprinkle a slow-release fertilizer (like osmocote) over the soil and mix it in lightly with your hands. This ensures your plants get steady nutrients without frequent feeding. Press the soil down gently but don’t compact it—you want it fluffy enough for roots to explore easily. Leave 1-2 inches of space at the top for watering and mulch.
☀️ Step 3: Select and Plant Your Green Thumb Haven Plants
For a 4-plant bed, choose varieties with similar light and water needs—think snake plants, pothos, spider plants, and peace lilies. These thrive together in bright, indirect light and tolerate occasional neglect. Space plants 4-6 inches apart to allow airflow and prevent overcrowding.
Dig small holes just deep enough to cover the roots but not bury the stems. Gently tease apart root balls if they’re crowded, then place each plant in its hole. Fill the gaps with soil, pressing lightly to secure the plant. Water deeply right after planting so the soil settles around the roots. You’ll know it’s right when water runs out the drainage holes—this signals the roots are hydrated without waterlogging.
💧 Step 4: Set Up Light and Watering Routines
Place your plant bed near a south- or east-facing window where it gets 4-6 hours of indirect light daily. If natural light is limited, supplement with a grow light positioned 6-12 inches above the plants for 12-14 hours a day. Watch for signs of stress—yellowing leaves mean too much light, while leggy growth signals it’s not enough.
Water when the top inch of soil feels dry to the touch, usually every 5-7 days. Stick your finger in the soil to check—if it’s damp, wait another day. Overwatering is the #1 killer of indoor plants, so let the soil dry slightly between waterings. A spray bottle helps mist leaves occasionally, especially for tropical varieties like pothos, which love humidity.
✂️ Step 5: Maintain and Expand Your Indoor Oasis
Prune yellow or damaged leaves immediately to keep your bed looking fresh. For trailing plants like pothos, gently weave the vines through the gaps to create a lush, cascading effect. Rotate the bed a quarter turn weekly so all sides get even light—this prevents plants from leaning toward the window.
Every 3-4 months, top-dress the soil with a ¼-inch layer of compost to replenish nutrients. This is your plant’s multivitamin! If you notice slow growth or pale leaves, it’s time to fertilize lightly with a balanced liquid fertilizer (like 10-10-10) diluted to half strength. Your indoor plant bed will thrive with just a little TLC—watch it transform into a vibrant, space-saving green haven.
Tips & tricks for perfect indoor plant beds
Between us, these little details make all the difference between a thriving indoor garden and one that fades away. Let me share what I've learned after watching too many plant beds struggle.
Drainage is Non-Negotiable: In Step 1, when testing your container's drainage, aim for water to drain completely within 5 minutes—not 10. If it takes longer, add more pebbles or broken pottery. I've seen too many plant beds fail because people skip this test. Remember, soggy soil = root rot. The 1-inch layer of drainage material is your first line of defense against overwatering, which is the #1 killer of indoor plants.
Soil Mix Matters More Than You Think: That ½ potting mix to ½ coconut coir or perlite blend in Step 2 isn't just a suggestion—it's a game-changer. I've tried using straight potting mix, and within weeks, the soil compacts and plants start wilting. The coconut coir adds moisture retention while the perlite keeps things aerated. Pro tip: If you don't have coconut coir, vermiculite works just as well for the same purpose.
Light Positioning Pays Off: When placing your bed near a window in Step 4, pay attention to which side gets the most light. South-facing windows provide the most consistent 4-6 hours of indirect light, but east-facing windows give softer morning light that's gentler on delicate leaves. If you're using a grow light, position it 8-12 inches above the plants—closer than the 6-12 inch range if your plants are small, farther if they're mature. The 12-14 hours of light mimics natural day cycles and prevents leggy growth.
Watering Technique That Saves Plants: That finger-in-the-soil check in Step 4 isn't just about timing—it's about texture. The soil should feel like a wrung-out sponge at the top inch. If it's dry but crumbly, water thoroughly. If it's damp but not soggy, wait another day. And here's what nobody tells you: bottom watering (placing the container in a tray of water for 10 minutes) helps prevent fungal issues on the soil surface. I do this every 2-3 waterings for my tropical plants.
Pro Tips for Indoor Plant Bed
- Between us, these little details make all the difference between a thriving indoor garden and one that fades away. Le...
- Drainage is Non-Negotiable: In Step 1, when testing your container's drainage, aim for water to drain completely with...
- Soil Mix Matters More Than You Think: That ½ potting mix to ½ coconut coir or perlite blend in Step 2 isn't just a su...
Frequently asked questions
Got questions about creating your own indoor plant bed?
You’re not alone! Here are some of the most common queries—plus quick, actionable answers to help you grow with confidence.
What’s the best soil mix for an indoor plant bed?
Use a lightweight, well-draining potting mix designed for container gardens. A blend of peat moss, perlite, and compost (3:1:1 ratio) works wonders. Avoid garden soil—it compacts and suffocates roots! For succulents or herbs, add extra perlite or sand to improve aeration. Pro tip: Sterilize soil by baking it at 200°F for 30 minutes to kill pests.
How often should I water my indoor plant bed?
Water when the top 1–2 inches of soil feel dry. Overwatering is the #1 killer—stick your finger in the mix to check! Most indoor plant beds need water every 7–10 days, but adjust for humidity (less in dry air) or plant types (succulents need less). Drainage holes are a must to prevent root rot. Troubleshoot: Yellowing leaves? You’re likely overwatering.
Can I use a regular planter box instead of a raised bed?
A standard planter box works, but raised beds offer better drainage and root aeration. If using a box, ensure it has drainage holes and elevates slightly off the floor. For a space-saving twist, try vertical planters or hanging pockets. Just avoid deep containers—roots need room to breathe! Alternative idea: Repurpose a wooden crate or IKEA shelf for a budget-friendly look.
How do I keep pests out of my indoor plant bed?
Prevention starts with clean tools and healthy plants. Inspect new plants for bugs before adding them. Use neem oil (mix 1 tsp with 1 quart water) as a natural spray for aphids or spider mites. Boost airflow with a small fan, and avoid overwatering—pests love damp soil. Quick fix: Wipe leaves with soapy water (1 tsp mild soap per gallon) weekly.
What are the easiest plants for beginners in an indoor bed?
Start with low-maintenance stars like snake plants (thrive in low light), pothos (grows almost anywhere), or succulents (drought-tolerant). Herbs like basil and mint also do well in shallow beds. Avoid fussy plants like ferns or orchids unless you’re ready for extra care. Bonus: Mix textures (e.g., spiky aloe + soft ferns) for a lush, Instagram-worthy display!
Wrapping up and next steps
Creating your own indoor plant bed is a rewarding way to bring nature indoors while maximizing small spaces! Whether you're a gardening newbie or a seasoned plant parent, this project lets you customize your green sanctuary with minimal effort. 🌿✨
Ready to transform your space? Start by gathering your materials, then follow the steps to build your dream plant bed. Next, pick your favorite low-maintenance plants—like pothos, snake plants, or ferns—and watch your indoor oasis thrive! Happy planting! 🌱