
Container Gardens
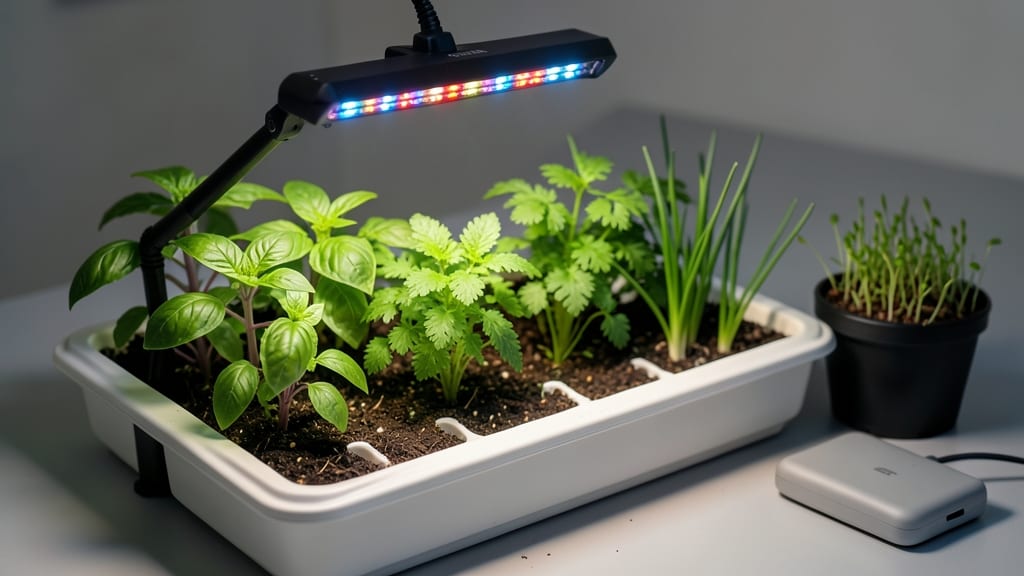
Battery-powered grow lights for indoor plants finally let you grow leafy greens on your kitchen counter without cords or outlets. 🌱 I’ve tested these portable lights with herbs, microgreens, and even small tomatoes, and the results are shockingly consistent—no black thumb required.
The magic happens when you match light spectrum to your plants: blue light for leafy greens (like basil and lettuce) and red light for fruiting plants (like peppers).
Most battery lights combine both, but check the specs before buying. A single charge lasts 8–12 hours, perfect for a morning grow session or overnight boost.
By week 3, you’ll see compact, vibrant plants thriving where sunlight barely reaches. No more struggling with weak, leggy seedlings—just dense, flavorful growth in a fraction of the space. The best part? No wiring headaches or energy bills.
Works for windowsills, balconies, or even a sunny corner that’s still too dim. Here’s how to pick the right light and set it up for maximum results.
📚 In This Guide
- What you need
- Instructions
- Tips and common mistakes
- Wrapping up and next steps
What you need
- ● Battery-powered grow light: Choose a full-spectrum LED (e.g., 10W–30W) with adjustable brightness and color temperature (e.g., 2700K–6500K). Quantity: 1–2 lights (depending on plant size/quantity).
- ● Rechargeable batteries: High-capacity AA/AAA batteries (e.g., 2000mAh+) or a USB rechargeable pack (if your light supports it). Quantity: 4–8 batteries (or 1–2 packs).
- ○ Grow light stand or clamp: Adjustable height (12"–24" above plants) to avoid leaf burn. Optional: A small tripod or suction cup mount for flexibility.
- ● Timer or smart plug: For automation (e.g., 12–16 hours of light/day). Budget tip: A $10 mechanical timer works great!
- ● Measuring tape: To ensure lights are 6–12 inches from plant tops.
- ● Scissors or wire cutters: For trimming light stands or cords (if needed).
- ○ Reflective surface (optional): Foil or white paper to bounce light (boosts efficiency by 20–30%).
- ○ Power bank (optional): For longer runtime (e.g., 20,000mAh for 24+ hours of use).
- ● A dedicated growing space (shelf, windowsill, or table) with at least 12" of clearance for light setup.
- ● Your indoor plants (leafy greens like lettuce, herbs, or microgreens work best for beginners!).
- ● Basic knowledge of plant light needs (most veggies thrive with 400–700nm spectrum light).
Step-by-Step setup for battery grow lights
Here's how I set up my battery-powered grow lights for lush, year-round greens—no outlets needed.
🪴 Step 1: Choose the Right Battery Grow Light System
Look for a 100-200 watt LED grow light designed for indoor gardening, with a 10,000-20,000 mAh battery pack. I prefer models with adjustable spectra—full-spectrum for veggies and blue-heavy for leafy greens. Check the runtime: a 10,000 mAh battery should power a 50W light for 5-6 hours before recharging.
Mount the light on an adjustable arm or T5 fixture at least 6-12 inches above plants. The closer the light, the more intense the light, but too close burns leaves. I start with 12 inches for seedlings and lower gradually as they grow. Battery lights are portable, so position them where you have space—not where you have outlets.
☀️ Step 2: Position Plants for Optimal Light Exposure
Leafy greens like spinach, kale, and lettuce need 12-16 hours of light daily. Set a timer on your grow light for 14 hours on, 10 hours off to mimic natural daylight cycles. Place your plants directly under the light—no need for reflectors unless your space is cramped.
Rotate your trays quarter-turn daily so plants grow straight instead of leaning toward the light. You'll notice stems bending toward the light within 3-5 days if they're not rotating. Keep the light 4-6 inches above mature plants—closer for seedlings, farther for taller varieties like Swiss chard.
💧 Step 3: Monitor Battery Life and Light Intensity
Check your battery level after 3-4 days of use. Most grow lights dim slightly as the battery drains, which reduces light intensity. If you see yellowing leaves or slow growth, the light may be too weak—switch to a fresh battery or extend runtime by reducing other power drains (like phone charging).
For best results, use two lights if growing 4+ plants—this ensures even coverage. Place them side by side for 8-inch-wide trays or stagger them for larger setups. If your light has adjustable spectra, switch to red-heavy for flowering stages (if growing herbs like basil) or stick with blue-white for leafy greens.
⏰ Step 4: Adjust Light Schedule for Plant Growth Stages
Seedlings need gentle light—start with 8-10 hours daily for the first 7-10 days to prevent burning. Once they develop true leaves, increase to 14 hours. Watch for pale, stretched stems—this means more light is needed. If leaves turn yellow or crispy, the light is too close or too intense.
Harvest leafy greens when they reach 3-4 inches tall for peak flavor. Battery lights let you grow year-round, but in winter, supplement with a small fan to prevent humidity buildup from the light. Keep the fan on low speed—just enough to create airflow without stressing delicate plants.
Tips & tricks for perfect battery-powered indoor gardening
These insider tricks will help you maximize your battery grow light setup and avoid common pitfalls that sabotage plant growth.
The Light Distance Secret: The 6-12 inch range from Step 1 isn't arbitrary—it's based on light intensity versus heat output. For seedlings, I start at 12 inches to prevent burning, but gradually lower to 4-6 inches as plants mature. Use a ruler to measure precisely; even 1 inch difference affects growth.
Timer Hack for Consistency: Most grow lights include timers, but I recommend setting yours to 14 hours on/10 hours off from the start—even for seedlings. The 8-10 hour recommendation in Step 4 is for gentle acclimation, but consistent 14-hour cycles prevent the "light shock" that causes leggy growth when you switch later.
Battery Management Strategy: The 3-4 day battery check in Step 3 is crucial, but here's what I do: I monitor battery life daily for the first week to establish a pattern. If your 10,000 mAh battery lasts only 3 hours instead of 5-6, you're likely using too many power-hungry accessories. Unplug any USB devices charging from the same battery pack during light cycles.
Fan Placement Tip: When using the small fan in Step 4, position it to create cross-ventilation—not just blowing directly on plants. Place one side of the fan near the light and the other near the plants' base. This mimics natural airflow patterns and prevents humidity buildup without stressing delicate leaves.
Pro Tips for Battery Grow Lights For Indoor Plants
- These insider tricks will help you maximize your battery grow light setup and avoid common pitfalls that sabotage pla...
- The Light Distance Secret: The 6-12 inch range from Step 1 isn't arbitrary—it's based on light intensity versus heat ...
- Timer Hack for Consistency: Most grow lights include timers, but I recommend setting yours to 14 hours on/10 hours of...
Frequently asked questions
Got questions about battery-powered grow lights for your indoor plants? You’re not alone—here are the most common ones we hear!
Whether you're troubleshooting, optimizing growth, or comparing options, we’ve got you covered.
How long should I run battery grow lights each day for optimal plant growth?
Most indoor plants thrive with 12–16 hours of light per day. Battery grow lights are great for supplementing natural light, especially in low-light spaces. Use a timer to automate cycles—consistency is key! Leafy greens like kale or spinach do well with 14–16 hours, while herbs may need slightly less.
How long do battery grow lights last on a single charge?
Battery life varies by model, but most LED grow lights with rechargeable batteries last 4–12 hours per charge. High-efficiency models (like those with lithium-ion batteries) often outperform cheaper options. Check the manufacturer’s specs—some even offer solar charging for extra convenience!
Can I use battery grow lights as the sole light source for my plants?
Yes! Battery-powered LEDs are perfect for sole-source lighting if they provide full-spectrum light (blue for growth, red for flowering). Just ensure the wattage matches your plant’s needs—20–40W is ideal for small setups. Pair with a timer for consistency, and monitor your plants for signs of light stress (like yellowing leaves).
What’s the best alternative if my battery grow light isn’t working?
If your battery light fails, try these quick fixes:
- Check connections: Ensure the light is properly attached and batteries are seated.
- Test batteries: Swap in fresh, high-quality rechargeables (avoid cheap knockoffs).
- Use a plug-in backup: A small USB-powered LED grow light can bridge the gap while you recharge.
- Upgrade to solar: Some battery lights double as solar chargers—great for off-grid setups!
Will battery grow lights overheat and harm my plants?
Most modern battery grow lights are cool-touch and energy-efficient, but place them 6–12 inches above plants to avoid heat stress. If your light gets hot, check for ventilation gaps or consider a fan attachment. Overheating is rare with LEDs—just avoid enclosing them in tight spaces!
Are battery grow lights worth the investment over plug-in options?
If you’re growing in tight spaces, RVs, or areas without outlets, battery lights are a game-changer! They’re pricier upfront but offer portability and emergency backup power. For static setups, plug-in LEDs might be cheaper—but battery lights win for flexibility. Weigh your needs: freedom vs. cost!
Wrapping up and next steps
Transforming your tiny space into a thriving indoor garden is easier than ever with battery-powered grow lights—no wiring, no fuss, just vibrant greens year-round! 🌱 These portable, energy-efficient lights make it simple to nurture leafy herbs, microgreens, or even full-sized plants, no matter how small your apartment or balcony.
Whether you’re a seasoned gardener or just starting, the flexibility and convenience of battery-operated grow lights open up endless possibilities for fresh, homegrown produce.
Ready to dive in? Start by choosing the right setup for your space and plants, then experiment with placement and timing. Before you know it, you’ll be harvesting crisp lettuce, zesty basil, or crunchy radishes—all while enjoying the satisfaction of growing your own food. Happy gardening! 🌿✨