
Blooming
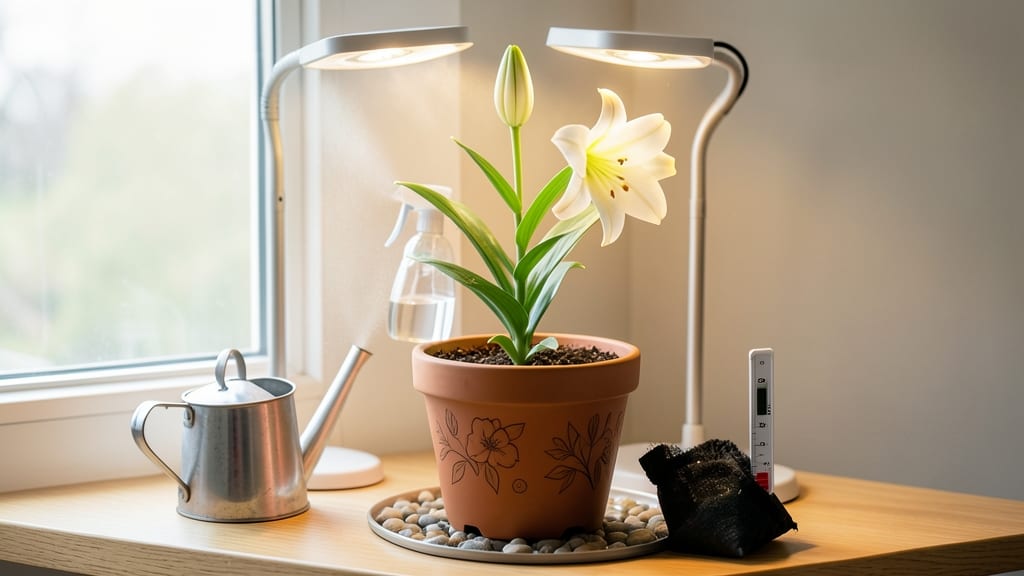
How to take care of lilies indoors rewards you with bold blooms that last for weeks—if you nail their light needs. 🌿 I’ve brought these dramatic flowers back from the brink after yellowing leaves and floppy stems, and I’ll show you how to avoid those mistakes. The key? Bright, indirect light for most of the day, cool nights, and a pot that drains well. Most people overwater lilies, drowning their roots in soggy soil. Let the top inch dry between waterings, and always use a pot with drainage holes. My best-performing indoor lilies live in a 6-inch container with a mix of potting soil and perlite—just enough to keep roots aerated but not waterlogged. By winter, you’ll see those signature trumpet-shaped blooms reaching for the light, their petals unfurling in layers of pink, white, or deep purple. The fragrance alone makes it worth the effort, and with proper care, these plants keep blooming for 6-8 weeks straight. This method works for Easter lilies, Asiatic lilies, and even some daylilies (though they’re technically different). Adjust light in winter with a grow bulb if your space gets dim—your lilies will thank you with bigger, showier blooms.
📚 In This Guide
- What you need
- Instructions
- Tips and common mistakes
- Wrapping up and next steps
What you need
- ● Lily bulbs or potted lilies: Choose Asiatic, Oriental, or Stargazer lilies (best for indoor care). Start with 1–3 bulbs if planting fresh or 1–2 potted plants for beginners.
- ● Well-draining potting mix: A blend of peat moss, perlite, and compost (or a pre-mixed bulb-specific soil). Avoid heavy garden soil—1 gallon per bulb is ideal.
- ● Containers with drainage: For bulbs: Pots with drainage holes (6–8 inches deep and wide). Terracotta or ceramic works best.
- ● For potted lilies: Ensure the current pot has adequate drainage or repot if needed.
- ● Watering can with a rose or fine-spray nozzle: Lilies hate soggy roots—gentle watering is key!
- ● Fertilizer: Balanced liquid fertilizer (10-10-10 or 20-20-20): Dilute to ½ strength for feeding.
- ○ Slow-release bulb fertilizer (optional but helpful): Mix into soil at planting time.
- ● Pruning shears or sharp scissors: For trimming spent blooms and foliage.
- ○ Grow lights (optional but recommended for low-light spaces): LED full-spectrum bulb (10,000–15,000K): Provide 12–14 hours of light daily if natural light is limited.
- ● Adjustable light stand or clip-on fixture: Position 6–12 inches above plants.
- ● Humidity tray or pebble tray: Fill with water and pebbles to boost humidity (especially in dry climates).
- ● Mulch (orchid bark or coconut coir): Helps retain moisture and mimics outdoor conditions.
- ● Soil moisture meter: Avoid overwatering by checking moisture levels before watering.
- ● Insecticidal soap or neem oil: Treat pests like aphids or spider mites early.
- ● Decorative pot or cachepot: For a stylish outer layer (ensure it doesn’t trap excess moisture).
- ● Plant support (small stakes or rings): Tall lilies may need gentle support as they grow.
Step-by-Step guide to keeping lilies thriving indoors
Here's how I keep my lilies blooming beautifully year-round with just a few key adjustments.
🪴 Step 1: Select the Right Lily Variety for Indoor Living
Not all lilies adapt well indoors. Look for Asiatic, Oriental, or Stargazer hybrids—they're the most forgiving with indoor conditions. Avoid woodland lilies like Lilium canadense; they need cooler temperatures and more humidity than most homes provide. I always check the plant tag for indoor suitability before purchasing.
If you're starting from bulbs, choose potted bulb varieties labeled for indoor forcing. These bulbs have been pre-treated to bloom indoors, unlike garden bulbs which may refuse to flower without a cold period. Plant them in a container with drainage holes—this prevents root rot, which is the #1 killer of indoor lilies.
☀️ Step 2: Position for Maximum Light Without Scorching
Lilies crave bright, indirect light—think of it as a sunbathing session without the midday glare. Place your lily near an east-facing window or within 2-3 feet of a south-facing window. If you notice leaves turning yellow or brown at the edges, it's a sign of too much direct sun. Rotate the pot a quarter turn weekly so growth stays even.
For deeper indoor spaces, supplement with a grow light placed 12-18 inches above the plant. Lilies need 12-14 hours of light daily. You'll know you've got it right when the leaves stay vibrant green and stems grow upright without leaning. Leggy growth means more light is needed immediately.
💧 Step 3: Master the Watering Balance
Water lilies when the top inch of soil feels dry to touch. Stick your finger in the soil—if it comes out clean, it's time to water. Overwatering is the silent killer here; soggy soil suffocates roots and invites fungal diseases. I always use room-temperature water to avoid shocking the plant.
Empty the saucer under the pot 30 minutes after watering to prevent the bulb from sitting in water. Lilies store nutrients in their bulbs, and excess moisture causes them to rot from the inside out. During winter, when growth slows, reduce watering to every 10-14 days—just enough to keep the soil from drying completely.
✂️ Step 4: Prune and Support for Long-Lasting Blooms
Deadhead spent blooms by snipping the stem ½ inch above the next leaf node. This redirects the plant's energy from seed production to growing stronger stems and leaves for next year. I always use clean, sharp scissors to avoid tearing the stems—rough cuts invite disease.
For tall varieties like Stargazers, add a bamboo stake or small trellis when the first buds appear. Tie the main stem loosely with soft twine to prevent stem breakage. Never wrap the twine tightly; lilies grow quickly and need room to expand. Remove any yellow or brown leaves immediately—they drain energy from the plant.
🌱 Step 5: Feed and Refresh for Next Season's Growth
Feed your lily with a balanced liquid fertilizer (10-10-10) every 4-6 weeks during active growth (spring through summer). Dilute it to half-strength to avoid burning the roots. I always fertilize after watering so the nutrients soak directly into the soil where roots can access them.
After blooming, reduce fertilization to every 8 weeks in fall and winter. Once the leaves turn yellow and die back completely, cut them back to 2 inches above the bulb. This signals the plant to rest. In late winter, repot if the bulb has outgrown its container—choose a pot just 1-2 inches larger in diameter and refresh the soil with a light, well-draining mix.
Tips & tricks for perfect indoor lily care
Keeping lilies thriving indoors takes just a few strategic adjustments—here's what I've learned after years of trial and error.
Light Strategy: In Step 2, when positioning your lily, pay close attention to the quality of light. East-facing windows provide ideal morning sun without the harsh afternoon rays. If you notice leaves curling or developing crispy edges by late afternoon, move your plant back slightly—this happens when direct sun hits after 11 AM. For north-facing windows, supplement with a grow light for those critical 12-14 hours of daily light. I use a simple LED clip light on a timer to maintain consistency, especially during shorter winter days.
Bulb Selection Secret: When choosing bulbs in Step 1, look for ones labeled "indoor forcing" or "potted bulb varieties"—these are pre-chilled and ready to bloom. I've found that bulbs from garden centers often need an extra cold period, which most homes can't provide. Pro tip: Check the bulb's size—larger bulbs (3-4 inches in diameter) produce more robust stems and larger blooms. Plant them just below the soil surface with the pointed end up for best results.
Watering Rescue: The 30-minute rule in Step 3 is non-negotiable—this prevents the dreaded bulb rot. I've seen too many lilies suffer from sitting in saucer water. For extra insurance, use a pot with drainage holes AND a cache pot underneath. This creates a buffer zone while still allowing excess water to escape. During winter dormancy, I actually stop watering completely if the soil stays moist—just a quick finger test tells me when it's time to hydrate again.
Fertilizer Timing: In Step 5, the 4-6 week feeding schedule works perfectly during active growth, but here's what I've learned about the transition: When you reduce to every 8 weeks in fall, stop fertilizing completely by late October. The plant needs this break to prepare for dormancy. I've found that adding a handful of worm castings to the soil in late winter gives a gentle nutrient boost without overloading the system when repotting.
Pro Tips for Take Care Of Lilies Indoors
- Keeping lilies thriving indoors takes just a few strategic adjustments—here's what I've learned after years of trial ...
- Light Strategy: In Step 2, when positioning your lily, pay close attention to the quality of light. East-facing windo...
- Bulb Selection Secret: When choosing bulbs in Step 1, look for ones labeled "indoor forcing" or "potted bulb varietie...
Frequently asked questions
Got questions about keeping lilies happy indoors?
You’re not alone—these stunning blooms need a little extra TLC to thrive year-round. Here are answers to the most common concerns, from light needs to troubleshooting.
How much light do indoor lilies really need?
Lilies love bright, indirect light—think east or west-facing windows. South-facing spots work too, but watch for leaf scorch. If your blooms look leggy or pale, they’re begging for more light! A grow light (12–14 hours/day) can save the day in dim rooms.
When should I repot my indoor lily?
Repot every 2–3 years or when roots spill over the pot. Spring is ideal—wait until after blooming to avoid stress. Use a pot just 1–2 inches larger, with fresh, well-draining soil. Pro tip: Add perlite or orchid bark to prevent soggy roots!
Why are my lily leaves turning yellow?
Yellow leaves usually mean overwatering or poor drainage. Let the top 1–2 inches of soil dry out between waterings, and ensure the pot has drainage holes. If the yellowing starts at the bottom, it’s likely natural aging—trim those leaves to redirect energy to new growth.
Can I grow lilies indoors without a sunny window?
If natural light is scarce, a full-spectrum LED grow light (like a 20W bulb) 6–12 inches above the plant will mimic sunlight. Place it on a timer for 14 hours/day. Just rotate the pot weekly so growth stays even—no lopsided lilies!
Are indoor lilies toxic to pets?
Yes!
Lilies are highly toxic to cats and dogs—even small ingestions can cause kidney failure. Keep them out of paw’s reach, and consider pet-safe alternatives like peace lilies or spider plants if you’re worried. When in doubt, consult your vet.
Wrapping up and next steps
Caring for lilies indoors is all about balancing their love for light, fresh air, and a little TLC—and you’ve got everything you need to make it happen! 🌱 With the right soil, watering routine, and a cozy spot near a window, these stunning blooms will reward you with vibrant beauty year after year. Now that you’re armed with the know-how, why not treat yourself (or a loved one) to a lily or two?
Ready to watch your indoor garden flourish? Start by picking out your favorite variety or exploring more tips for keeping houseplants thriving—your green thumb is about to level up! 🌸