
Container Gardens
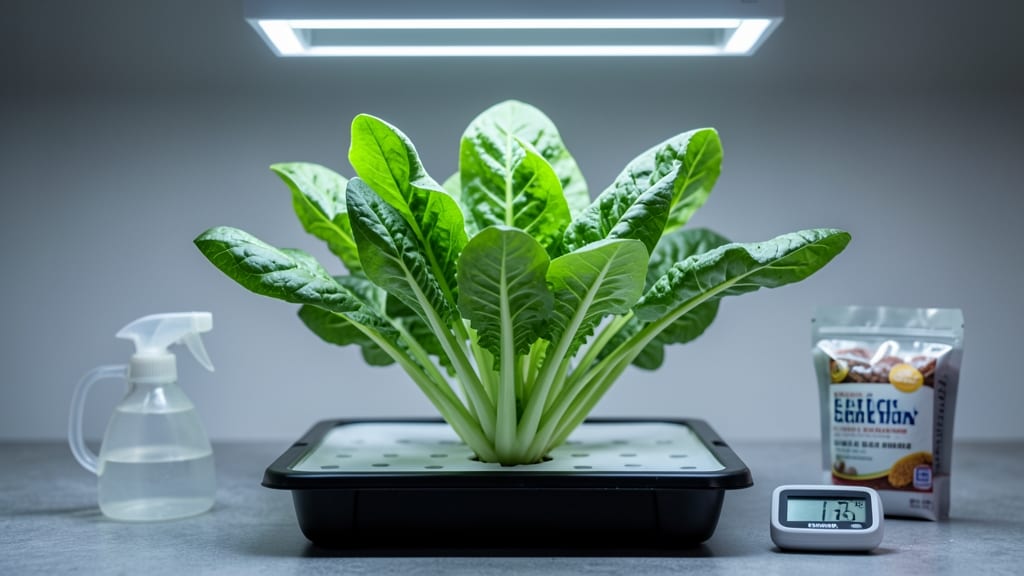
Growing romaine indoors means crisp, homegrown greens even when your windows are dark. 🌱 I’ve grown enough romaine in my dim apartment to feed my family for weeks—no greenhouse or sunny balcony required.
The secret? Matching light, water, and temperature to what romaine actually needs, not what you think it needs.
You’ll need just three things: a shallow container (6–8 inches deep), well-draining potting mix, and either a south-facing window or a basic LED grow light for 12–14 hours daily.
Romaine thrives in cool temps (60–70°F) and hates soggy roots, so we’re talking light watering—about once a week, checking soil moisture first. No fancy setups here, just reliable results.
By week 4, you’ll harvest tender, buttery leaves straight from your countertop. The flavor? Better than store-bought, with none of the bitterness that comes from long grocery store trips. And since romaine bolts slower indoors, you’ll enjoy fresh salads for months, not weeks.
Works in kitchens, offices, or even bathrooms with enough light. The only mistake I made? Overwatering—so let’s fix that first. Ready to grow?
📚 In This Guide
- What you need
- Instructions
- Tips and common mistakes
- Wrapping up and next steps
What you need
- ● Romaine seeds: Choose Lactuca sativa (romaine variety) seeds—about 10-15 seeds per container (or 1 packet for multiple pots). Opt for organic or heirloom seeds for best results.
- ● Growing container: A 5-10 inch deep pot (minimum 6-inch diameter) with drainage holes. Recommended: Fabric grow bags, ceramic pots, or recycled containers (like plastic bins with holes drilled in).
- ● High-quality potting mix: A lightweight, well-draining mix (avoid garden soil). Look for a seed-starting mix or blend with 50% peat/coir + 50% perlite/vermiculite for aeration.
- ● Grow lights or sunny window: Natural light: A south-facing window with 6+ hours of direct sunlight daily.
- ● Grow lights: A full-spectrum LED grow light (12-16 inches above plants) on a 14-16 hour timer.
- ● Watering can or spray bottle: With a gentle misting nozzle to avoid disturbing seeds.
- ● Plant labels & pencil: To track planting dates and varieties.
- ● Seedling heat mat: (For faster germination, especially in cooler homes.)
- ● Humidity dome or plastic wrap: To retain moisture during germination.
- ● Fertilizer: Balanced liquid fertilizer: (e.g., 5-5-5 or 10-10-10) diluted to ½ strength after 3-4 weeks.
- ● Slow-release granules: Mixed into soil at planting for steady nutrients.
- ● Support stakes or trellis: (If growing cos or romaine types that bolt upright—though most romaine stays low.)
- ● pH testing kit: To ensure soil pH is 6.0-7.0 (romaine prefers slightly acidic to neutral).
- ● Pruning shears: For harvesting outer leaves without damaging the core.
Step-by-step instructions for growing romaine indoors
Crisp, homegrown romaine thrives indoors with the right light and care—here’s how to grow it successfully.
🌱 Step 1: Select Containers and Prepare the Growing Medium
Choose 4-inch deep containers with drainage holes for each plant—romaine’s shallow roots need room to spread without waterlogging. I use fabric grow bags because they wick excess moisture away while still allowing roots to breathe. Fill each container with 2 cups of high-quality potting mix (avoid garden soil—it compacts and blocks airflow).
Tap the container gently to settle the soil, then moisten it thoroughly until water drains freely from the bottom. The mix should feel like a damp sponge—not soggy, not bone-dry. Press down lightly to create a firm planting surface, but don’t compact it. Romaine roots need loose soil to establish quickly.
🌿 Step 2: Plant Seeds at the Right Depth and Spacing
Sow 4-5 romaine seeds per container, spaced ½ inch apart in a loose circle. Press them ¼ inch deep into the soil—any deeper slows germination because the seedlings must push through extra material. Cover lightly with a sprinkle of additional potting mix, then mist the surface with a spray bottle until evenly moist.
Here’s the thing—romaine seeds germinate best in warmth (70-75°F). Place the containers on a seedling heat mat or in a sunny windowsill near a space heater (keep it 50°F or warmer) until sprouts appear in 5-10 days. Don’t overwater now; the soil should stay lightly damp but not glisten with excess moisture.
☀️ Step 3: Provide Consistent Light for Compact Growth
Romaine needs 12-14 hours of bright light daily to stay crisp and upright. A south-facing window works if it gets 6+ hours of direct sun, but most indoor spaces lack enough intensity. Supplement with a full-spectrum LED grow light positioned 6 inches above the plants. Raise it as they grow to maintain that distance.
Watch for leggy seedlings—thin, pale stems with leaves spaced far apart. This means your light is too far or weak. Strong romaine has thick stems, deep green leaves, and compact spacing between nodes. Rotate the containers a quarter turn daily so plants grow straight rather than leaning toward the light.
💧 Step 4: Water and Fertilize for Crisp, Tender Leaves
Water when the top inch of soil feels dry to the touch, typically every 2-3 days. Use room-temperature water and water at the base to avoid wetting leaves (this prevents fungal diseases like downy mildew). Let excess water drain completely—romaine hates soggy roots but wilts fast if dried out.
After 3 weeks, switch to liquid fertilizer (½-strength balanced formula) every 2 weeks. You’ll see the difference immediately: brighter green leaves, faster growth, and thicker stems. Stop fertilizing 2 weeks before harvest to let the flavor develop fully.
✂️ Step 5: Harvest Outer Leaves for Continuous Yield
Harvest outer leaves when they reach 4-6 inches tall by snipping just above a set of leaves with clean scissors. This encourages the plant to produce more leaves from the center, giving you 4-6 weeks of harvests per plant. Avoid cutting into the main stem—romaine bolts (goes to seed) quickly if stressed.
Real talk: the first harvest is the sweetest. After that, leaves may taste slightly milder, but they’re still packed with nutrients. If the plant looks tired after 6-8 weeks, replace it—romaine’s lifespan indoors is limited, but you’ll have fresh greens ready in 30-45 days from seed.
Tips & tricks for perfect indoor romaine growth
Between us, these little details make all the difference when growing crisp romaine indoors—especially when sunlight is scarce.
Container Selection: Fabric grow bags are ideal, but if you don't have them, any container with drainage holes will work—just avoid plastic without holes, which can suffocate roots. The 4-inch depth is crucial; deeper containers risk waterlogging while shallower ones restrict root growth. I've also found that terracotta pots help regulate moisture better than plastic.
Germination Warmth: That 70-75°F temperature range isn't just a suggestion—it's the sweet spot for germination. If your space runs cooler, place containers on a seedling heat mat or near a warm spot (like above a fridge). I've seen germination times stretch to 14 days when temperatures dip below 60°F, so keep them cozy until those first green shoots appear.
Light Strategy: The 12-14 hours of light is non-negotiable for crisp romaine. If your grow light isn't full-spectrum, supplement with a small fluorescent bulb nearby—romaine needs blue light for leafy growth. And here's a pro move: adjust your light height every 3-4 days as plants grow to maintain that 6-inch distance. Too close? Leaves scorch. Too far? They stretch leggy.
Fertilizer Timing: Starting fertilizer at 3 weeks gives plants time to establish roots before feeding. I use a fish emulsion (½-strength) because it's gentle but effective. The 2-week interval after that keeps nutrients consistent without overloading the soil. Stopping 2 weeks before harvest prevents a bitter taste—this is when plants start tasting their best, and you don't want fertilizer interfering.
Pro Tips for Growing Romaine Indoors
- Between us, these little details make all the difference when growing crisp romaine indoors—especially when sunlight ...
- Container Selection: Fabric grow bags are ideal, but if you don't have them, any container with drainage holes will w...
- Germination Warmth: That 70-75°F temperature range isn't just a suggestion—it's the sweet spot for germination. If yo...
Frequently asked questions
about growing romaine indoors—because every gardener has a few burning questions before diving in! Here are the most common ones, answered clearly and concisely.How long does it take for romaine to grow indoors?
Indoor romaine typically takes 4–6 weeks from seed to harvest, depending on light and care. With strong grow lights (12–16 hours/day), you can expect faster growth. Pro tip: Thin seedlings to 4–6 inches apart for better air circulation and speedier maturity.
Can I grow romaine indoors without a grow light?
Yes, but results will be slower and less robust. Place your container near a south-facing window for 6+ hours of sunlight daily. Expect smaller, less crisp leaves. For best results, supplement with a LED grow light (even a basic bulb helps!).
Why is my indoor romaine turning bitter or yellow?
Bitterness often signals over-maturity or heat stress (keep temps between 60–75°F). Yellowing leaves? Check for overwatering (root rot) or nutrient deficiency (use a balanced fertilizer every 2–3 weeks). Fix it: Trim affected leaves and adjust care immediately.
How do I harvest romaine for the crispiest texture?
Harvest outer leaves first, leaving the inner core intact for regrowth. For maximum crispness, harvest in the morning and store in a sealed container with a damp paper towel. Avoid cutting the entire head—romaine continues growing if you leave 2–3 inches of the base!
What’s the best alternative if romaine struggles indoors?
Try butter lettuce, arugula, or spinach—they’re even easier for beginners! Butter lettuce thrives in low light, while arugula grows fast (3–4 weeks). Bonus: All three are nutrient-packed and perfect for salads. Rotate crops to keep your indoor garden productive year-round.
Wrapping up and next steps
Growing romaine indoors is not only achievable but also incredibly rewarding—especially when you’re craving fresh, crisp greens without stepping outside! 🌱 With the right setup, patience, and a dash of care, you’ll soon be harvesting your own homegrown salad staples.
Whether you’re a beginner or a seasoned plant parent, this method proves that space and sunlight aren’t barriers—just creative opportunities.
Ready to take the next step? Start small with just one container and expand as you gain confidence. Soon, you’ll be sharing your thriving romaine with friends—or simply enjoying the satisfaction of a garden that thrives right on your windowsill! 🌿