
Container Gardens
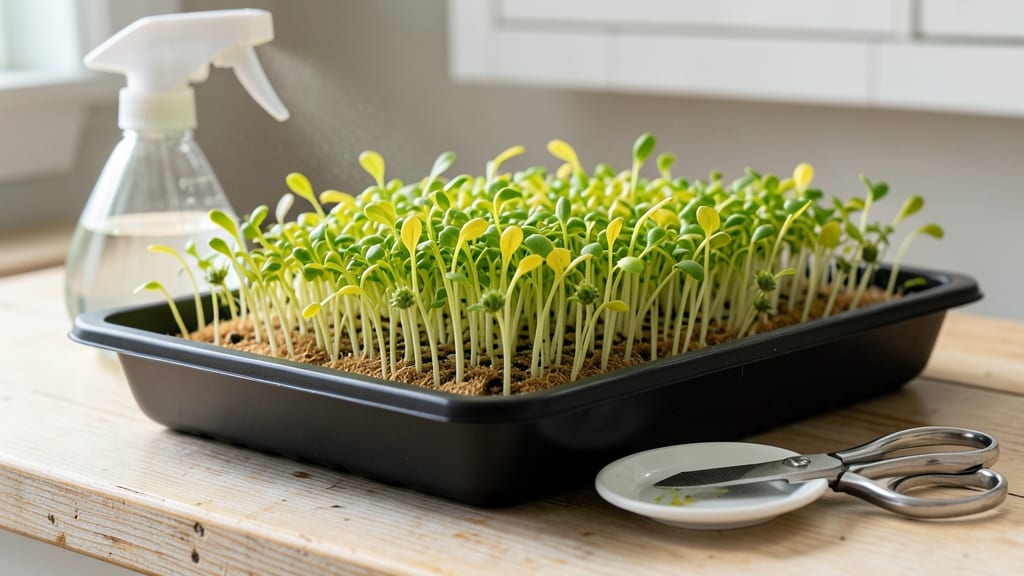
Growing micro herbs indoors means fresh, flavorful greens on your countertop in just three weeks—no sunlight required. 🌱 I’ve grown everything from cilantro to basil in my tiny kitchen, and the secret isn’t fancy gear but the right setup for fast, dense growth.
These tiny powerhouses pack big flavor and grow in shallow containers, making them perfect for small spaces or busy schedules.
The magic happens with 3 simple tools: a shallow tray (or even a repurposed container), a grow light (or a sunny windowsill), and a well-draining soil mix.
Micro herbs like basil and parsley thrive in 1-2 inches of soil, and you’ll harvest them before they bolt—no waiting months for full-sized plants. Water lightly but consistently, and you’ll have harvest-ready greens in under a month.
Imagine snipping fresh cilantro for tacos or basil for pesto straight from your windowsill—no grocery store markup, no wilting. These herbs grow so fast that you’ll harvest multiple times before they even flower. Plus, they’re disease-resistant and forgiving, so even beginner gardeners can’t kill them.
Whether you’re urban apartment dwellers or just want to cut grocery costs, this method works year-round. Let’s get those trays set up and turn your countertop into a mini herb farm!
📚 In This Guide
- What you need
- Instructions
- Tips and common mistakes
- Wrapping up and next steps
What you need
- ● Micro herb seeds: Choose fast-growing varieties like basil, cilantro, parsley, chives, or dill. Start with 1–2 packets (50–100 seeds total) to test the waters.
- ● Growing medium: Use coco coir, hydroponic clay pebbles, or seed-starting soil (sterilized). A 2–3 inch deep tray (e.g., 10x20 inch) works perfectly.
- ● Water: Room-temperature, filtered water (chlorine-free). Aim for ¼–½ cup per day, depending on humidity.
- ○ Grow lights (optional but recommended): LED grow lights (full-spectrum, 10–20W) for 12–16 hours/day.
- ● Alternative: Place near a south-facing window (if natural light is bright).
- ● Spray bottle (16 oz) for gentle watering.
- ● Fine-mesh screen or breathable lid (to cover seeds until germination).
- ● Tweezers or small spoon for seed placement.
- ○ Scissors (optional) for trimming mature herbs.
- ○ Food-safe container (optional): Repurpose a shallow tray, egg carton, or mason jar (with drainage holes).
- ● Time commitment: 3–4 weeks from seed to harvest (check seed packets for exact days).
- ● Space: A small countertop or windowsill (6–12 inches of space).
- ● Patience: Micro herbs are tiny—harvest when 1–3 inches tall!
Step-by-Step instructions for growing micro herbs indoors
Here’s how to grow lush microgreens and herbs indoors without sunlight—ready to harvest in just three weeks.
🌱 Step 1: Prepare Your Growing Tray and Soil
Start by filling a 4-inch deep tray with 2-3 inches of moistened organic potting mix. I like to mix in a handful of compost for extra nutrients, but avoid garden soil—it’s too dense and can harbor pathogens. Press the soil down lightly with your fingers until it’s firm but not compacted. This ensures good root contact while leaving room for tender sprouts to push through.
If your tray lacks drainage, poke ¼-inch holes in the bottom with a nail or screwdriver. This prevents waterlogging, which can drown your micro herbs before they even sprout. Moisten the soil with a spray bottle until it’s damp but not soggy—think of a wrung-out sponge. Overwatering now will just create a muddy mess that slows germination.
🌿 Step 2: Sow Seeds Evenly for Dense Growth
Scatter your micro herb seeds sparingly—they’re tiny, so a pinch goes a long way. I use tweezers to distribute them evenly, aiming for ¼-inch spacing between seeds. Press them ⅛-inch deep into the soil; deeper planting delays germination because the seedlings must work harder to reach light. Cover the tray with another shallow tray or plastic wrap to retain moisture and warmth.
Place the tray in a warm spot (70-75°F)—a sunny windowsill or under a grow light works. Check daily for moisture; mist lightly if the soil surface dries out. You’ll see first sprouts in 3-5 days, but don’t disturb them until they’ve grown 1-2 inches tall. Patience here pays off—rushing to uncover too soon can dry out the delicate seedlings.
☀️ Step 3: Provide Consistent Light for Rapid Growth
Once sprouts emerge, remove the cover and move them to 12-16 hours of bright light daily. A LED grow light hung 4-6 inches above the tray works best—natural light alone won’t cut it unless you’re in a greenhouse. You’ll notice leggy, pale growth if the light’s too far away; adjust until stems stay compact and dark green. Rotate the tray quarter-turn daily to prevent leaning toward the light source.
Keep the soil evenly moist—not soggy, not dry. Water from the bottom by placing the tray in ½-inch of water for 10 minutes, then drain. This method avoids disturbing roots and ensures deep hydration. You’ll know you’re doing it right when the soil feels damp 1 inch down but not waterlogged at the surface.
✂️ Step 4: Harvest at Peak Flavor and Texture
Micro herbs are ready to harvest when they reach 1-3 inches tall, depending on the variety. Use clean scissors to snip just above the soil line—this encourages a second flush of growth. Rinse gently under cool water, then pat dry with a paper towel. Store in an airtight container in the fridge for up to 5 days, or freeze for longer storage. The first harvest is the most flavorful; subsequent cuts will be milder but still fresh.
After harvesting, add ½-inch of fresh potting mix to the tray and sow a new batch of seeds. With this method, you’ll have continuous harvests every 2-3 weeks—no outdoor space required. The key is consistency: light, moisture, and warmth. Once you nail these, you’ll have a year-round herb garden on your countertop.
Tips & tricks for perfect indoor micro herb growth
A few strategic moves will help you avoid the most common pitfalls when growing micro herbs indoors. These are the details that separate a thriving tray from a failed experiment.
Soil Preparation: The 2-3 inches of moistened organic potting mix should feel like a wrung-out sponge—not compacted, not loose. I press it down gently with my fingers until it holds its shape when touched, but still leaves room for sprouts to push through. If your soil feels too dense after pressing, add a thin layer of perlite to improve aeration. This prevents waterlogging while maintaining the perfect moisture balance for germination.
Seed Spacing Secret: In Step 2, when aiming for that ¼-inch spacing between seeds, think of a fine mesh screen—each seed should have its own little square. I use a toothpick to create tiny divots in the soil before pressing seeds in, which helps maintain consistent spacing. This prevents overcrowding and ensures each sprout gets enough light and nutrients to grow strong.
Light Management: For the critical 12-16 hours of daily light, position your LED grow light at exactly 4-6 inches above the tray. I test this by holding a business card between the light and plants—if you can't read the text through it, the light is too close. This distance prevents burning while providing optimal intensity. If you notice leggy growth, immediately move the light closer or increase the duration slightly.
Harvest Timing: When harvesting at 1-3 inches tall, use clean scissors to cut just above the soil line—never pull or twist stems. This clean cut prevents damage to the roots and encourages a second flush of growth. I harvest in the morning when the plants are most hydrated, which makes them easier to handle and preserves their vibrant color and flavor.
Pro Tips for Growing Micro Herbs Indoors
- A few strategic moves will help you avoid the most common pitfalls when growing micro herbs indoors. These are the de...
- Soil Preparation: The 2-3 inches of moistened organic potting mix should feel like a wrung-out sponge—not compacted, ...
- Seed Spacing Secret: In Step 2, when aiming for that ¼-inch spacing between seeds, think of a fine mesh screen—each s...
Frequently asked questions
Got questions about growing microgreens indoors? You’re not alone—let’s tackle the most common ones!
How much light do micro herbs really need?
Micro herbs thrive under grow lights (like LED or fluorescent bulbs) for 12–16 hours daily. Natural light works too, but place them near a bright window (south-facing is ideal). Avoid direct sunlight—it can scorch tender leaves! For best results, use a full-spectrum grow light 6 inches above your tray.
Can I harvest micro herbs faster than 3 weeks?
Most microgreens (like pea shoots or radish) are ready in 1–3 weeks, but timing depends on the variety. Check the seed packet for specifics—some, like sunflower sprouts, are edible in just 4–5 days! Harvest when the first true leaves appear (usually 1–2 inches tall).
What’s the best way to water micro herbs without overdoing it?
Keep soil consistently moist (not soggy!) by misting lightly daily or using a spray bottle. Avoid overwatering—root rot is a real risk! For faster germination, soak seeds in water for 6–8 hours before planting. A self-watering tray can help maintain perfect moisture levels.
Are micro herbs safe to eat straight from the soil?
Yes! Micro herbs are edible from root to stem—just rinse them gently under cool water to remove soil. For extra cleanliness, soak in a bowl of water for 10 minutes, then pat dry. Store in an airtight container in the fridge for up to 5–7 days. Pro tip: Use organic seeds to avoid pesticides.
What do I do if my micro herbs turn yellow or wilt?
Yellowing leaves often mean overwatering or nutrient deficiency. Let the soil dry slightly between waterings, and ensure good airflow (no humidity traps!). Wilting? Check for underwatering or root rot—adjust your care routine. If mold appears, toss the batch and sterilize your tray with 10% hydrogen peroxide.
Wrapping up and next steps
Growing micro herbs indoors isn’t just a trend—it’s a game-changer for fresh, flavorful greens year-round, without needing sunlight! Whether you’re a busy parent, urban dweller, or just love the idea of homegrown goodness, these tiny powerhouses prove that big flavors come in small packages. 🌱✨
Ready to take the next step? Start with one easy-to-grow variety (like basil or cilantro) and experiment with flavors in your favorite dishes. Before you know it, you’ll be harvesting crisp, nutrient-packed herbs faster than you can say “farmers’ market”—all from your kitchen counter!