
Container Gardens
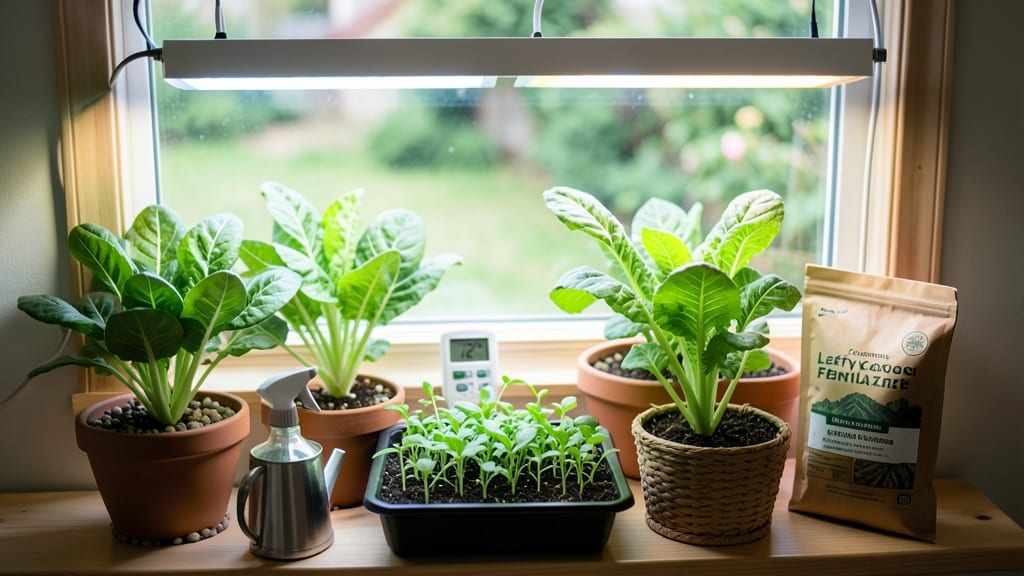
Growing leafy greens indoors with LED lights means fresh salad greens year-round, no matter your window view. 🌱 I’ve grown crisp lettuce, peppery arugula, and fluffy baby spinach on my kitchen counter using just a $20 LED bulb—no greenhouse or fancy setup required.
The secret isn’t complicated: it’s about light, water, and picking the right greens that thrive in tight spaces.
You don’t need a sunroom or even a south-facing window. A basic LED grow light (or even a bright desk lamp) gives greens the 12-16 hours of light they crave daily. Use well-draining potting mix—regular garden soil compacts too much—and water when the top inch feels dry.
Fast growers like baby kale or microgreens deliver harvests in 2-3 weeks, while romaine or butter lettuce mature in 4-6 weeks.
The payoff? Crisp, homegrown greens that taste fresher than anything from the store. No leggy stems, no bitter leaves—just buttery lettuce, tender spinach, and zesty arugula ready to snip whenever you want. Plus, you’ll save money and cut food waste by growing what you actually eat.
Works in apartments, offices, or even a sunny bathroom. Here’s how to set it up without the guesswork—no green thumb required.
Common Causes Of Stunted Growth
Even with LED lights, your leafy greens might not thrive as expected. Understanding the root causes—especially in controlled indoor environments—helps you troubleshoot and fix issues before they derail your harvest. Below are the most common culprits behind weak, slow, or stunted growth, explained in simple terms with actionable science.
LED grow lights are a game-changer, but not all lights are created equal. If your greens look pale, leggy, or fail to grow dense, the issue might be light intensity (how bright the light is) or spectrum mismatch (the color wavelengths your plants need).
Leafy greens like spinach, kale, and lettuce thrive under 12–16 hours of light daily, with an ideal intensity of 10,000–20,000 lux (measured 6–12 inches above the plants). If your LED bulbs are too dim or too far away, photosynthesis slows down, leading to weak stems and sparse leaves.
Even worse? Many budget LEDs lack the right blue (400–500 nm) and red (600–700 nm) wavelengths critical for growth.
Without enough blue light, stems stretch (etiolation), and without red, leaves stay small and dull. Pro tip: Check your LED’s photosynthetic photon efficacy (PPE)—aim for at least 1.5–2.5 µmol/J for optimal results.
Root rot and stunted growth often stem from too much water or poor airflow around roots. Leafy greens hate soggy conditions—they need well-draining soil and consistent moisture, not drowning.
Here’s how to spot the issue:
- Yellowing leaves (especially lower ones) + mushy stems = overwatering.
- Slow growth despite good light = compacted soil blocking oxygen.
- Foul smell from the soil = fungal/bacterial infection from stagnant water.
Leafy greens prefer soil that’s moist but not wet. Use a mix of coco coir, perlite, and compost (60:30:10 ratio) to improve drainage. Pro tip: Stick your finger 1 inch into the soil—if it’s damp but not dripping, you’re golden. If your container lacks drainage holes, switch to self-watering setups or raised beds.
Indoor environments can swing from too hot (from LED heat) to too cold (near drafty windows). Leafy greens prefer 60–75°F (15–24°C) during the day and 55–65°F (13–18°C) at night. Outside this range, growth stalls, and plants may develop purple stems (a sign of phosphorus deficiency from stress).
Humidity also plays a role. Too dry? Leaves curl or crisp at the edges. Too humid? Fungal diseases like powdery mildew take hold. Aim for 40–60% humidity—use a hygrometer to monitor and a pebble tray with water to boost moisture if needed.
LED lights add heat! Place a fan 12+ inches away to circulate air and prevent hot spots. If your space is chilly, consider a small space heater (safely positioned) or move pots to a warmer spot.
Even with great light and water, leafy greens can starve if their nutrient mix is off. Common deficiencies cause:
- Nitrogen (N) deficiency → Pale, slow-growing leaves (fix: fish emulsion or blood meal).
- Iron (Fe) deficiency → Yellowing between leaf veins (chlorosis) (fix: chelated iron supplement).
- Magnesium (Mg) deficiency → Yellow patches on older leaves (fix: Epsom salt spray).
- Phosphorus (P) deficiency → Dark, purple stems (fix: bone meal or rock phosphate).
Most indoor growers use liquid hydroponic nutrients or slow-release fertilizer granules. For soil, a balanced 10-10-10 or 5-5-5 fertilizer (applied every 2–4 weeks) works well. Pro tip: Test your water’s pH (ideal: 6.0–7.0)—nutrients lock up if the soil is too alkaline or acidic.
Tiny invaders like aphids, spider mites, or fungus gnats suck nutrients and stress plants, leading to stunted growth. Even bacterial or fungal infections (e.g., Pythium root rot) can cripple your greens without obvious signs.
Watch for:
- Sticky residue on leaves = aphids.
- Fine webbing = spider mites.
- Mushy stems + mold = root rot.
- Holes in leaves = slugs or snails (yes, they invade indoors too!).
Prevention is key:
- Inspect new plants under a magnifying glass before bringing them inside.
- Use neem oil or insecticidal soap for pests.
- Sterilize tools with rubbing alcohol to avoid spreading disease.
- Let soil dry slightly between waterings to deter fungus gnats.
Bottom line: Most stunted growth issues boil down to light, water, nutrients, or stress. Start with the basics—check your LED setup, soil moisture, and plant health—then tweak one variable at a time. With indoor growing, consistency is your best friend!
Quick Fixes for Common Growing Glitches
Indoor leafy greens thrive when you address issues fast—before they spiral. Below are practical, step-by-step solutions for the most frustrating problems, paired with prevention tips to keep your plants happy long-term. Think of this as your indoor garden first-aid kit!
---
Cause: Stretching for light or overcrowding.
Fix It: 🔥 Step 1: Adjust Light Distance Move your LED grow lights closer (4–6 inches from leaves) or raise them if plants are burning. Use a ruler to measure—consistency is key!
🍳 Step 2: Supplement with Natural Light (If Possible) Place trays near a bright window (south-facing is ideal) for 2–4 hours/day. Rotate pots weekly for even growth.
👨🍳 Step 3: Thin or Prune Snip the topmost leaves of leggy stems to encourage bushier growth. For severe cases, transplant the strongest seedlings into deeper pots.
💡 Prevention Tips: - Use a timer for LED lights (12–16 hours/day). - Choose compact varieties like ‘Baby Kale’ or ‘Microgreens’—they tolerate low light better. - Reflect light with white walls or foil-lined boxes to maximize coverage.
---
Cause: Overwatering, root rot, or nutrient deficiency.
Fix It: 🥘 Step 1: Check the Soil Stick your finger 1 inch deep—if it’s soggy, pause watering for 2–3 days. Use a pot with drainage holes and a tray underneath to catch excess.
🔪 Step 2: Diagnose the Issue - Yellow lower leaves? Likely overwatering or nitrogen deficiency. Flush soil with water to remove salts, then fertilize lightly with fish emulsion. - Crispy edges? Underwatering or low humidity. Mist leaves or place a humidifier nearby.
⏰ Step 3: Revive Stressed Plants - Root rot? Remove the plant, trim blackened roots, and repot in sterile, well-draining soil. - Nutrient burn? Switch to a balanced hydroponic nutrient (like General Hydroponics Flora Series) and dilute to half-strength.
🌡️ Prevention Tips: - Water only when the top inch of soil is dry (use your finger—no guesswork!). - Aerate soil with perlite or coco coir to prevent compaction. - Rotate pots weekly to ensure even light exposure (prevents one-sided stress).
---
Cause: High humidity, poor airflow, or contaminated soil.
Fix It: 💡 Step 1: Isolate & Inspect Quarantine affected plants immediately. Check undersides of leaves and soil surface for eggs/larvae.
🎯 Step 2: Natural Remedies - Aphids/Mites: Spray with neem oil solution (1 tsp neem oil + 1 tsp mild soap per quart of water). Repeat every 3–4 days. - Fungus Gnats: Let soil dry between waterings and top with sand or diatomaceous earth to deter larvae.
✨ Step 3: Deep Clean - Wipe leaves with a soapy cloth (1% mild soap solution). - Replace top 1–2 inches of soil if gnats persist. - Increase airflow with a small fan (set to low) to dry leaves faster.
🔥 Prevention Tips: - Sterilize tools with rubbing alcohol between uses. - Use beneficial insects like ladybugs or predatory mites for long-term control. - Avoid over-fertilizing—excess nitrogen attracts pests.
--- Cause: Insufficient light, poor soil, or temperature fluctuations.
Fix It: 🔥 Step 1: Optimize Light - Upgrade your LED setup: Ensure your grow light covers the entire plant canopy (no shadows!). For leafy greens, full-spectrum LEDs (4000–6000K) work best. - Extend light hours: Use a timer to provide 14–16 hours of light/day (greens need more than veggies).
🍳 Step 2: Boost Soil Health - Test your soil pH (ideal: 6.0–7.0 for most greens). Adjust with lime (to raise pH) or vinegar (to lower). - Add compost or worm castings for nutrients. Avoid synthetic fertilizers unless you’re experienced—they can burn tender greens.
👨🍳 Step 3: Control Temperature Keep your grow space between 60–75°F. Avoid drafts from AC vents or heaters, which stress plants.
💡 Prevention Tips: - Rotate plants weekly for even growth. - Harvest regularly—leafy greens grow faster when you pick outer leaves! - Use reflective surfaces (aluminum foil on walls) to maximize light efficiency.
--- If your greens are beyond saving, don’t toss them!
Try: - Propagate cuttings: Snip healthy stems and root them in water or moist soil. - Revive wilted leaves: Place stems in cool water overnight to rehydrate before replanting. - Start over with seeds: Use the soil from failed plants (sterilized) as a base for new seedlings.
Frequently asked questions
What are the fastest leafy greens to grow indoors?
For quick harvests, try microgreens (ready in 7–14 days) like radish, broccoli, or sunflower sprouts. Baby kale and arugula mature in 2–3 weeks, while butter lettuce and spinach take 4–6 weeks. Choose compact varieties like ‘Baby Bok Choy’ or ‘Lollo Rossa’ for space efficiency.
Can I grow leafy greens without grow lights?
Yes! Place your pots near a south-facing window where they get 6+ hours of direct sunlight daily. For north-facing windows, supplement with a bright LED desk lamp (5000K+ color temp) for 12–14 hours/day. Avoid east/west windows—they provide uneven light.
How often should I fertilize indoor leafy greens?
Use a balanced liquid fertilizer (5-5-5 or 10-10-10) every 2–4 weeks once seedlings sprout. For hydroponics, dilute nutrients to half-strength weekly. Over-fertilizing burns tender greens—always water first to avoid salt buildup. Organic options like fish emulsion work well too!
Why are my greens growing tall and skinny?
This is called etiolation—caused by insufficient light or too much distance from your LED. Move lights 4–6 inches closer or extend light hours to 14–16/day. Rotate pots weekly for even growth. Compact varieties like ‘Red Russian Kale’ handle low light better than romaine.
Do I need to repot my greens as they grow?
Only if roots circle the pot or grow out of drainage holes. Most leafy greens thrive in 6–8 inch pots with 2–3 inches of soil depth. Transplant when you see roots emerging from the bottom. Use well-draining potting mix (coco coir + perlite) and water lightly after repotting to reduce shock.