
Container Gardens
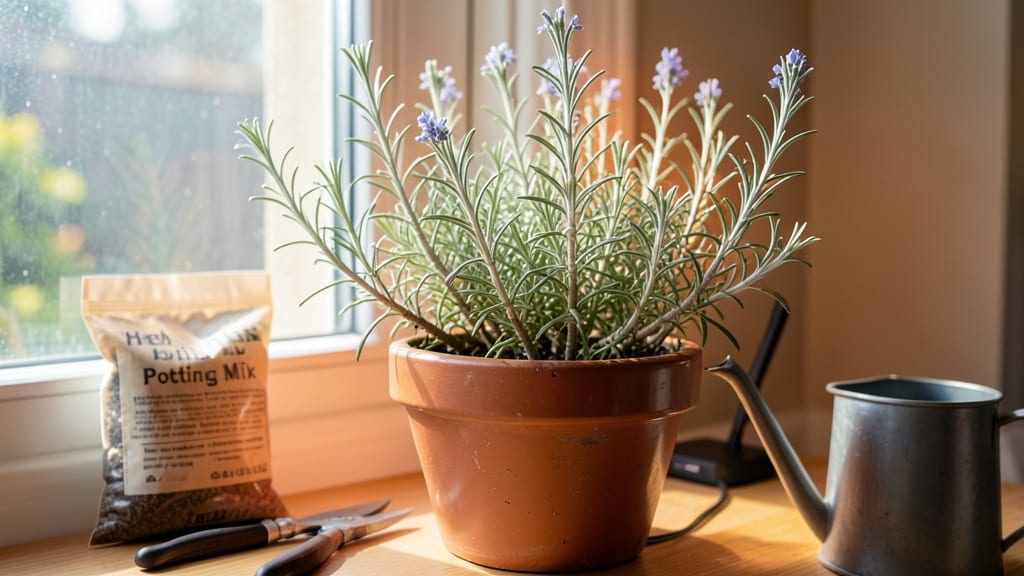
Bringing rosemary indoors for winter keeps its piney scent alive all year—no more buying wilted sprigs from the grocery store. 🌿 I learned the hard way that simply moving a plant inside without prep leads to sad, leggy stems.
The secret is in the pruning, light, and a few simple adjustments that turn winter rosemary into a thriving houseplant.
Start by trimming back one-third of the plant before bringing it inside—this encourages bushier growth and prevents shock. Choose a pot with drainage holes and well-draining soil, since rosemary hates soggy roots.
Place it near a south-facing window where it can soak up at least 6 hours of sunlight daily, or supplement with a grow light if natural light is scarce.
Water only when the top inch of soil feels dry, and avoid misting the leaves—rosemary prefers drier air. A light fertilizer every 6-8 weeks keeps it perky, but don’t overdo it. The reward? A fragrant, compact plant that smells like a Mediterranean vacation, even in January.
Come spring, harden it off gradually before moving back outside. If you notice yellowing leaves or pests, adjust your care—rosemary’s tough, but it sends signals when something’s off. With these tweaks, your rosemary will survive winter and thrive for years to come.
📚 In This Guide
- What you need
- Instructions
- Tips and common mistakes
- Wrapping up and next steps
What you need
- ● Healthy rosemary plant(s): Choose upright or prostrate varieties (e.g., 'Tuscan Blue' or 'Prostratus'). Ensure the plant is pest-free and free of disease.
- ● 6–10-inch terracotta or ceramic pot: Select a container with drainage holes (1–2 plants per 6-inch pot). Avoid plastic if humidity control is a concern.
- ● Well-draining potting mix: Use a cactus/succulent blend or mix 1 part potting soil with 1 part perlite or coarse sand.
- ● Pruning shears or sharp scissors: Sterilize with rubbing alcohol before use to prevent bacterial spread.
- ● Spray bottle (8–16 oz): For gentle misting—rosemary hates soggy roots but loves humidity!
- ● Grow lights or sunny windowsill: Aim for 6–8 hours of bright, indirect light daily (south-facing window or LED grow lights work best).
- ○ Humidity tray (optional but helpful): A shallow tray filled with pebbles and water placed under the pot adds moisture.
- ● Hydrogen peroxide (3%) or neem oil: For preventative pest control (e.g., spider mites or aphids).
- ● Moisture meter: Ensures soil stays in the dry-to-slightly-moist range (rosemary despises wet feet!).
- ● Decorative cache pot: A non-porous outer pot (e.g., ceramic) to hide the functional container and add style.
- ● Fertilizer (balanced, water-soluble): Dilute to half-strength and use every 4–6 weeks in winter.
- ● Air purifier or small fan: Improves air circulation to prevent fungal issues in dry indoor environments.
Step-by-step instructions for bringing rosemary indoors for winter
Here's how to rescue your rosemary before frost—keeping it lush and fragrant all winter long.
🌿 Step 1: Select the Healthiest Stems for Indoor Transition
Choose 3-4 inch long stems with woody bases—these are the strongest candidates for indoor survival. Avoid stems that look leggy or overly soft, as they won’t handle the shift well. I like to pick stems just below a leaf node where new growth can sprout easily. Use clean, sharp pruning shears to make a clean cut at a 45-degree angle—this prevents water from pooling and rotting the stem.
Strip the lower leaves from each stem, leaving only the top 2-3 inches of foliage. This reduces moisture loss and helps the plant focus energy on root development. Place the cuttings in a glass of room-temperature water, ensuring only the stripped portion is submerged. Change the water every 2-3 days to prevent bacterial growth.
⏰ Step 2: Encourage Root Growth Before Potting
Set the glass in a bright, indirect light spot—near an east-facing window works best. Rosemary roots best in warmth, so if your home runs cool, place the glass on a seedling heat mat or near a warm vent. You’ll see tiny roots forming in 1-2 weeks—this is your signal that the cuttings are ready for soil.
Don’t rush this step. Weak roots mean a weak plant. Watch for brown, mushy stems—this is a sign of rot, and you’ll need to trim the affected parts and restart with fresh cuttings. Healthy roots will look white and fuzzy, spreading outward from the stem.
🪴 Step 3: Plant in Well-Draining Soil and Choose the Right Pot
Use a small pot (4-6 inches wide) with drainage holes—rosemary hates soggy roots. Fill it with a mix of 50% potting soil and 50% perlite or coarse sand to ensure excellent drainage. Gently tap the pot to settle the soil, then make a hole deep enough to bury half the stem—this encourages stability and root growth.
Plant the rooted cutting, firming the soil around it lightly. Water sparingly—just enough to moisten the soil, not drench it. Place the pot in a south-facing window or under a grow light for 14-16 hours daily. Rosemary needs bright light to thrive indoors, or it’ll stretch and lose its fragrance.
☀️ Step 4: Adjust Care for Indoor Conditions
Water only when the top inch of soil feels dry—overwatering is the fastest way to kill indoor rosemary. I use a spray bottle for light misting to avoid soggy soil. Keep the pot in a spot with humidity (like a kitchen or bathroom) to prevent the leaves from drying out. If the air is too dry, group the pot with other plants to create a microclimate.
Rosemary loves cool nights—if your home stays above 70°F, place the pot on a cool windowsill or near an open window (but avoid drafts). Prune lightly every 4-6 weeks to encourage bushier growth. Use the same 45-degree cut technique, and you’ll have fresh sprigs for cooking all winter.
✂️ Step 5: Revive and Prune for Spring Readiness
As spring approaches, gradually acclimate your rosemary to outdoor conditions. Start by placing it outside for 1-2 hours daily, increasing exposure over 2 weeks. This prevents shock when you replant it in the garden. Before moving it back outside, give it a light pruning to remove any leggy growth—this encourages compact, bushy new shoots.
You’ll know it’s ready for the garden when it’s vigorously growing and the soil is warm. Plant it in full sun and water deeply to help it transition. With the right care, your indoor rosemary will thrive outdoors again, stronger than ever.
Tips & tricks for bringing rosemary indoors for winter
Here's what nobody tells you about keeping rosemary thriving indoors—these tricks make all the difference.
Stem Selection Matters: The 3-4 inch stems with woody bases are your best bet for survival. I've learned this the hard way—soft, leggy stems often rot during the transition. Look for stems just below a leaf node where new growth naturally emerges. If you're unsure, tap the stem: it should feel firm, not hollow. This simple test saves you from wasted effort later.
Root Growth Timing: Those 1-2 weeks of root development might feel slow, but patience pays off. I've seen cuttings with fuzzy white roots after just 10 days in warm conditions, while others took nearly 3 weeks in cooler spaces. Check your cuttings daily after day 7—you'll spot tiny root hairs forming at the water line. This is your green light to move to soil.
Light is Non-Negotiable: The 14-16 hours of daily light rosemary needs indoors is crucial—skimp here and you'll get stretchy, weak plants. If your south-facing window isn't enough, supplement with a grow light. I've used simple LED shop lights on a timer for great results. Watch for leaves turning pale or stems elongating—these are clear signs your plant needs more light.
Winter Care Adjustments: The 70°F threshold for nighttime temperatures is important. If your home stays warmer, create cooler conditions by placing the pot on a ceramic tile or near an open window (but avoid drafts). I've found that grouping rosemary with other plants creates a more stable microclimate. The extra humidity helps prevent those crispy leaf edges that signal dry air.
Pro Tips for Bringing Rosemary Indoors For Winter
- Here's what nobody tells you about keeping rosemary thriving indoors—these tricks make all the difference.
- Stem Selection Matters: The 3-4 inch stems with woody bases are your best bet for survival. I've learned this the har...
- Root Growth Timing: Those 1-2 weeks of root development might feel slow, but patience pays off. I've seen cuttings wi...
Frequently asked questions
about bringing rosemary indoors for winter—because even the best gardeners need a little extra guidance!When is the best time to bring rosemary indoors before winter?
Move rosemary indoors before the first frost (typically late fall, around October-November in most climates). Wait until nighttime temperatures dip below 40°F (4°C), but don’t delay too long—rosemary struggles in prolonged cold. A few weeks before winter is ideal to give it time to adjust!
Can I bring rosemary indoors too early?
Yes, but it may go dormant or drop leaves if exposed to too much heat or light too soon. If you bring it in early, place it in a cool, bright spot (like a garage or unheated sunroom) until winter. Once indoors, transition it gradually to warmer conditions to avoid shock.
What’s the best indoor light setup for rosemary?
Rosemary thrives near a south-facing window with 6+ hours of sunlight daily. If natural light is lacking, supplement with a grow light (12–14 hours/day). Avoid dim corners—leggy growth or leaf drop are signs it’s not getting enough light. A sunny windowsill is your best bet!
Why is my indoor rosemary dropping leaves?
Leaf drop usually means overwatering, low light, or temperature stress. Let the soil dry out between waterings (stick your finger in—top inch should be dry). Ensure it’s in a well-lit spot and avoid drafts or sudden heat changes (like near a heater). Prune dead leaves to encourage new growth!
Can I keep rosemary indoors year-round, or should I move it back outside?
You can keep rosemary indoors year-round, but it may grow slower and become leggy. For best results, move it back outside in spring (after last frost) to rejuvenate. If you must keep it indoors long-term, prune regularly, rotate for even light, and fertilize lightly in spring.
What’s a good alternative if I don’t have a sunny window?
If your space lacks sunlight, try a grow light (LED or fluorescent) or consider a low-light-tolerant herb like thyme or mint instead. Rosemary is high-maintenance indoors without light—if you’re committed, a sunny windowsill or grow tent is worth the investment!
Wrapping up and next steps
Bringing rosemary indoors for winter is a rewarding way to enjoy its fragrant beauty year-round—without losing its charm or health! With the right pruning techniques and care, your rosemary can thrive as a lush, aromatic houseplant.
Now that you’re equipped with the secrets, it’s time to roll up your sleeves and give it a try!
Ready to transform your space? Start by selecting a sunny spot, trimming your plant, and monitoring its needs. Before you know it, your kitchen or windowsill will smell like a Mediterranean retreat! 🌿✨