
Container Gardens
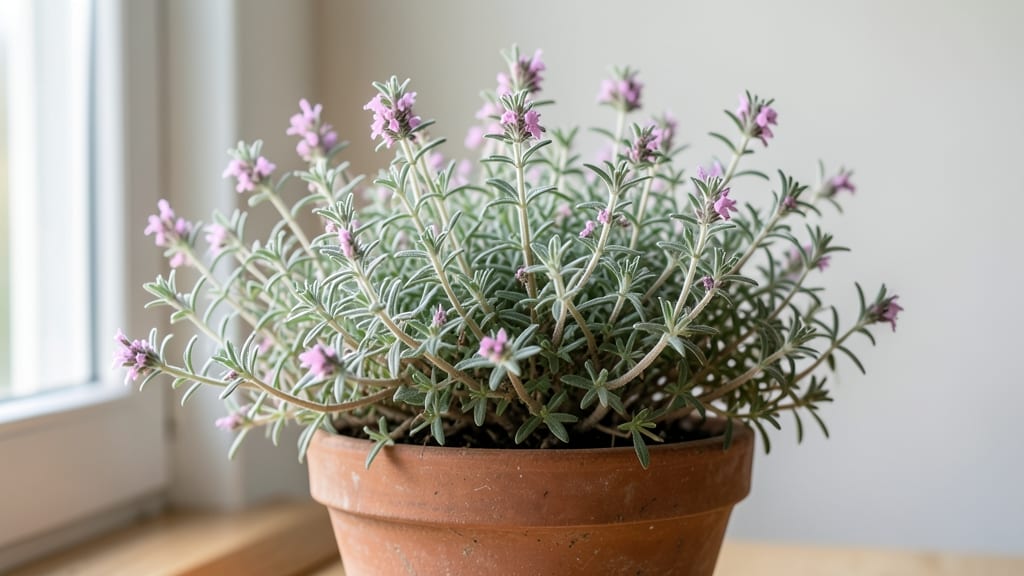
Growing an indoor thyme plant transforms any windowsill into a fragrant herb garden that works harder than store-bought bundles. 🌿 The secret lies in mimicking its Mediterranean roots—bright light, well-draining soil, and occasional pruning to keep it bushy.
I've kept my thyme thriving for three winters straight, and the smell alone makes it worth the effort. Most people overwater this drought-tolerant herb, but thyme prefers dry conditions. Let the top inch of soil dry out between waterings, and you'll avoid the root rot that kills so many houseplants.
A sunny south-facing window or basic grow light keeps it happy year-round, with minimal fuss. By midsummer, you'll have a lush, aromatic plant that doubles as a kitchen staple and a decorative centerpiece.
The tiny gray-green leaves stay fragrant even when dry, making it perfect for potpourri or dried herb bundles. Prune after harvest to encourage bushier growth—my plant now produces twice the leaves it did when I first started. Works in any sunny spot, from kitchens to bathrooms.
Here's how to keep yours thriving without the guesswork.
📚 In This Guide
- What you need
- Instructions
- Tips and common mistakes
- Wrapping up and next steps
What you need
- ● Thyme plant: 1 healthy nursery-grown plant (preferably Thymus vulgaris or Thymus citriodorus for lemon thyme). Look for compact varieties ideal for containers.
- ● Container: 1 pot with drainage holes (4–6 inches in diameter). Terracotta or ceramic works best for airflow.
- ● Potting mix: 1 bag (5–10 quarts) of well-draining cactus or herb mix. Avoid heavy garden soil—thyme hates soggy roots!
- ● Drainage material: Small pebbles or perlite (1 cup) to place at the bottom of the pot.
- ● Watering can: 1 with a narrow spout for precise hydration.
- ● Pruning shears: 1 pair of clean, sharp shears (sterilize with rubbing alcohol).
- ● Slow-release fertilizer: 1 packet of balanced 10-10-10 or organic herb fertilizer (follow package instructions).
- ● Humidity tray: 1 shallow tray + pebbles (if your home is dry).
- ● Grow lights: 1 LED bulb (6–8 inches above the plant) for low-light spots.
- ● Decorative stones or moss: For a cute, finished look around the pot.
Step-by-step instructions for growing thyme indoors
Here's how to cultivate a thriving, aromatic thyme plant that fits perfectly on your windowsill.
🪴 Step 1: Choose the Right Container and Soil Mix
Thyme thrives in containers with excellent drainage, so select a pot with drainage holes that's at least 6 inches deep and 4-5 inches wide—this size accommodates the 4 plants we're growing. I recommend terracotta because it breathes and prevents root rot, but any ceramic or plastic pot will work as long as it drains well.
Fill the pot with a well-draining potting mix—avoid garden soil, which compacts and suffocates roots. I blend 2 parts potting soil with 1 part perlite or coarse sand to create air pockets. Moisten the mix lightly before planting; it should feel like a damp sponge, not dripping water. Press it gently into the pot to eliminate air gaps but avoid compacting it.
🌱 Step 2: Plant Thyme Cuttings or Young Plants
If using 4-inch nursery starts, dig a hole in the center of the pot deep enough to accommodate the root ball without bending stems. Gently remove the plant from its container, loosen the roots if they're circling, and place it in the hole. Fill around the roots with soil, pressing lightly to secure the plant without compacting.
For cuttings, dip 4-inch stems (taken from a healthy thyme plant) in rooting hormone, then insert them 1 inch deep into the soil, spacing them evenly around the pot's edge. Water lightly to settle the soil, but don’t soak—thyme roots need air, not waterlogged conditions. Place a small pebble over each cutting to weigh it down and ensure good contact with the soil.
☀️ Step 3: Position for Light and Temperature
Thyme craves bright, indirect light—place your pot within 3-6 inches of a south- or west-facing window where it receives 6-8 hours of sunlight daily. If natural light is insufficient, supplement with a grow light positioned 4-6 inches above the plant for 12-14 hours per day. You’ll know the light is right when the leaves stay deep green and compact, not stretching or turning pale.
Keep the pot in a spot with temperatures between 65-80°F—thyme tolerates fluctuations but avoids drafts, so avoid placing it near air vents or open windows. In winter, if your home runs cooler, move the pot to a warmer room or use a small heat mat underneath to maintain soil warmth.
💧 Step 4: Water and Maintain Proper Humidity
Water thyme only when the top inch of soil feels dry to the touch—this usually means every 5-7 days, but adjust based on your home’s humidity. Stick your finger in the soil; if it’s damp below the surface, wait another day. Overwatering is the fastest way to kill thyme, so err on the side of dryness. When you do water, pour slowly until it drains from the bottom, then empty the saucer to prevent soggy roots.
Thyme prefers moderate humidity, but it’s adaptable. If your home is very dry, mist the leaves lightly once a week or place the pot on a tray of pebbles filled with water (ensure the pot isn’t sitting in water). You’ll notice healthy growth when the plant stays upright with fragrant, silvery-green leaves—if it wilts or drops leaves, it’s a sign of overwatering or low light.
✂️ Step 5: Prune and Harvest for Long-Term Growth
Prune thyme after it establishes for 4-6 weeks by cutting back one-third of the longest stems to encourage bushiness. Use clean, sharp scissors and cut just above a leaf node—this is where new growth will sprout. Regular pruning keeps thyme compact and prevents it from becoming leggy. You’ll see fresh, vibrant growth within 2-3 weeks of pruning.
Harvest thyme by snipping small sprigs from the outer edges of the plant, leaving the center to keep growing. Use fresh sprigs in cooking or dry them by bundling stems and hanging upside down in a warm, dry place for 1-2 weeks. If your plant outgrows its pot (after 12-18 months), transplant it to a 1-gallon container with fresh potting mix to give it room to thrive.
Tips & tricks for perfect indoor thyme growth
Took me a while to figure these out, so here goes—your windowsill herb garden starts with these key moves.
Container Selection: While the instructions specify a 6-inch deep pot, I've found that adding a few extra drainage holes (if your pot doesn't have them) makes all the difference. Thyme roots hate sitting in water, so create a "false bottom" with small pebbles or broken terracotta pieces before adding soil. This prevents clogged drainage holes from becoming a death sentence for your plants.
Light Optimization: The 6-8 hours of sunlight requirement is non-negotiable, but here's what I learned about maximizing it: Rotate your pot every 2-3 weeks so all sides get even exposure. If you notice your thyme stretching toward the light (a sign of etiolation), you're not getting enough. In winter, supplement with a simple LED grow light on a timer—just 4-6 inches above the plant for those critical 12-14 hours will keep it thriving.
Humidity Hack: Thyme's moderate humidity needs can be tricky in dry climates. I've had the most success with a pebble tray method: Place the pot on a tray filled with pebbles and water (just enough so the pebbles stay wet, not the pot). The evaporation creates perfect humidity without overwatering. This works especially well in winter when indoor air gets dry from heating systems.
Pruning Precision: When you're ready to prune after that 4-6 week establishment period, here's the trick: Always cut at a 45-degree angle just above a leaf node. This creates a larger surface area for new growth to sprout from. I like to do this pruning right after watering—it gives me a clear view of where those nodes are while the stems are plump and easy to see.
Pro Tips for Thyme Indoor Plant
- Took me a while to figure these out, so here goes—your windowsill herb garden starts with these key moves.
- Container Selection: While the instructions specify a 6-inch deep pot, I've found that adding a few extra drainage ho...
- Light Optimization: The 6-8 hours of sunlight requirement is non-negotiable, but here's what I learned about maximizi...
Frequently asked questions
Got questions about growing thyme indoors? You’re not alone! Here are some of the most common concerns—and their easy fixes—to help your fragrant herb thrive.
How much light does an indoor thyme plant need?
Thyme loves bright, indirect sunlight (6+ hours daily). Place it near a south- or west-facing window, or use a grow light if natural light is limited. Yellowing leaves? It’s begging for more light!
How often should I water my indoor thyme?
Water thyme only when the top inch of soil feels dry—usually every 1–2 weeks. Overwatering is the #1 killer! Use well-draining soil and a pot with drainage holes to prevent soggy roots.
Why is my thyme turning brown or crispy?
Brown edges? It’s often a sign of underwatering or low humidity. Mist the leaves lightly or place the pot on a tray with pebbles and water. Too much sun can also scorch thyme—rotate the pot occasionally for even growth.
Can I grow thyme from store-bought stems?
Snip healthy stems (4–6 inches), strip the lower leaves, and place them in water or moist soil. Keep them in bright, indirect light until roots form (2–4 weeks). Pro tip: Use rooting hormone for faster success!
When is my indoor thyme ready to harvest?
Harvest thyme anytime after 3–4 months by snipping sprigs just above a leaf node. Avoid taking more than ⅓ of the plant at once. For best flavor, harvest in the morning and use fresh or dry in small batches.
Wrapping up and next steps
Growing thyme indoors isn’t just about adding greenery—it’s about bringing fragrant, versatile flavor into your home with minimal effort!
Whether you’re a beginner or a seasoned plant parent, this hardy herb thrives in small spaces, offering fresh leaves for cooking, healing properties, and a soothing aroma. Your kitchen (and taste buds) will thank you!
Ready to harvest your first batch? Start by potting your thyme today—then, share your progress or favorite recipes with fellow plant lovers. Happy growing! 🌿✨