
Container Gardens
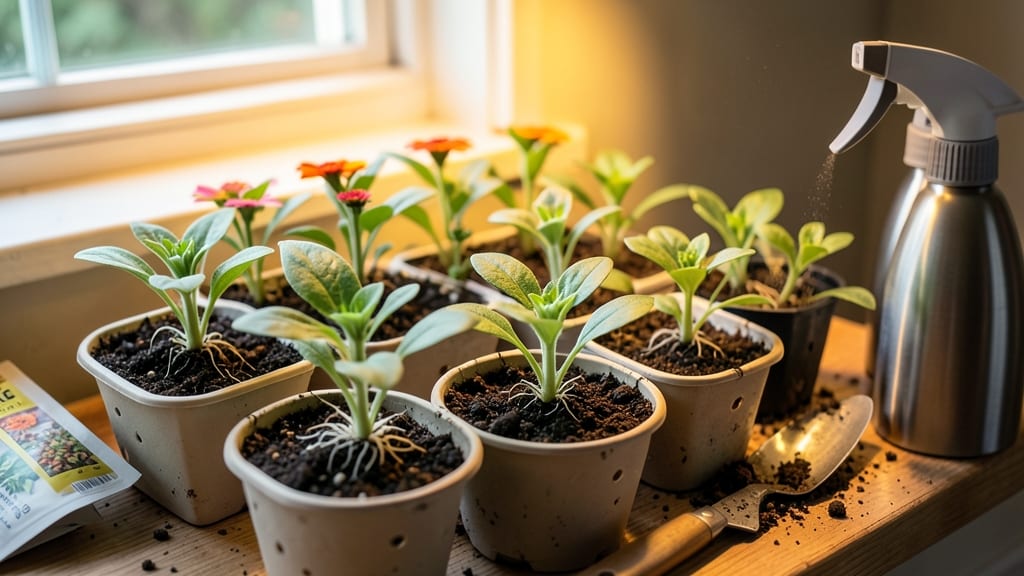
Planting zinnias indoors lets you enjoy bold summer color even when your windowsill gets more shade than sun. 🌿 I’ve grown zinnias in my dim apartment for years, and the secret isn’t fancy grow lights—it’s choosing the right varieties and giving them the care they actually need.
Most people assume zinnias need full sun, but with a few tweaks, you’ll get those cheerful blooms indoors too.
The key starts with compact varieties like ‘Thumbelina’ or ‘Crystal’—they stay small enough for containers and tolerate lower light better than their tall cousins.
You’ll need a 6-inch pot with drainage, a mix of potting soil and perlite (for airflow), and a grow light just 6–8 inches above the plants for 12–14 hours a day. Water when the top inch of soil feels dry, and pinch back the first blooms to encourage bushier growth.
By mid-summer, your zinnias will burst into vibrant reds, oranges, and yellows, and the fragrance will fill your space like a mini garden party. The best part? These plants keep blooming for months if you deadhead spent flowers and keep the soil consistently moist.
Even my blackest thumb can’t kill these—once you get the light and watering right, they’re nearly foolproof.
Works for any indoor space—sunrooms, offices, or even a bright bathroom—just adjust the light distance based on how strong your bulb is. Here’s how to set it up without the guesswork.
📚 In This Guide
- What you need
- Instructions
- Tips and common mistakes
- Wrapping up and next steps
What you need
- ● Zinnia seeds: Choose a compact variety like Zinnia elegans (e.g., 'Thumbelina' or 'Crystal'). Aim for 3–5 seeds per container (or 1–2 per cell if using seed trays).
- ● Containers: 2–4" pots for single plants (minimum 1-gallon capacity for mature growth).
- ● Seed trays or 6-pack cell packs for starting multiple seeds.
- ○ Optional: Self-watering pots or grow bags for convenience.
- ● Potting mix: Lightweight, well-draining mix (e.g., 50% peat/coir + 50% perlite/vermiculite). Avoid garden soil—it compacts too easily!
- ● Grow lights: Full-spectrum LED (e.g., 12–16" height, 12–14 hours/day). Budget pick: 20W clip-on lights (~$15–$25).
- ● Humidity dome or plastic wrap: To retain moisture while seeds germinate.
- ● Fertilizer: Balanced liquid fertilizer (e.g., 5-5-5 or 10-10-10) for young seedlings. Dilute to ½ strength.
- ● Grow light timer: Automates light cycles (saves time!).
- ● Spray bottle: For gentle watering (avoids disturbing soil).
- ● Support stakes: 6–12" bamboo or floral picks for taller varieties (e.g., 'Benary’s Giant').
- ● Thermometer/hygrometer: Monitors temperature (ideal: 65–75°F) and humidity (50–70%).
Step-by-step instructions for planting zinnias indoors
Here’s how to grow vibrant zinnias indoors—no sunlight struggles, just cheerful blooms.
🌱 Step 1: Choose the Right Containers and Soil
Zinnias need room to grow, so pick 4-inch-wide pots (one per plant) with drainage holes—zinnias hate soggy roots. I use terra cotta because it wicks away excess moisture better than plastic. Fill each pot with well-draining potting mix (never garden soil—it compacts too much). Press the soil down lightly so it’s firm but still loose enough for roots to spread.
Leave about ½ inch of space between the soil and pot rim. This prevents water from spilling over when you water, and it gives you room to add more soil later if needed. Tap the pot gently on the table to settle the soil without compacting it. You’ll see the surface should look even but not packed down like dirt in a garden.
🌱 Step 2: Plant Seeds at the Correct Depth
Zinnia seeds are tiny but easy to handle. Plant 1-2 seeds per pot at a depth of ¼ inch—any deeper, and they’ll struggle to push through. Use your finger or a small stick to make a tiny hole, drop the seeds in, and cover lightly with a sprinkle of soil. Don’t press down hard; just pat it gently so the seeds stay in place.
Water the soil until it’s moist but not soaked, then place the pots in a warm spot (around 70-75°F). A seedling heat mat speeds up germination, but a sunny windowsill works too. Keep the soil consistently moist—not dripping wet—until you see the first green sprouts, which usually takes 7-10 days. If the soil dries out completely before germination, the seeds may not sprout at all.
☀️ Step 3: Provide Bright Light for Strong Growth
Once your zinnias sprout, move them to the brightest spot in your home—south-facing windows are ideal. If natural light is weak, supplement with a grow light (LED or fluorescent) placed 4-6 inches above the plants. Zinnias need 12-14 hours of light daily to stay compact and sturdy. Without enough light, they’ll stretch tall and leggy, with weak stems that can’t support blooms.
Rotate the pots a quarter turn every few days so the plants grow straight instead of leaning toward the light. You’ll notice the leaves will darken and the stems will thicken as they get stronger. If you see the leaves turning pale or the plants stretching toward the light, it’s time to move them closer to the light source or increase the grow light’s intensity.
💧 Step 4: Water and Fertilize for Blooms
Water zinnias when the top inch of soil feels dry—stick your finger in the soil to check. Overwatering is the biggest mistake; zinnias are drought-tolerant once established, so it’s better to underwater slightly than drown them. Water at the base of the plant (not the leaves) to avoid fungal diseases like powdery mildew, which loves damp foliage.
Start fertilizing with a balanced liquid fertilizer (like 10-10-10) when the plants have 3-4 true leaves, about 3-4 weeks after planting. Dilute it to half-strength and apply every 2 weeks. You’ll see the difference in bigger, brighter blooms and stronger stems. Pinch off the first set of flowers to encourage bushier growth—this might seem counterintuitive, but it leads to more blooms later.
✂️ Step 5: Deadhead and Maintain for Continuous Blooms
Deadheading—removing spent blooms—is the secret to nonstop zinnias. As soon as a flower fades, snip it off just above the next set of leaves with clean scissors. This redirects the plant’s energy into producing new blooms instead of seeds. Do this every 2-3 days during peak blooming season, and your zinnias will keep flowering for weeks.
Watch for pests like aphids or spider mites, especially if the air is dry. Wipe leaves with a damp cloth if you spot them, or spray with neem oil for a natural remedy. With the right care, your zinnias will reward you with bold, cheerful blooms all season long—even indoors!
Tips & tricks for growing zinnias indoors
A few smart moves will help your zinnias thrive indoors like they're basking in summer sunshine.
Container and Soil Selection: Terra cotta pots are my go-to because they breathe better than plastic, preventing soggy roots that zinnias despise. If you don't have terra cotta, look for any pot with drainage holes—even repurposed containers with holes drilled in the bottom work. For soil, mix your well-draining potting mix with 20% perlite or vermiculite to improve aeration. This prevents that compacted garden soil feeling that stunts root growth.
The Light Factor: Those 12-14 hours of light are non-negotiable for compact growth. I've seen zinnias stretch like overgrown weeds when they don't get enough light—it's heartbreaking! If you're using a grow light, position it 4-6 inches above the plants and adjust based on leaf color. Pale leaves mean they need more light; dark green leaves with slight red tinges mean you're golden. Pro tip: Use a timer for your grow light to maintain consistent light cycles, especially if your natural light varies.
Germination Game-Changer: The 70-75°F warm spot is crucial for germination, but consistency matters more than exact temperature. I've had great success using a simple seedling heat mat under the pots, but even a warm spot on top of your fridge works in a pinch. The key is keeping that soil moist but not soaked during germination—think of it like a damp sponge, not a swamp. Once those first green sprouts appear, you can reduce watering slightly but keep the soil consistently moist.
Deadheading Strategy: That 2-3 day deadheading schedule is your secret weapon for continuous blooms. I keep a small pair of clean scissors dedicated just to this task on my windowsill. When you remove spent blooms, you're essentially telling the plant, "Hey, make more flowers instead of seeds!" This redirect of energy is what keeps your zinnias producing vibrant blooms for weeks. Just be sure to snip above a set of leaves—never at a joint where branches meet.
Pro Tips for Planting Zinnias Indoors
- A few smart moves will help your zinnias thrive indoors like they're basking in summer sunshine.
- Container and Soil Selection: Terra cotta pots are my go-to because they breathe better than plastic, preventing soggy roots that zinnias despise.
- The Light Factor: Those 12-14 hours of light are non-negotiable for compact growth.
Frequently asked questions
Got questions about growing zinnias indoors?
You’re not alone! Here are answers to the most common inquiries—from sunlight substitutes to troubleshooting wilting blooms.
Can zinnias grow indoors without direct sunlight?
Yes! While zinnias thrive in sunlight, they can adapt indoors with bright, artificial light (like grow lights 12–16 hours/day). Place them near a south-facing window if possible, but supplement with LED grow bulbs for consistent blooms. Avoid dim corners—they’ll stretch and flop!
How long does it take for zinnias to bloom indoors?
Indoor zinnias typically bloom in 6–10 weeks from seed, depending on variety and light conditions. Dwarf zinnias (like ‘Thumbelina’) may flower faster (4–6 weeks), while taller types need more patience. Pro tip: Pinch back leggy stems to encourage bushier growth and more blooms!
Why are my indoor zinnias wilting or dropping buds?
Wilting or bud drop usually signals overwatering, underwatering, or stress. Let the top inch of soil dry between waterings, and ensure pots have drainage holes. Check for:
- Yellow leaves = overwatering
- Crispy edges = underwatering
- Dropping buds = temperature swings (keep them 65–75°F)
What’s the best indoor alternative if zinnias don’t thrive?
If zinnias struggle with your setup, try these low-light-friendly bloomers:
- African violets (thrive in indirect light, bloom year-round)
- Peperomia (drought-tolerant, colorful foliage)
- Wax begonia (loves humidity, great for bathrooms)
Or revisit zinnias with self-blanching grow lights—they’re surprisingly forgiving!
When is the best time to start zinnias indoors?
Sow seeds 6–8 weeks before your last frost date (or anytime indoors!). For year-round blooms, stagger plantings every 2–3 weeks. Fun fact: Zinnias are annuals, so treat them like a seasonal project—no long-term commitment needed!
Wrapping up and next steps
Growing zinnias indoors is a rewarding way to bring vibrant color to your space—even without direct sunlight! With the right containers, lighting, and care, you’ll enjoy cheerful blooms year-round. Remember, consistency in watering, pruning, and light exposure is key to thriving plants.
Ready to dive in? Start by gathering your supplies and follow the steps above—your indoor garden will thank you! Next, experiment with different varieties or try pairing zinnias with other low-light-loving plants for a stunning container display. Happy planting! 🌱✨