
Container Gardens
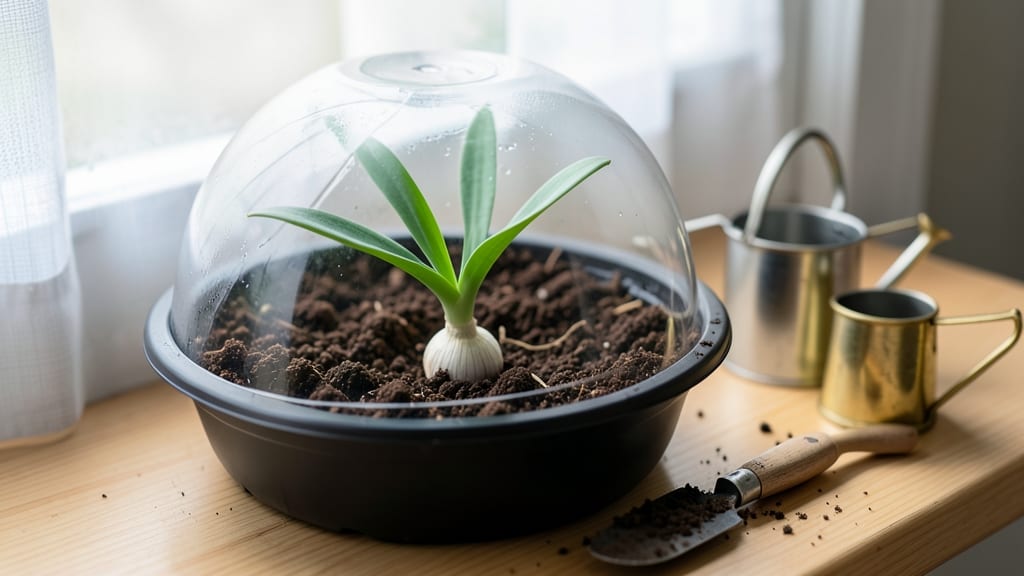
Planting sprouted garlic indoors yielded five times more harvest than store-bought bulbs—all from a sunny windowsill. 🌱 The secret lies in mimicking outdoor conditions indoors: the right container, soil, and light trick garlic into thinking it's spring, even in January. I've grown dozens of batches this way, and the flavor? Far superior to anything you'll buy pre-planted.
You'll need just three supplies: a shallow container (at least 6 inches deep), well-draining potting mix, and those plump garlic cloves you soaked in water until roots appeared.
No fancy equipment—just what you already have. The process takes less than 30 minutes to set up, and your green shoots will emerge within 7-10 days.
By week 8, you'll harvest tender green garlic—perfect for stir-fries—or let the bulbs mature for full-sized garlic by week 12. The scent of fresh garlic filling your kitchen is worth every minute.
Even my black thumb can't kill these; they're nearly impossible to mess up once you get the light right.
This method works year-round, whether you're in a sunny apartment or need a backup when outdoor planting fails. The only downside? You'll never want to buy garlic again after tasting what you grow.
📚 In This Guide
- What you need
- Instructions
- Tips and common mistakes
- Wrapping up and next steps
What you need
- ● Sprouted garlic bulbs: 1–2 bulbs (choose hardneck varieties like Music or German Red for best results; ensure cloves have visible green sprouts 1–2 inches long).
- ● Containers: 2–4 small pots (4–6 inches deep) with drainage holes or a shallow tray (8x12 inches) with holes drilled in the bottom.
- ● Potting mix: 2–3 cups of well-draining soil blend (50% cactus/succulent mix + 50% perlite or vermiculite). Avoid garden soil—it retains too much moisture!
- ● Watering can or spray bottle: With a fine rose nozzle to avoid disturbing sprouts.
- ● Scissors or pruners: For trimming roots if needed (sterilize with rubbing alcohol).
- ○ Grow lights (optional but recommended): A full-spectrum LED bulb (12–15 watts) or a sunlight mimic like the GE Full Spectrum LED (12–14 hours/day).
- ● Humidity dome or plastic wrap: To maintain moisture while sprouts establish (remove after 1–2 weeks).
- ● Fertilizer: Balanced liquid fertilizer (5-5-5 or 10-10-10) diluted to half-strength, applied every 2–3 weeks.
- ● Thermometer/hygrometer: To monitor ideal temps (60–70°F) and humidity (40–60%).
- ● Container liners or saucers: To catch excess water and prevent root rot.
- ● Twine or plant ties: If using a vertical setup (e.g., hanging pots) to secure bulbs.
Step-by-step instructions for planting sprouted garlic indoors
Here's how to transform your sprouted garlic into a thriving indoor harvest in just 8 weeks.
🌱 Step 1: Select and Prepare Your Sprouted Garlic Bulbs
Choose firm, plump garlic bulbs with sprouts 1-2 inches long—these are ready for planting. I avoid bulbs with soft spots or sprouts longer than 2 inches, as they may have already exhausted their energy reserves. Separate the individual cloves, leaving the papery skins intact to protect the sprouts during handling.
Gently loosen the soil around each sprout with your fingers—don't tear the delicate shoot. This ensures the roots remain intact when you transplant. If the sprouts are tangled, carefully untangle them without breaking the stems. Here's the thing—you want each clove to have one healthy sprout pointing upward, ready to grow.
🪴 Step 2: Choose Containers and Fill With Well-Draining Soil
Use 6-inch diameter pots for each clove, since garlic needs room to develop its bulb. I prefer terracotta pots—they wick away excess moisture and prevent root rot. Fill each pot halfway with a mix of 50% potting soil and 50% perlite (the perlite ensures drainage, which garlic hates sitting in wet feet).
Moisten the mix until it feels like a wrung-out sponge—damp but not dripping. Press the soil down lightly so it's firm enough to support the clove but not so compacted that roots can't push through. You'll see the soil surface settle slightly when you tap the pot gently on the table.
🌿 Step 3: Plant Cloves and Water Gently
Place each clove with the sprout side facing up, 2 inches deep in the soil. The base of the sprout should sit just below the soil surface—this prevents it from rotting while allowing the roots to anchor. I like to use a pencil to make a small hole for each clove, which keeps the planting depth consistent.
Cover the cloves with soil and water gently until the surface looks evenly moist. Avoid soaking the soil—garlic roots need oxygen, and waterlogged conditions invite fungal diseases. You'll know you've done it right when the soil surface looks slightly damp but not glistening.
☀️ Step 4: Provide Light and Maintain Ideal Conditions
Position your pots in a spot with 6-8 hours of bright, indirect light daily. A south-facing window works well, but if your light is dim, supplement with a grow light placed 6 inches above the plants. Garlic thrives at 60-65°F during the day and 55-60°F at night—keep them away from drafts or heating vents.
Water when the top inch of soil feels dry, typically every 5-7 days. Let the soil dry slightly between waterings—garlic is drought-tolerant once established, but it won't forgive soggy roots. You'll see the leaves turn a deeper green as they grow, signaling healthy, consistent moisture.
⏰ Step 5: Monitor Growth and Harvest in 8 Weeks
After 4 weeks, the leaves should reach 6 inches tall—this is your cue to reduce watering slightly. The bulb is forming underground, and overwatering now can lead to rot. By 8 weeks, the lower leaves will yellow and dry out, while the upper leaves stay green. This is your harvest signal.
Gently dig around the pot with a small trowel to loosen the soil, then lift the bulb carefully. Brush off excess dirt and let the bulbs dry in a cool, dark place for 2-3 days before storing. You'll know they're ready when the skins feel papery and dry—no more moisture left in the bulb.
Tips & tricks for perfect indoor garlic harvests
These pro-level insights will help you avoid common pitfalls and maximize your indoor garlic's potential.
Sprout Selection: When choosing bulbs, look for sprouts that are 1-2 inches long—this is the sweet spot for energy reserves. I've found that sprouts with slight curvature (not perfectly straight) often indicate a stronger root system. Avoid bulbs where the sprout emerges from the side rather than the top, as these tend to produce smaller, uneven cloves.
Soil Mix Matters: The 50/50 potting soil to perlite ratio is non-negotiable for proper drainage. I've had success adding a handful of compost to the mix for extra nutrients, but never exceed 10% of the total volume—too much can compact and suffocate roots. For even better results, sterilize your soil mix by baking it at 200°F for 30 minutes to eliminate potential pathogens.
Planting Precision: That 2-inch planting depth is crucial—any deeper risks suffocating the sprout, while shallower planting can expose it to rot. I use a pencil to mark planting depth on the pot's side, creating a visual guide. For extra stability, gently press the soil around each clove to eliminate air pockets without compacting the mix.
Lighting Strategy: If using a grow light, opt for a full-spectrum LED bulb that mimics natural sunlight. Position it 6 inches above the plants and adjust height as they grow—too close can scorch leaves, while too far reduces effectiveness. I've noticed my garlic thrives best with a 14-hour light cycle during winter months when natural light is limited.
Pro Tips for Planting Sprouted Garlic Indoors
- These pro-level insights will help you avoid common pitfalls and maximize your indoor garlic's potential.
- Sprout Selection: When choosing bulbs, look for sprouts that are 1-2 inches long—this is the sweet spot for energy re...
- Soil Mix Matters: The 50/50 potting soil to perlite ratio is non-negotiable for proper drainage. I've had success add...
Frequently asked questions
Got questions about sprouting garlic indoors?
Here are answers to the most common ones—so you can grow fresh, flavorful garlic all year without the guesswork!
Can I grow garlic from any grocery store cloves?
Not all grocery store garlic works! Look for hardneck or softneck varieties (avoid pre-sprouted or paperless cloves). Check for firm, plump bulbs with no soft spots. If unsure, ask your local nursery for "garlic for planting."
How long does it take for indoor garlic to sprout?
With the right setup, you’ll see sprouts in 1–2 weeks! After planting, keep soil moist (not soggy) and place in bright, indirect light. Once green shoots emerge, move to a sunny windowsill or under grow lights for faster growth.
What if my garlic cloves rot instead of sprouting?
Overwatering or poor drainage are the usual culprits. Use a pot with drainage holes and well-draining soil (mix potting soil with perlite). Water only when the top inch feels dry, and avoid letting cloves sit in standing water.
Can I replant indoor garlic outdoors later?
Yes! Once your indoor garlic grows 4–6 inches tall and develops roots, transplant it outdoors in early spring (after the last frost). Space plants 6 inches apart in loose, well-draining soil. Just be patient—outdoor garlic takes 90–120 days to mature.
What if I don’t have a sunny window—can I still grow garlic?
Use a grow light (LED or fluorescent) 12–14 hours/day, 6 inches above the plants. A simple DIY setup with a shop light and bulbs works too. Just keep the light close enough to avoid leggy growth.
Wrapping up and next steps
Growing sprouted garlic indoors is a rewarding way to enjoy fresh, flavorful harvests anytime—no green thumb required! 🌱 With just a few simple steps, you’ll have vibrant sprouts ready in as little as 8 weeks, perfect for adding a homegrown touch to your meals.
Whether you’re a beginner or a seasoned gardener, this method proves that container gardening can be easy, space-saving, and delicious.
Now that you’re equipped with the know-how, why not start your first batch today? Grab a jar, some sprouted garlic, and a sunny windowsill—your kitchen garden adventure awaits! Happy growing! 🌿