
Container Gardens
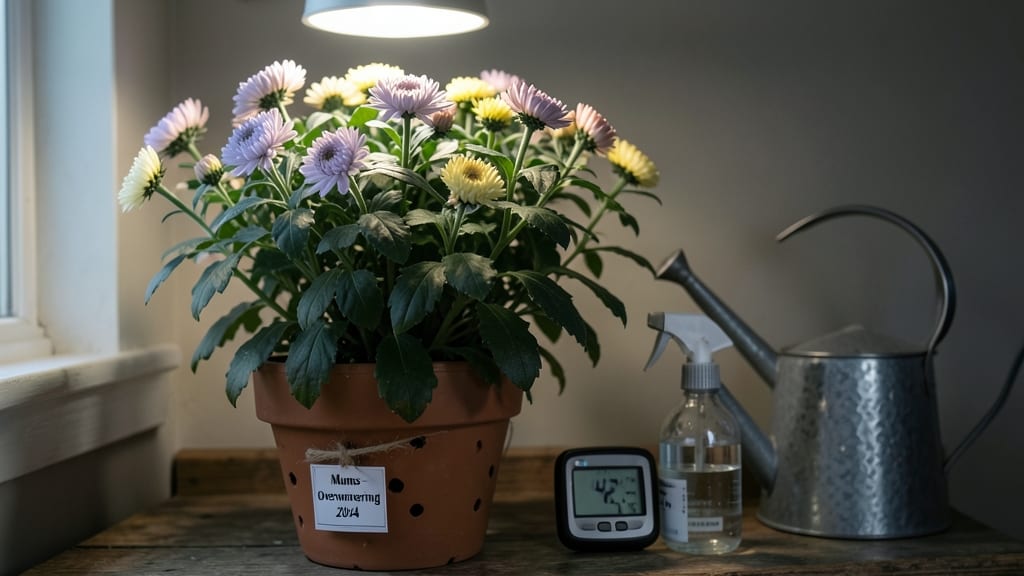
Overwintering mums indoors turns last year's spent blooms into next spring's showstoppers. 🌿 I've saved my favorite mums through three winters now, and the secret isn't complicated—it's about timing, light, and a little patience.
Most people toss their mums when the blooms fade, but these hardy plants just need a cozy indoor break to bounce back stronger than ever.
You'll need just a few simple supplies: sharp pruners, a clean pot (or the original one), well-draining potting mix, and a sunny windowsill. The key is trimming back the stems to about 3-4 inches and repotting before the first frost.
Mums hate soggy roots, so make sure your container has drainage holes—this is where most overwintering failures start.
By February, you'll see fresh green growth pushing through, and with proper care, you'll have blooms again by next fall. The plants develop stronger root systems each year, making them more resilient and productive.
That first flush of new leaves in late winter is the most rewarding part—proof that your mums are alive and ready for another season.
This method works for any variety of chrysanthemums, from classic garden mums to smaller container types. The only real challenge is remembering to keep them lightly watered and dust their leaves occasionally.
Trust me, the effort pays off when you're the only one on the block with fresh mums in October.
📚 In This Guide
- What you need
- Instructions
- Tips and common mistakes
- Wrapping up and next steps
What you need
- ● Mums in containers: 1–5 plants (depending on size; 6–12" pots work best). Ensure pots have drainage holes!
- ● Well-draining potting mix: 1–2 bags (look for a blend labeled "container mix" or "potting soil" with perlite/vermiculite).
- ● Drainage tray or saucer: 1 per plant (to catch excess water and prevent root rot).
- ● Bright, indirect light source: A south- or east-facing window (or grow lights for 12–14 hours/day if natural light is limited).
- ● Watering can with a narrow spout: 1 (to avoid disturbing soil).
- ○ Humidity tray or pebble tray: 1 (optional but helpful for dry indoor air).
- ● Pruning shears or clean scissors: 1 pair (sterilized with rubbing alcohol).
- ● Balanced liquid fertilizer: 1 bottle (dilute to half-strength, e.g., 10-10-10 or 20-20-20).
- ○ Thermometer (optional but handy): 1 (to monitor temps; ideal range: 50–65°F).
- ● Grow lights: LED or fluorescent (12–14 hours/day if natural light is insufficient).
- ● Humidifier: 1 (to combat dry indoor air, especially in winter).
- ● Mulch or decorative stones: For aesthetics and slight moisture retention.
- ● Plant labels: To track varieties and care notes.
- ● Spray bottle: For gentle misting (if humidity is very low).
Step-by-step instructions for overwintering mums indoors
Here's how I keep my mums thriving through winter—no wilting, no yellowing, just lush growth ready for spring.
🪴 Step 1: Select Healthy Plants and Prepare the Right Containers
Choose mums with firm stems and no brown leaves—these are your best bet for survival. I like to use 6-8 inch pots with drainage holes to prevent soggy roots. If your mums are still in garden soil, gently remove them and trim back any dead foliage with clean, sharp scissors.
Fill each pot with well-draining potting mix—I mix regular potting soil with 20% perlite to keep roots from sitting in water. The goal is loose, airy soil that lets excess moisture drain away quickly. Tap the pot gently to settle the soil, leaving about 1 inch from the rim for watering.
☀️ Step 2: Mimic Outdoor Conditions with Light and Temperature
Mums need bright, indirect light to stay healthy indoors. Place them near a south- or east-facing window where they’ll get at least 6 hours of light daily. If your space is dim, supplement with a grow light for 12-14 hours a day—just don’t let the stems stretch too tall, which means they’re reaching for more light.
Keep temperatures between 60-65°F during the day and 50-55°F at night. A cool basement or garage works well for nighttime, but avoid drafty spots. Watch for leaves curling or yellowing—this usually means it’s too cold or too hot. Adjust by moving the plant closer to a window or adding a small space heater if needed.
💧 Step 3: Water Sparingly and Fertilize Lightly
Water only when the top inch of soil feels dry. Overwatering is the fastest way to kill mums indoors—roots rot quickly in cold, damp conditions. I use a spray bottle to mist the soil lightly, then wait until the next check before watering again. You’ll know you’re doing it right when the soil stays slightly moist but not soggy.
Every 4-6 weeks, feed with a balanced, water-soluble fertilizer diluted to half strength. Too much fertilizer now can burn the roots, and mums are sensitive to salt buildup. I skip fertilizing in late fall and early winter—just focus on keeping them hydrated and happy until spring.
✂️ Step 4: Prune and Monitor for Pests
Trim back any dead or yellowing leaves with clean scissors, cutting just above a healthy leaf node. This encourages new growth and keeps the plant looking tidy. If you notice leggy stems reaching toward the light, it’s time to move the plant closer to the window or add a grow light.
Check for pests like spider mites or aphids every 2 weeks. Wipe leaves gently with a damp cloth if you spot any webbing or tiny bugs. I’ve found that a weekly spray with neem oil keeps pests away without harming the plant. If you see brown spots on the leaves, it might be a fungal issue—reduce watering and improve airflow around the plant.
⏰ Step 5: Gradually Acclimate for Spring Planting
Starting in late winter, begin moving the pots outside for 2-3 hours daily to harden them off. Start with a shaded spot and slowly increase sun exposure over 2-3 weeks. This helps them adjust to outdoor conditions without shock. Watch for wilting—if leaves droop, bring them back inside for another day or two.
By early spring, your mums should be ready to go back outside full-time. Plant them in well-draining soil and water deeply to help them establish roots. With proper care, they’ll bloom again next fall, just like they did before winter. The key is patience—don’t rush the process, and they’ll reward you with vibrant color year after year.
Tips & tricks for overwintering mums indoors
Took me a while to figure these out, so here's what actually works for keeping mums thriving through winter.
Lighting Strategy: The 6 hours of daily light is non-negotiable, but here's the thing—if your windows face north, you'll need that grow light for the full 12-14 hours. I've seen mums stretch painfully toward windows when they're not getting enough light. Rotate your pots weekly so all sides get even exposure, and watch for that classic "reaching" sign—it's your plant's SOS for more light.
Temperature Balance: Keeping daytime at 60-65°F and nights at 50-55°F is crucial, but here's what nobody tells you: drafts are the silent killer. Even a gentle breeze from an open window can shock your mums. Place them in a spot where they won't get blasted by heating vents or cold drafts. I've lost plants to drafts when they were perfectly happy with the temperature otherwise.
Soil Science: That 20% perlite mix in Step 1 isn't just about drainage—it's about creating air pockets that prevent root rot. I've found that adding a handful of coarse sand to the mix gives even better aeration. And here's a pro move: after repotting, let the soil settle for 24 hours before watering. This gives any sharp edges time to dull and prevents root damage when you first water.
Pest Prevention: The 2-week pest check is essential, but I've added a weekly neem oil spray to my routine—it's like insurance against spider mites. Here's the trick: spray in the evening when the plant is calm. I've noticed that morning sprays sometimes cause the leaves to crisp slightly from the oil residue drying too quickly in sunlight.
Pro Tips for Overwintering Mums Indoors
- Took me a while to figure these out, so here's what actually works for keeping mums thriving through winter.
- Lighting Strategy: The 6 hours of daily light is non-negotiable, but here's the thing—if your windows face north, you...
- Temperature Balance: Keeping daytime at 60-65°F and nights at 50-55°F is crucial, but here's what nobody tells you: d...
Frequently asked questions
Got questions about overwintering mums indoors?
Here are answers to the most common concerns—so you can keep those cheerful blooms thriving through winter!
When should I bring mums indoors before the first frost?
Move your mums indoors before temperatures drop below 40°F (4°C). Aim for late summer to early fall—typically 4–6 weeks before your first frost date. This gives them time to adjust without shock. If leaves yellow or drop, it’s a sign they’re stressed from cold but not yet damaged.
Can I overwinter mums in a garage or basement?
Not ideal! Garages and basements lack humidity and light, which mums need. Instead, choose a bright, cool spot (50–60°F / 10–15°C) like a sunroom, porch, or even a well-lit basement with a grow light. Avoid drafts—consistent conditions are key to survival.
How often should I water mums indoors?
Water only when the top inch of soil feels dry—usually every 7–10 days. Overwatering causes root rot, while underwatering stresses the plant. Use pots with drainage holes and a tray to catch excess water. Pro tip: Mist leaves occasionally to mimic humidity they’d get outdoors!
Will my mums bloom again next year if I overwinter them?
Yes! With proper care, mums can rebloom for years. Prune spent flowers in fall, fertilize lightly in early spring, and provide 6+ hours of sunlight daily. Some varieties may bloom less vibrantly the first year indoors, but patience pays off—think of it as a long-term investment in beauty!
What should I do if my mum’s leaves turn yellow or wilt?
Yellow leaves often mean overwatering or nutrient deficiency. Wilted leaves could signal underwatering or root stress. Troubleshoot: Check soil moisture, ensure drainage, and trim damaged leaves. If pests like spider mites appear, isolate the plant and treat with neem oil. Most issues are fixable with quick adjustments!
Wrapping up and next steps
Overwintering mums indoors is a rewarding way to preserve their beauty and ensure vibrant blooms next season—and you’ve got all the tools to make it happen!
With the right care, patience, and a cozy spot, your mums will thrive until spring. 🌸 Now’s the perfect time to act: gather your supplies, prep your plants, and give them the love they deserve. Your future garden’s star performers are just a few steps away!
- Next step: Start by reviewing your materials and setting up your overwintering space this week.
- Pro tip: Take photos of your mums now—you’ll love tracking their progress! 📸