
Container Gardens
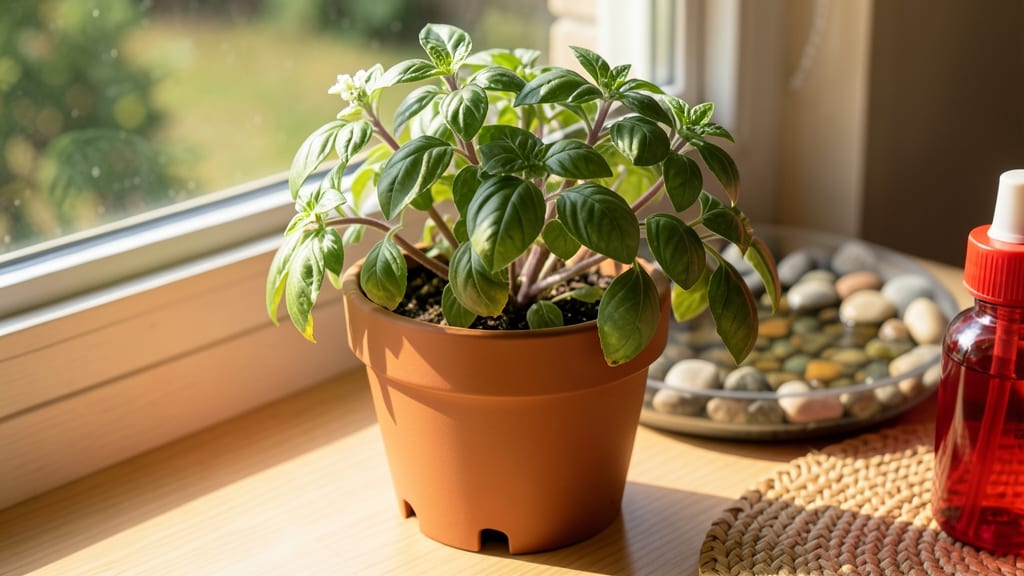
Overwintering basil indoors keeps that fresh, fragrant aroma going all year—no more sad grocery-store pots. 🌿 I’ve saved my plants through three winters now, and the secret isn’t complicated: it’s about light, timing, and a little pruning know-how.
Most people rush the transition, but patience here means basil that thrives, not just survives.
Start by bringing your basil inside before the first frost—usually late September or October, depending on your zone. Choose a south-facing window (or a grow light if that’s not an option) and trim back the plant by one-third to encourage bushier growth.
The goal is to mimic summer conditions: 60-70°F temperatures, high humidity, and 12+ hours of light daily. Without enough light, leaves turn yellow and growth stalls.
You’ll notice new growth within 2-3 weeks if you’ve got the light right—bright, glossy leaves and that signature basil scent. Keep the soil evenly moist (not soggy) and fertilize lightly every 4-6 weeks with half-strength balanced fertilizer.
The biggest challenge? Leggy stems from weak light, but a simple prune and rotation fixes that fast.
By spring, your overwintered basil will be ready to go back outside—hardier and more productive than store-bought starts. The same tricks work for other herbs like parsley or cilantro too. Here’s how to keep it thriving through those dark winter months.
📚 In This Guide
- What you need
- Instructions
- Tips and common mistakes
- Wrapping up and next steps
What you need
- ● Healthy basil plant(s): 1-3 mature basil plants (potted or freshly harvested from your garden). Choose Genovese, Thai, or Purple basil for best results.
- ○ Containers: 1-2 6-8 inch diameter pots with drainage holes (terracotta or ceramic preferred). Optional: Self-watering pots for convenience.
- ● Well-draining potting mix: 2-3 bags of lightweight, organic mix (e.g., 50% potting soil + 50% perlite or coconut coir). Avoid garden soil—it compacts and retains too much moisture!
- ● Grow lights: 1-2 full-spectrum LED grow lights (12-15 watts per square foot) or a south-facing window with at least 6 hours of direct sunlight daily.
- ● Pruning shears: 1 pair of sterilized, sharp scissors (clean with rubbing alcohol between cuts).
- ● Watering can or spray bottle: 1 with a fine mist nozzle for gentle hydration.
- ○ Humidity tray or pebble tray: 1 (optional but helpful for dry indoor air). Fill with water and pebbles, then place the pot on top.
- ● Fertilizer: 1 bottle of balanced liquid fertilizer (e.g., 10-10-10) or fish emulsion (diluted to half-strength). Use sparingly—over-fertilizing can harm roots!
- ● Thermometer/hygrometer: 1 to monitor temperature (60-75°F) and humidity (40-60%).
- ● Insecticidal soap or neem oil: 1 bottle as a preventative against spider mites or aphids.
- ● Support stake or tomato cage: 1 for leggy basil plants to encourage upright growth.
Step-by-Step instructions for overwintering basil indoors
Here's how I keep my basil thriving through winter with minimal fuss—no fancy equipment needed.
🌿 Step 1: Select and Prepare Healthy Stems
Choose the healthiest basil stems from your summer plants—look for thick, upright growth with at least 4-6 leaves per stem. Avoid stems with yellowing or spotted leaves, as these won't survive the transition. Use clean, sharp scissors to cut 4-6 inch sections, making the cut just below a leaf node where new roots will form.
Strip the lower leaves from each stem, leaving only the top 2-3 sets of leaves. This prevents rot when the stems sit in water. I like to work in the morning when stems are crisp—this ensures they're hydrated and ready for rooting.
💧 Step 2: Root the Cuttings in Water
Fill a clean glass or jar with room-temperature water and place the basil stems in it so the stripped portion is submerged by about 1-2 inches. Use a rubber band or twist tie to hold stems together if needed—this keeps them stable while roots develop. Place the container in a spot with bright, indirect light, like an east-facing window.
Change the water every 2-3 days to prevent bacterial growth. You'll see tiny white roots emerge within 7-10 days. Once roots reach about 1 inch long, the cuttings are ready for planting. I know it's ready when I gently tug on the stem and feel slight resistance—no more wiggling like a new cutting!
☀️ Step 3: Plant in Containers With Proper Light
Use 4-inch diameter pots with drainage holes and fill them with a well-draining potting mix. I like to add a handful of perlite to each pot to improve aeration. Plant each rooted cutting about 2 inches deep, firming the soil gently around the stem to eliminate air pockets. Water lightly until the soil is evenly moist but not soggy.
Basil needs 6-8 hours of bright light daily to thrive indoors. A south-facing window works, but most homes don't have enough light there. I supplement with a 12-inch LED grow light placed 6 inches above the plants for 12-14 hours daily. You'll notice leaves growing smaller or stretching toward the light if it's not enough—this is your cue to move the light closer or add more hours.
🪴 Step 4: Maintain Ideal Conditions
Keep the soil consistently moist but never waterlogged—stick your finger 1 inch deep into the soil. If it feels dry, it's time to water. I use room-temperature water to avoid shocking the roots. Basil prefers 65-75°F temperatures, so avoid cold drafts from windows or doors. If your home runs cooler, a small space heater nearby can help maintain consistent warmth.
Fertilize lightly every 4-6 weeks with a balanced liquid fertilizer diluted to half strength. Over-fertilizing causes salt buildup, which burns roots. I also pinch off the top sets of leaves when the plant reaches 6 inches tall to encourage bushier growth. This is the secret to keeping basil productive all winter!
✂️ Step 5: Prune and Harvest Regularly
Prune your basil every 4-6 weeks to maintain shape and encourage new growth. Use clean scissors to trim just above a leaf node, cutting back about ⅓ of the plant each time. This prevents leggy growth and keeps the plant compact. Harvest leaves regularly—never take more than ⅓ of the plant at once, or it will struggle to recover.
Watch for signs of stress like yellowing leaves or wilting. If you see these, check the light and water first. Basil is sensitive to overwatering, so always let the top inch of soil dry out between waterings. With proper care, your overwintered basil will stay fragrant and productive until spring—ready to transition back outdoors when temperatures warm.
Tips & tricks for overwintering basil indoors
Keeping your basil thriving through winter doesn't have to be complicated—here's how to avoid common pitfalls and maximize your success.
Selection Matters: When choosing stems in Step 1, look for vibrant green leaves with no brown spots or yellowing. The stems should feel firm when squeezed gently—this indicates healthy, hydrated plants. I've found that stems with at least 5 leaves (instead of the minimum 4-6) tend to root more reliably. Avoid stems that feel soft or mushy, as these won't survive the transition. The morning is truly the best time to cut—stems are fully hydrated after a night's rest, making them more resilient.
Rooting Acceleration: In Step 2, you can speed up root development by adding a natural rooting hormone like cinnamon powder (just sprinkle a pinch on the cut ends) or a few drops of aloe vera gel to the water. This isn't required, but I've seen roots appear in just 5-7 days instead of the usual 7-10 when using these boosters. Change the water more frequently if you notice any cloudiness—every 2 days is better than waiting the full 3 days when using these enhancements. The key visual cue is when you can see tiny white hairs forming along the submerged portion.
Light Optimization: For Step 3, if you don't have a south-facing window, consider using a reflective surface like aluminum foil behind the pots to maximize the light you do have. This simple trick can make a noticeable difference in leaf size and color. Also, rotate your plants quarter-turn daily so all sides get even light exposure—this prevents lopsided growth. I've had success with a 10-inch LED grow light (instead of the suggested 12-inch) placed 8 inches away when using higher-wattage bulbs, though you'll need to monitor closely for heat buildup.
Temperature Troubleshooting: If your home consistently stays below 65°F, consider using a small ceramic heat mat under the pots to maintain root warmth. Basil roots prefer slightly warmer temperatures than the leaves. I've also found that placing pots on a tray of pebbles with water (not touching the bottom) creates a humid microclimate that helps prevent crispy leaf edges in dry indoor air. Just be careful not to let the pots sit directly in standing water, as this can lead to rot.
Pro Tips for Overwinter Basil Indoors
- Keeping your basil thriving through winter doesn't have to be complicated—here's how to avoid common pitfalls and max...
- Selection Matters: When choosing stems in Step 1, look for vibrant green leaves with no brown spots or yellowing. The...
- Rooting Acceleration: In Step 2, you can speed up root development by adding a natural rooting hormone like cinnamon ...
Frequently asked questions
Got questions about keeping your basil thriving through winter? Here are answers to the most common concerns—so you can enjoy fresh leaves all season long!
How do I know when it’s time to bring basil indoors before winter?
Watch for signs of stress like yellowing leaves, stunted growth, or wilting—usually 2–3 weeks before your first frost (check your local frost date!). If nights dip below 50°F (10°C), it’s time to move potted basil inside to a bright spot. Pro tip: Gradually acclimate plants to indoor light over 3–5 days to avoid shock!
Can I overwinter basil in a dark basement or closet?
Nope! Basil needs 6+ hours of bright light daily—a dark basement will cause leggy, weak growth. If natural light is limited, supplement with a grow light (12–16 hrs/day) or place near a sunny window (south-facing is ideal). No light? Skip overwintering and start fresh in spring!
Why is my overwintered basil turning yellow or dropping leaves?
Yellow leaves often mean overwatering, low light, or cold drafts. Check soil moisture (keep it slightly dry between waterings) and ensure temps stay 60–75°F (15–24°C). Move plants away from vents/AC units, and prune yellow leaves to redirect energy. Bonus: Boost humidity with a pebble tray!
Do I need to prune basil before overwintering?
Yes! Trim back 1/3 of the plant before bringing it inside to encourage bushier growth. Remove flowering stems (they weaken flavor) and any yellow/damaged leaves. Pro move: Snip just above a leaf node to promote new shoots. Prune lightly every 4–6 weeks indoors too!
Can I still use overwintered basil for cooking if it’s smaller?
Smaller plants may yield fewer leaves, but their flavor is often more concentrated. Use leaves sparingly in sauces, pestos, or teas. For a harvest boost, try harvesting leaves in batches (never more than 1/3 at once) and fertilize lightly with diluted fish emulsion every 4–6 weeks.
Wrapping up and next steps
Overwintering basil indoors is easier than you think—and the rewards are worth every effort! 🌱 With the right light tricks, a little patience, and a cozy spot near your kitchen, you can enjoy fresh basil all year long.
Whether you’re saving seeds, sharing cuttings, or simply savoring homegrown pesto, your green thumb will thank you.
Ready to take the next step? Start small: Try overwintering just one plant this season, experiment with lighting, and tweak as you go. Before you know it, you’ll have a thriving indoor basil garden—and maybe even a new hobby! 😊