
Planting
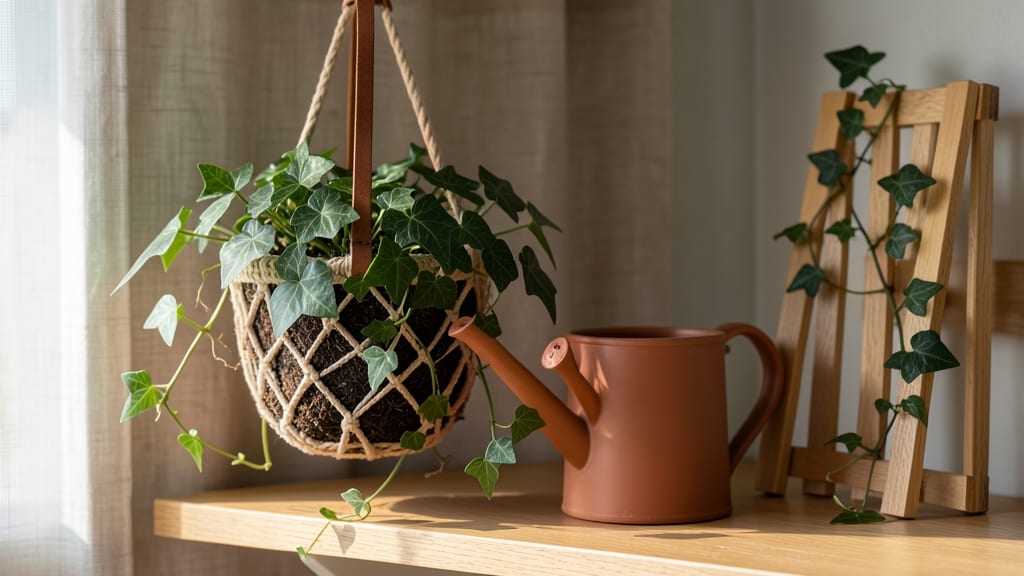
My ivy plant care routine starts with one key secret: low-light tolerance—the reason these plants thrive in offices, bathrooms, and dim corners. 🌿 The same traits that make ivy easy to overlook are what make it nearly indestructible indoors, as long as you nail a few basics like watering rhythm and occasional pruning.
Most people drown ivy by keeping soil soggy, but the real trick is letting the top inch dry out between waterings.
Swedish ivy (Hedera helix) and English ivy both prefer moderate humidity, so misting or placing the pot on a pebble tray helps prevent crispy leaf edges—especially in winter when indoor air gets dry. A well-draining potting mix with perlite keeps roots happy without the risk of rot.
You’ll notice new growth within 4-6 weeks if you stick to this routine, with vines stretching toward light sources or trailing elegantly from shelves. The plants reward patience with glossy, heart-shaped leaves that bounce back from neglect—though yellowing means you’re overwatering, not underwatering.
Works for hanging baskets, vertical gardens, or as a trailing accent. Here’s how to keep yours thriving year-round without the fuss.
📚 In This Guide
- What you need
- Instructions
- Tips and common mistakes
- Wrapping up and next steps
What you need
- ● Ivy plant: Choose between English ivy (Hedera helix) or Boston ivy (Parthenocissus tricuspidata)—both work well indoors.
- ● 6- to 10-inch pot: Ensure it has drainage holes (1-2 per plant). Terracotta or ceramic pots work best.
- ● Well-draining potting mix: A blend of 50% peat or coconut coir, 30% perlite or pumice, and 20% compost keeps roots happy.
- ● Drainage tray: A shallow tray to catch excess water and prevent root rot.
- ● Watering can with a narrow spout: For precise watering without over-saturating the soil.
- ○ Misting bottle (optional): Helps maintain humidity, especially in dry climates.
- ● Houseplant fertilizer: A balanced, water-soluble fertilizer (e.g., 10-10-10 or 20-20-20) for feeding.
- ● Pruning shears or clean scissors: For trimming leggy growth or shaping your ivy.
- ● Grow lights: If your space lacks natural light, a full-spectrum LED grow light (12-16 hours/day) keeps ivy lush.
- ● Peat moss or sphagnum moss: Adds moisture retention for low-light spots.
- ● Support structure: A trellis, moss pole, or hanging basket to encourage climbing or trailing.
- ● Soil moisture meter: Ensures you’re not over- or under-watering.
- ● Neem oil or insecticidal soap: For treating pests like spider mites or aphids.
Step-by-Step guide to keeping your ivy plant thriving indoors
Here's how to coax that lanky ivy into a full, vibrant plant—even in dim corners.
🌿 Step 1: Pick the Perfect Spot for Low-Light Success
Ivies tolerate low light better than most plants, but they still need bright indirect light to stay lush. Place yours near an east-facing window or a few feet from a north window—direct sun will scorch those delicate leaves. You'll know it's happy when new growth appears within 4-6 weeks.
Rotate the pot a quarter turn every 2 weeks so all sides get equal light. This prevents the plant from leaning toward the window. If leaves start yellowing or growing sparse, move it closer to the light source—just avoid harsh afternoon rays.
💧 Step 2: Water When the Top 1-2 Inches Feel Dry
Ivies prefer their soil to dry out slightly between waterings. Stick your finger 1-2 inches deep—if it feels dry, it's time to water. Overwatering is the #1 killer of indoor ivies, so let excess water drain completely from the pot's holes. I always check the weight: a dry pot feels light, while a damp one stays heavy.
Mist the leaves occasionally to boost humidity, especially if your home runs dry in winter. You'll see the difference in glossy, healthy leaves versus crispy brown edges. In low-light spots, water every 7-10 days—less often if the air feels dry.
☀️ Step 3: Prune for Fullness and Control Growth
Ivies grow fast, so trim them back once a month to encourage bushiness. Use clean scissors to snip just above a leaf node where you want new growth to sprout. This is where the magic happens: those little leaf buds will burst into new foliage within 2-3 weeks.
Don't be afraid to cut back leggy stems by half—they'll regrow thicker and fuller. If your ivy starts looking scraggly, give it a hard prune in spring to refresh its shape. Always wear gloves; ivy sap can irritate sensitive skin.
🪴 Step 4: Feed Lightly During Growing Season
Use a balanced liquid fertilizer (like 10-10-10) diluted to half strength every 4-6 weeks in spring and summer. This gives your ivy just enough nutrients without overwhelming it. You'll notice richer green leaves and faster growth after the first feeding.
Skip fertilizing in fall and winter—your ivy is resting then. Over-fertilizing causes salt buildup in the soil, which shows up as brown leaf tips. If you see this, flush the soil with water to rinse out excess salts.
⏰ Step 5: Watch for Pests and Act Fast
Ivies attract spider mites and mealybugs when stressed. Check the undersides of leaves weekly for tiny webs or cottony bugs. At the first sign, wipe leaves with a damp cloth dipped in soapy water (1 tsp mild dish soap per quart of water). Repeat every 3-5 days until pests vanish.
Isolate the plant if infestation spreads—these pests jump to nearby plants. A strong spray of water also helps dislodge pests. Healthy ivies rarely get pests, so proper light and watering are your best defense.
Tips & tricks for perfect indoor ivy care
Common pitfalls—and how to sidestep every one when nurturing your ivy plant.
Light Exposure Secret: In Step 1, when placing your ivy near an east-facing window, avoid the temptation to move it closer to a south-facing window for extra light. Direct sun—even through sheer curtains—can cause brown patches on leaves within just 4-6 weeks. Instead, rotate the pot every 2 weeks to ensure even growth. I've seen ivies develop yellow patches when one side gets more light than the other—this simple rotation prevents that uneven stress.
Watering Wisdom: The finger test in Step 2 is foolproof, but here's what I've learned: if your ivy's leaves start curling at the edges, you're either underwatering or overwatering. Check the soil weight—if the pot feels light but the top inch is still damp, your ivy needs less frequent watering (every 10-14 days in winter). The key is letting the soil dry completely between waterings, especially in low-light spots where evaporation slows down.
Pruning Pro Tip: When you're trimming back those leggy stems in Step 3, don't just cut at random—look for the leaf nodes where tiny buds form. Snipping just above these nodes is what triggers new growth. I've found that cutting back by half in spring gives the most dramatic transformation, with fuller growth appearing within 2-3 weeks. And always use clean scissors—dull blades can crush stems and invite infections.
Fertilizer Finesse: The diluted fertilizer recommendation in Step 4 is spot-on, but timing matters more than you'd think. I've ruined ivies by fertilizing in winter when they're dormant. Instead, start fertilizing in early spring when you see new growth, then switch to every 6 weeks in summer. If you notice brown leaf tips after fertilizing, flush the soil with water immediately—this removes excess salts that build up and damage roots.
Pro Tips for Ivy Plant Care Indoors
- Common pitfalls—and how to sidestep every one when nurturing your ivy plant.
- Light Exposure Secret: In Step 1, when placing your ivy near an east-facing window, avoid the temptation to move it c...
- Watering Wisdom: The finger test in Step 2 is foolproof, but here's what I've learned: if your ivy's leaves start cur...
Frequently asked questions
Got questions about keeping your ivy thriving indoors?
Here are answers to the most common ones—so you can avoid wilting leaves and enjoy that lush, green glow year-round.
How often should I water my indoor ivy plant?
Water your ivy when the top inch of soil feels dry—usually every 1-2 weeks, depending on humidity and light. Overwatering is the #1 killer! Stick your finger in the soil to check; if it’s damp, wait a few more days. Pro tip: Ivy loves moisture but hates soggy roots—use a pot with drainage holes!
Can ivy survive in low light, or will it always stretch toward the window?
Ivy can tolerate low light, but it’ll stretch (called "etiolation") if it’s too dark. Place it near a bright, indirect light source (like an east-facing window) for compact growth. If it’s already leggy, rotate the pot weekly to encourage even growth. Bonus: Variegated ivy needs more light to keep its pretty patterns!
Why are my ivy leaves turning yellow or brown?
Yellow leaves often mean overwatering, while brown edges or crispy spots signal underwatering or low humidity. Check the soil moisture and adjust your watering routine. Fix it fast: Mist the leaves occasionally or place the pot on a tray of pebbles with water (but no standing water at the bottom!).
Is ivy toxic to pets or kids?
Yes! Ivy contains saponins, which can cause mild stomach upset if ingested. Keep it out of reach of curious pets or toddlers. Safe swap: Try a pet-friendly alternative like pothos or parlor palm if you’re worried. When in doubt, call your vet or poison control.
How do I prune ivy to keep it bushy and full?
Prune in early spring to encourage new growth. Use clean scissors to trim back leggy stems to a leaf node (where leaves grow). You can also pinch off the tips of young stems to promote bushiness. Pro move: Propagate the cuttings in water or soil to grow more ivy plants—free greenery!
What’s the best fertilizer for indoor ivy?
Use a balanced, water-soluble fertilizer (like 10-10-10) diluted to half-strength every 4-6 weeks during spring and summer. Skip fertilizing in fall/winter when growth slows. Overdoing it? Yellow leaves or leaf drop are red flags—cut back and flush the soil with water to reset.
Does ivy need humidity, and how can I increase it?
Ivy enjoys moderate humidity (40-50% is ideal). If your home is dry, mist the leaves 2-3 times a week or place the pot on a humidity tray (pebbles + water). Grouping plants together or using a humidifier near it also helps. Watch for: Brown leaf tips = dry air!
Wrapping up and next steps
Caring for an indoor ivy plant is simpler than you think—with the right light, water, and a little patience, you’ll soon have a thriving, lush green companion! 🌿 Remember, ivy is a resilient plant that thrives in low-light conditions, making it perfect for nearly any space.
Whether you’re a beginner or a seasoned plant parent, these tips will help you nurture your ivy into a stunning indoor feature.
Now that you’re armed with the low-light secrets, why not take the next step? Try propagating your ivy to share with friends or expand your plant collection—it’s easier than you’d expect! Happy growing! 🌱