
Planting
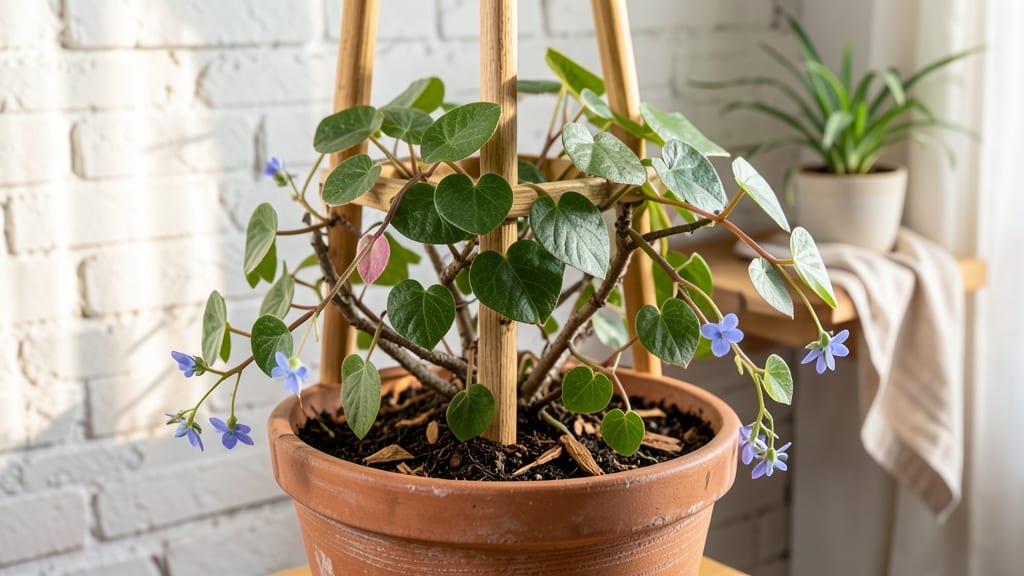
Growing an indoor kiwi plant with fruit isn’t just possible—it’s a rewarding challenge that turns your living room into a mini orchard. 🌱 I’ve watched my compact Actinidia deliciosa 'Issai' vine climb a trellis, unfurl delicate flowers, and even produce tiny kiwis indoors, proving that container gardening can deliver edible surprises.
The key lies in mimicking its natural habitat: bright, indirect light, consistent humidity, and a little patience as it establishes itself.
You’ll need a sturdy trellis (even a simple wooden dowel works), well-draining potting mix, and a way to maintain 60-70% humidity—think pebble trays or a humidifier near the plant.
Male and female flowers appear on the same vine, but you’ll need two plants for pollination (or hand-pollinate with a soft brush). Prune aggressively in early spring to encourage bushier growth, and expect your first fruits in 2-3 years—not overnight, but worth the wait.
The payoff comes in late summer or fall, when you’ll harvest tiny, sweet kiwis—not the giant grocery-store varieties, but perfect for snacking or baking. The vine itself becomes a lush, fast-growing focal point, with heart-shaped leaves that add texture to any room.
With the right setup, you’ll break the myth that kiwis only grow in greenhouses or warm climates.
This method works best for small-space gardeners or anyone with a sunny window and a trellis. Start with the compact 'Issai' variety—it’s the most adaptable for indoor conditions—and be prepared for a multi-year investment.
The first year focuses on establishing roots; the second on flowers; and the third on fruit. Patience is the secret ingredient here.
📚 In This Guide
- What you need
- Instructions
- Tips and common mistakes
- Wrapping up and next steps
What you need
- ● Kiwi vine plant: Choose a Actinidia deliciosa (hardy kiwi) or Actinidia arguta (hardy kiwi) variety—both can thrive indoors with care. (1 plant required, male & female needed for pollination!)
- ● Large container or pot: Minimum 15–20 gallons (24–36" diameter) with drainage holes. (Terracotta or fabric pots work best!)
- ● High-quality potting mix: Well-draining, organic-rich soil blend (e.g., 60% potting soil + 30% perlite + 10% compost). (Avoid garden soil—it compacts and suffocates roots!)
- ● Trellis or sturdy support: A 6–8 ft tall freestanding trellis, A-frame, or wall-mounted system with horizontal crossbars for vine training. (DIY with PVC pipes or buy pre-made!)
- ● Fertilizer: Balanced liquid fertilizer (10-10-10 or 20-20-20): For active growth phases.
- ● Slow-release organic fertilizer (e.g., worm castings or fish emulsion): For nutrient boosts.
- ● Pruning shears: Sharp, sterilized bypass pruners (for shaping and harvesting).
- ● Support ties or soft plant clips: To gently secure vines to the trellis.
- ● Misting bottle or humidifier: Kiwi vines love 60–70% humidity—critical for indoor growth!
- ● Grow lights: Full-spectrum LED lights (12–16 hrs/day) if natural light is less than 6 hrs/day.
- ● Heating mat: For cooler climates (60°F+ is ideal for root health).
- ● Pollination aid: A small paintbrush to manually pollinate flowers if bees aren’t visiting.
- ● Drip irrigation system: For consistent moisture without overwatering.
- ● Decorative pots or planters: To hide the functional container and add style!
Step-by-step instructions for growing indoor kiwi plants
Here's the method I've perfected for thriving indoor kiwi vines with reliable fruiting—no greenhouse needed.
🪴 Step 1: Select and Prepare Your Growing Space
Choose a 6-foot tall trellis or sturdy vertical support for your kiwi vine. I use a metal garden trellis in a corner where it won't get knocked over. Kiwi vines need strong support—their tendrils can't bear the weight of fruit alone. Place your trellis near a south-facing window or under grow lights for 12-14 hours of light daily. If using natural light, rotate the plant quarter-turn weekly so growth stays even.
Kiwi plants thrive in 60-75°F temperatures. Keep them away from drafts or heating vents—fluctuations stress the plant. I place mine on a heat mat during winter to maintain consistent warmth. The moment you see new growth slow or leaves yellow, check for temperature swings first.
🌱 Step 2: Plant Your Kiwi Vine with Proper Spacing
Start with a 1-2 year old kiwi plant (hardy kiwi varieties like 'Issai' work best indoors). Dig a hole twice as wide as the root ball but only as deep as the container it came in. Gently remove the plant, loosen the roots if they're circling, and place it in the hole. The crown should sit just above soil level—burying it too deep causes rot.
Backfill with well-draining potting mix (avoid garden soil—it compacts and suffocates roots). Water deeply until moisture runs from the drainage hole. I use a 5-gallon watering can to ensure even saturation. After planting, mulch with 2 inches of organic mulch to retain moisture and regulate soil temperature.
☀️ Step 3: Train Vines and Provide Essential Care
As new growth appears, tie main stems to the trellis with soft plant ties every 6-8 inches. Kiwi vines grow aggressively—if left untrained, they'll tangle and break under fruit weight. Prune leggy growth (thin, pale stems) to encourage bushier, stronger vines. You'll know you're doing it right when new shoots emerge from the base and along the main stems.
Water when the top 2 inches of soil feel dry. Kiwi plants hate soggy roots but also wilt quickly if dehydrated. I check moisture by sticking my finger in the soil—if it's dry past my first knuckle, it's time to water. Fertilize every 4-6 weeks with a balanced 10-10-10 fertilizer during growing season (spring-fall). Reduce feeding in winter when growth slows.
✂️ Step 4: Prune for Fruit Production and Winter Prep
In late winter or early spring, prune to shape your vine. Remove dead, crossing, or weak branches first. Then cut back overly long stems to encourage branching. Kiwi flowers appear on new wood, so prune just after flowering to preserve next year's fruit. You'll see clusters of tiny flowers in spring—these develop into fruit over 6-8 months.
For winter care, reduce watering slightly but keep soil slightly moist. Move the plant to a cooler spot (50-60°F) if possible. Kiwi vines enter dormancy naturally—you'll notice slower growth and fewer leaves. This is normal! Resume regular care in spring when new buds appear. If your vine looks stressed, a foliar spray of seaweed extract boosts resilience.
🍈 Step 5: Harvest and Overwinter for Next Year
Kiwi fruit ripens in late fall to winter (depending on variety). Harvest when fruit gives slightly when gently squeezed and turns a muted yellow-green. Cut stems with clean pruners, leaving a ½-inch stem attachment. Store at 35-40°F to slow ripening. I keep harvested fruit in a paper bag with a banana to speed up softening.
After harvest, clean the trellis and prune any remaining dead growth. If your vine is 4+ years old, consider replacing it—older plants produce fewer fruit. I repot every 2-3 years in spring, increasing pot size by 2-4 inches if needed. Kiwi vines are long-lived, but container-bound roots need occasional upgrades to keep producing.
Tips & tricks for perfect indoor kiwi plants
Real talk: Growing kiwi plants indoors takes patience, but these tricks will help you avoid common pitfalls and maximize your harvest.
Lighting Strategy: The 12-14 hours of light daily is non-negotiable for fruiting, but quality matters more than quantity. If using grow lights, position them 6-12 inches above the plant and use full-spectrum bulbs. I've found that supplementing with a timer ensures consistent light cycles—kiwi vines thrive on routine. For natural light, rotate your plant weekly to prevent lopsided growth toward the window.
Temperature Consistency: Those 60-75°F ranges are ideal, but fluctuations are the real enemy. I've learned this the hard way after seeing leaves yellow from drafts. Place your plant near an interior wall away from doors, windows, or vents. In winter, a heat mat set to 70°F under the pot creates a stable root zone, preventing temperature stress that stunts growth.
Pruning for Productivity: When pruning in late winter, focus on creating an open center that allows light penetration to the inner branches. I cut back 25-30% of the previous year's growth to encourage new, fruiting wood. The key is to prune just after flowering—this preserves next year's flower buds while still shaping the vine. Use clean, sharp pruners to avoid tearing stems, which invites disease.
Harvesting Know-How: The muted yellow-green color and slight give when squeezed are your best indicators for harvest readiness. I've found that harvesting in the morning gives fruit a chance to ripen fully at room temperature. Store harvested kiwis at 35-40°F with a banana in the bag—this mimics the natural ethylene gas production that speeds ripening without over-softening the fruit.
Pro Tips for Indoor Kiwi Plant
- Real talk: Growing kiwi plants indoors takes patience, but these tricks will help you avoid common pitfalls and maxim...
- Lighting Strategy: The 12-14 hours of light daily is non-negotiable for fruiting, but quality matters more than quant...
- Temperature Consistency: Those 60-75°F ranges are ideal, but fluctuations are the real enemy. I've learned this the h...
Frequently asked questions
Got questions about growing your own indoor kiwi plant? We’ve got answers! Whether you’re a beginner or a seasoned plant parent, these FAQs will help you troubleshoot, optimize care, and maximize your harvest. Let’s dive in!
Can I grow a kiwi plant indoors year-round, or will it need a dormant period?
Indoor kiwi vines (Actinidia arguta) can thrive year-round with consistent care, but they’ll still benefit from a mild dormant period (like shorter daylight in winter) to encourage fruiting. Reduce watering slightly and keep temps between 40–50°F for 4–6 weeks. This mimics natural cycles without stressing the plant!
How long does it take for an indoor kiwi plant to produce fruit?
Patience is key! Indoor kiwi vines typically take 2–3 years to bear fruit, depending on variety and care. Female plants need a male pollinator (even if nearby) for pollination. Pro tip: Use a small paintbrush to hand-pollinate flowers if bees aren’t visiting!
Why are my kiwi plant’s leaves turning yellow or dropping?
Yellow leaves usually signal overwatering or nutrient deficiency. Check soil moisture—it should be damp but not soggy. Feed with a balanced fertilizer (like 10-10-10) every 4–6 weeks in growing season. Bonus: Yellow edges? It might need more humidity (try a pebble tray!).
What’s the best indoor kiwi plant alternative if I want faster fruit?
If kiwis are too slow, try hardy kiwi (Actinidia arguta)—it’s cold-hardier and fruits sooner! Other fast options:
- Dwarf citrus trees (like calamondin) for year-round fruit.
- Strawberry plants (in hanging baskets) for quick harvests.
- Dwarf figs (like ‘Little Miss Figgy’) for low-maintenance sweet rewards.
How do I prune my indoor kiwi vine for maximum fruit?
Prune in late winter/early spring to shape the vine and encourage fruiting. Remove:
- Dead or crossing branches.
- Weak shoots (keep 2–3 strong canes).
- Overly leggy growth (pinch back tips to promote bushiness).
Wrapping up and next steps
Growing your own indoor kiwi plant is a rewarding journey that brings fresh, homegrown fruit to your table year-round! With the right trellis, patience, and care, you’ll enjoy sweet, aromatic kiwis straight from your living space.
Whether you’re a seasoned gardener or just starting, this project is totally doable—just start small and stay consistent.
Ready to take the next step? Pick your favorite kiwi variety, gather your supplies, and begin your trellis setup this weekend. Before you know it, you’ll be harvesting your first kiwi fruits—how cool is that? 🌱✨