Vegetables
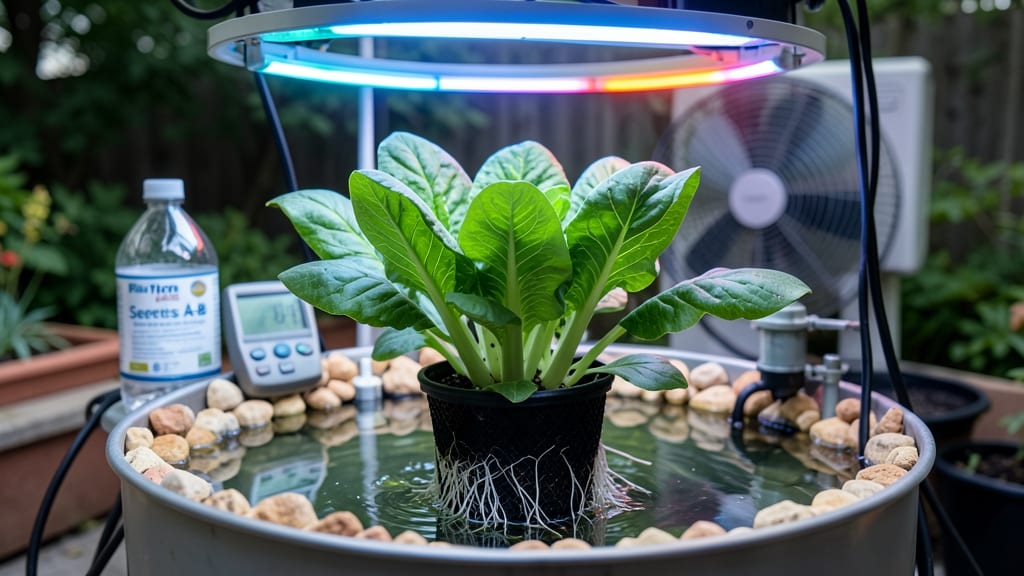
Indoor hydroponic vegetable gardening without soil or sunlight is easier than you think. 🌱 I set up my first hydroponic system last winter, and now I'm harvesting crisp lettuce, juicy cherry tomatoes, and fragrant herbs year-round—no backyard required. The secret lies in the right system, nutrients, and light combo that mimics what plants need from nature.
The beauty of hydroponics is that you don't need a green thumb or acres of space. A simple deep water culture (DWC) setup fits on a kitchen counter, while nutrient film technique (NFT) systems work well for leafy greens.
My first batch of baby kale was ready in just 21 days, and I've since expanded to peppers and strawberries—all without dirt or sunlight.
You'll save money on groceries, eliminate pests, and enjoy fresher produce than anything from a store. The initial setup costs more than a soil garden, but the year-round harvests pay off quickly. Plus, there's something incredibly satisfying about watching roots grow in water instead of soil.
Whether you're dealing with a tiny apartment or just want to grow beyond your outdoor season, hydroponics delivers. The key is starting small, testing what works, and troubleshooting as you go—just like any new gardening adventure.
📚 In This Guide
- What you need
- Instructions
- Tips and common mistakes
- Wrapping up and next steps
What you need
- ● Hydroponic System: Kratky method (DIY or pre-made) or deep water culture (DWC) system
- ● 5-gallon bucket (for Kratky) or 10–20 gallon reservoir (for DWC)
- ● Growing Medium: Coco coir bricks (1–2 per plant) or rockwool cubes (1–2 inches)
- ● Nutrient Solution: Balanced hydroponic nutrients (e.g., General Hydroponics Flora Series)
- ● pH test kit (digital or liquid) + pH adjusters (pH Up/Down)
- ● Lighting: LED grow light (full-spectrum, 20–40W) or T5 fluorescent bulb
- ● Adjustable light stand (12–18 inches above plants)
- ● Air Pump & Stone: Small aquarium pump (2–4W) + air stone (for oxygenation)
- ● Seeds or Seedlings: Fast-growing hydroponic-friendly veggies (e.g., lettuce, herbs, cherry tomatoes, kale)
- ● Timer for lights (14–16 hours/day for veggies)
- ● Reflective material (aluminum foil or Mylar) to boost light efficiency
- ● Humidity dome (for seedlings) or space heater (for cold climates)
- ● EC/TDS meter (to monitor nutrient strength)
- ● Notebook for tracking pH, nutrients, and growth progress
Step-by-step guide to setting up your indoor hydroponic vegetable garden
Here's how to launch a thriving hydroponic system that delivers fresh veggies year-round.
🪴 Step 1: Select and Assemble Your Hydroponic System
For this project, you'll need a 4-plant hydroponic kit with a reservoir, grow tray, and LED grow light. I recommend a deep water culture (DWC) system for beginners—it's simple yet effective for leafy greens and herbs. Start by filling the reservoir with 3 gallons of distilled water (tap water can contain harmful minerals). Add 1 teaspoon of hydroponic nutrient solution per gallon and stir until fully dissolved.
Place the grow tray on top of the reservoir, ensuring the net pots are securely seated. The water level should reach just below the plant stems—this prevents root rot while keeping roots submerged in oxygenated nutrient solution. I like to use a waterproof submersible pump to maintain circulation, which prevents stagnation and root suffocation. Run the pump for 10-15 minutes before adding plants to oxygenate the solution fully.
🌱 Step 2: Plant Your Vegetable Starters
Choose 4 fast-growing hydroponic varieties like lettuce, spinach, basil, or kale—these thrive in indoor conditions. Gently remove seedlings from their nursery pots and rinse the roots under lukewarm water to remove soil residue. This step is critical: any remaining soil can introduce pathogens or clog the net pots. Place each seedling into a net pot, ensuring the roots dangle into the nutrient solution but the stem stays above water.
Press the net pots firmly into the grow tray to stabilize them. You'll notice the roots begin to extend within 24-48 hours—this is a good sign they're absorbing nutrients. Avoid overcrowding; each plant should have at least 4 inches of space between neighbors. If using a clone collar, position it just above the waterline to protect young stems from rot.
☀️ Step 3: Position and Configure the Grow Light
Place your hydroponic setup 12-18 inches below a full-spectrum LED grow light (or under a south-facing window if natural light is strong). Most indoor veggies need 14-16 hours of light daily, so set a timer for automatic operation if your light doesn’t have built-in controls. I use a 24/7 timer for simplicity, but adjust to 12 hours of light during dormancy periods if growing seasonally.
Monitor leaf color closely: dark green leaves indicate proper light, while pale or yellowing means the light is too far away. If stems grow long and leggy, raise the light closer—4-6 inches above the plants—until they thicken and leaves darken. Avoid touching the leaves when adjusting the light; oils from your skin can harm delicate foliage.
💧 Step 4: Maintain Nutrient Levels and Water Quality
Check the nutrient solution every 3-4 days—evaporation and plant uptake reduce potency. Top off with distilled water to maintain the 3-gallon level, then add ½ teaspoon of nutrient solution per gallon to restore balance. Over time, the solution may develop cloudiness or algae, which signals contamination. In this case, drain and replace 50% of the solution with fresh, oxygenated water and nutrient mix.
Keep the reservoir covered to prevent debris and pests from entering. I use a fine mesh screen over the reservoir to block insects while allowing airflow. If white, fuzzy growth appears on the solution surface, it’s root rot or mold—immediately replace the solution and trim affected roots. Healthy roots should be white or light tan, not brown or slimy.
⏰ Step 5: Harvest and Prune for Continuous Growth
Leafy greens like lettuce and spinach are ready to harvest in 3-5 weeks, while herbs like basil take 4-6 weeks. Use clean scissors to snip leaves just above a node (the bump where leaves grow)—this encourages new growth. For cut-and-come-again harvests, trim outer leaves first, leaving the inner rosette intact. You’ll see regrowth within 5-7 days, signaling the plant is thriving.
Prune yellow or damaged leaves immediately to redirect energy to healthy growth. If your plants flower prematurely (common in low-light conditions), snip the flower buds—this keeps energy focused on leaf production. With proper care, a 4-plant system can yield 1-2 harvests per week, giving you fresh greens year-round without soil or sunlight.
Tips & tricks for perfect indoor hydroponic vegetable gardening
Here's what I've learned after setting up my own thriving indoor hydroponic garden—these details make all the difference.
Oxygenation is Key: That 10-15 minute pump run before adding plants isn't just about circulation—it's oxygenating the nutrient solution. Roots need oxygen as much as nutrients. I've found that adding a small air stone to the pump creates even finer bubbles, which dramatically improves root health. Without proper oxygenation, roots can suffocate even with perfect nutrient levels.
Light Distance Matters: When adjusting your 12-18 inch light position, think of it like Goldilocks—too far and your plants stretch leggy, too close and they burn. I recommend starting at 16 inches and making small adjustments. Use a ruler to measure precisely, and check leaf color daily: dark green means you're in the sweet spot, pale yellow means it's too far, and brown spots mean it's too close.
Nutrient Solution Refresh: The 3-4 day nutrient check is non-negotiable, but here's what I do when I notice cloudiness: I don't just replace 50% of the solution—I also add a pinch of hydrogen peroxide (just a few drops) to the fresh mix. This gives an extra boost of oxygen and helps prevent mold. Always stir thoroughly after adding nutrients to ensure even distribution throughout the 3 gallons.
Harvesting Technique: When harvesting your 3-5 week leafy greens, use a pair of sharp scissors and cut at a 45-degree angle just above the node. This exposes more surface area for new growth and prevents water from pooling in the cut. For basil, I find harvesting the outer leaves first encourages bushier growth—you'll get more leaves overall from each plant.
Pro Tips for Indoor Hydroponic Vegetable Gardening
- Here's what I've learned after setting up my own thriving indoor hydroponic garden—these details make all the difference.
- Oxygenation is Key: That 10-15 minute pump run before adding plants isn't just about circulation—it's oxygenating the nutrient solution.
- Light Distance Matters: When adjusting your 12-18 inch light position, think of it like Goldilocks—too far and your plants stretch leggy, too close and they burn.
Frequently asked questions
Got questions about indoor hydroponic vegetable gardening?
You’re not alone! Here are answers to the most common queries to help you grow fresh veggies year-round with confidence.
What vegetables grow best in indoor hydroponics?
Leafy greens like lettuce, spinach, and kale thrive in hydroponics, along with herbs (basil, mint) and compact veggies (cherry tomatoes, peppers). Avoid root crops (carrots, potatoes) or sprawling plants (cucumbers) unless you have vertical space. Start with beginner-friendly options!
How long does it take to harvest vegetables in a hydroponic system?
Harvest times vary by plant:
- Leafy greens: 3–6 weeks
- Herbs: 4–8 weeks
- Cherry tomatoes: 8–12 weeks
- Peppers: 10–14 weeks
Is hydroponic gardening cheaper than buying store-bought veggies?
Long-term, yes! While initial setup costs (~$50–$300) may seem high, hydroponics saves money by:
- Reducing water use (90% less than soil gardening)
- Eliminating pesticides (healthier, no residue)
- Year-round harvests (no seasonal price spikes)
What do I do if my hydroponic plants turn yellow or wilt?
Yellow leaves often signal nutrient deficiencies or overwatering. Wilting? Check these fixes:
- pH imbalance: Test water (ideal: 5.5–6.5). Adjust with pH up/down solutions.
- Nutrient lockout: Flush the system with plain water and reapply fertilizer.
- Root issues: Ensure roots aren’t flooded (hydroponics needs oxygen!).
Can I switch from hydroponics to soil gardening later?
Hydroponics teaches you plant care fundamentals (light, nutrients, humidity) that translate to soil gardening. Transition by:
- Gradually hardening off plants (acclimate to outdoor conditions).
- Using hydroponic knowledge to boost soil health (e.g., balanced fertilizers).
Wrapping up and next steps
Indoor hydroponic vegetable gardening isn’t just a trend—it’s a game-changer for fresh, homegrown produce anytime, anywhere. 🌱 With minimal space and no sunlight needed, you can grow nutrient-packed greens, herbs, and veggies while saving money and reducing waste.
Whether you’re a beginner or a seasoned gardener, this method makes year-round harvesting effortless and rewarding.
Ready to dive in? Start small—pick one easy plant like lettuce or basil—and let your green thumb shine! Your future self (and taste buds) will thank you. 😊