
Tools
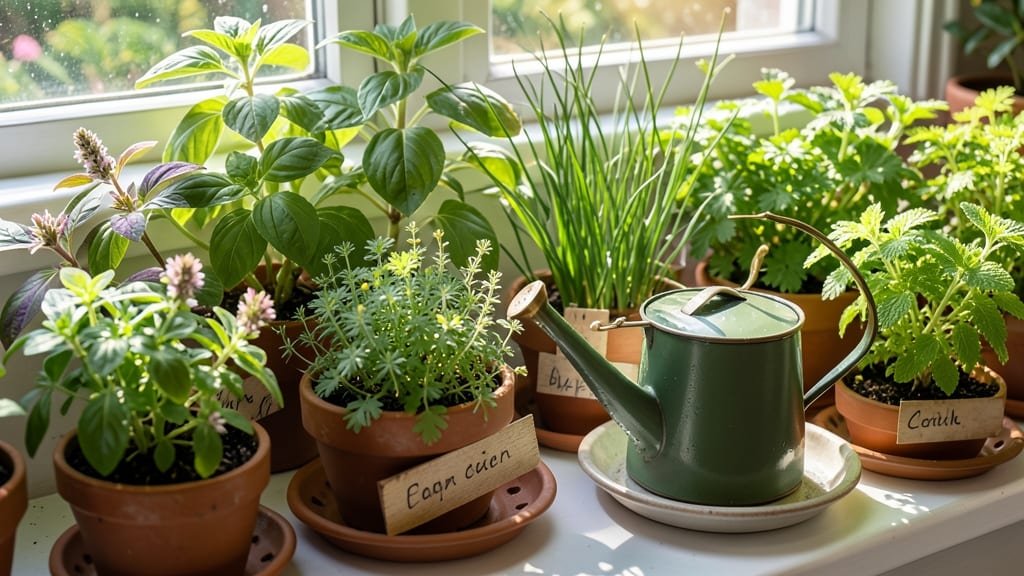
Your indoor herb garden on the windowsill can become a fresh, fragrant oasis that outshines store-bought bundles—no greenhouse or perfect sunlight required. 🌿 I’ve turned my tiny kitchen ledge into a thriving basil, thyme, and parsley factory using just a few simple tricks, and you can too, even in apartments with limited light.
The secret starts with the right herbs: basil, parsley, chives, and mint thrive in indirect light, while cilantro and dill tolerate slightly brighter spots. Pair them with 4-6 inch pots (one herb per container) and drainage holes—skipping this step is how I killed my first batch.
A south- or west-facing window gives the best results, but even east-facing spots work with a grow light on a timer for 6-8 hours daily.
Within 3-4 weeks, you’ll snip fresh basil for pesto or parsley for garnishes straight from your windowsill. The plants stay compact, the smell fills your kitchen with earthy fragrance, and you’ll never buy wilted herbs again.
Plus, the setup costs under $20 for pots, soil, and seeds—far cheaper than weekly grocery trips.
This works for any windowsill, from cozy kitchens to dorm rooms. The key is consistency: water when the top inch of soil feels dry, rotate pots weekly for even growth, and prune regularly to encourage bushiness.
Even my first attempt—with overwatered cilantro and a sunburned basil—ended up edible. Let’s get growing!
📚 In This Guide
- What you need
- Instructions
- Tips and common mistakes
- Wrapping up and next steps
What you need
- ● Herb seeds or seedlings: Choose fast-growing varieties like basil, mint, parsley, or chives (3–5 plants).
- ● Containers: Small pots (4–6 inches deep) with drainage holes (3–5 pots, one per herb).
- ● Potting mix: Lightweight, well-draining soil blend (1–2 bags, depending on container size).
- ● Drainage trays or saucers: To catch excess water (1 per pot or a shared tray).
- ● Spray bottle: For gentle watering (8–16 oz).
- ● Measuring cup or spoon: To ensure proper watering (1–2 tbsp per container).
- ○ Fertilizer (optional): Balanced liquid fertilizer (e.g., 10-10-10) or organic compost tea.
- ○ Grow lights (optional): LED bulb (6000K–6500K) for 6–8 hours/day if natural light is limited.
- ○ Humidity dome (optional): Clear plastic wrap or a propagation lid to retain moisture.
- ● A sunny windowsill (south- or west-facing) with 4–6 hours of indirect light daily.
- ● Patience! Herbs like basil thrive in 2–4 weeks; slower growers (e.g., rosemary) may take longer.
Step-by-step instructions for building your windowsill herb garden
Here's how to create a thriving indoor herb garden that actually grows—no wilting, no leggy stems, just fresh herbs year-round.
🪴 Step 1: Choose and Prepare Your Containers
Start with 4 small pots (4-6 inches wide) that have drainage holes—herbs hate soggy roots. I like terracotta because it breathes, but plastic works too if you add a layer of pebbles at the bottom. Fill each pot with 2-3 inches of well-draining potting mix (never garden soil—it compacts and suffocates roots). Press the mix down gently until it's firm but not packed.
Here's the thing—most people skip the drainage layer, and that's how you end up with root rot. If your pots don't have holes, drill a few yourself. Trust me, your herbs will thank you when you see them thriving instead of wilting.
🌱 Step 2: Select and Plant Your Herbs
For a windowsill garden, choose fast-growing, compact herbs like basil, parsley, chives, or thyme. Plant 1-2 seeds per pot (or a single small transplant) about ¼ inch deep—too deep and they'll struggle to emerge. Cover lightly with soil, then water gently until the surface feels damp but not soaked.
I always label my pots right away because after a week, identical green sprouts start looking identical. Use toothpicks and a marker—it's foolproof. If you're planting from seed, expect germination in 7-14 days depending on the herb and your home's warmth.
☀️ Step 3: Position for Maximum Light
Herbs need 6+ hours of bright light daily, so place your pots on the south-facing windowsill (or west-facing if south isn't an option). If your window is shady, supplement with a grow light kept 4-6 inches above the plants for 12-14 hours a day. You'll see leggy, pale stems if they're stretching toward light—that's your cue to move them closer.
Rotate the pots a quarter turn every few days so they grow evenly. I know it seems like extra work, but uneven growth is a dead giveaway that your plants aren't getting enough light. A little rotation now saves you from lopsided herbs later.
💧 Step 4: Water and Maintain for Healthy Growth
Water when the top inch of soil feels dry—stick your finger in to check. Overwatering is the #1 killer of indoor herbs, so let the soil dry slightly between waterings. When you water, do it at the base, not from above, to avoid fungal diseases. You'll know you're doing it right when the soil stays evenly moist but never soggy.
Fertilize lightly every 4-6 weeks with a balanced liquid fertilizer (half-strength). I swear by a simple mix of water and a pinch of fish emulsion—it's organic and works wonders. Watch for yellowing leaves; that's usually a sign of overwatering or nutrient deficiency. Adjust your care and you'll see fresh, vibrant growth within a week.
✂️ Step 5: Harvest and Encourage Regrowth
Start harvesting once you see 3-4 sets of leaves—this encourages bushier growth. Snip just above a leaf node (the point where leaves meet the stem) with clean scissors. Regular harvesting prevents herbs from flowering too soon, which ruins their flavor. You'll notice basil, for example, tastes sweeter when you harvest it consistently.
Don't harvest more than ⅓ of the plant at once, or you'll shock it. I like to harvest in the morning when oils are at their peak. Store fresh clippings in a jar of water on the counter—it keeps them crisp for days, just like fresh-cut flowers.
Tips & tricks for perfect indoor herb garden windowsill
Took me a while to figure these out, so here goes—these tricks will help your windowsill herbs thrive without the guesswork.
Container Selection: Terracotta pots are ideal because they wick away excess moisture, but if you use plastic, add a ½-inch layer of pebbles at the bottom before the soil. This mimics natural drainage and prevents the dreaded root rot that kills so many indoor gardens. I’ve lost count of how many herbs I’ve saved by adding this simple layer—it’s a game-changer for moisture control.
Lighting Strategy: If your south-facing window isn’t an option, a simple LED grow light on a timer (set for the 12-14 hours mentioned in Step 3) works wonders. Position it 4-6 inches above the plants and adjust the height as they grow. I’ve seen herbs stretch toward light and turn leggy, but with consistent artificial light, they grow just as robustly as those in sunny spots.
Soil Quality Matters: Skip the garden soil—it’s too dense and can suffocate roots. Use a well-draining potting mix specifically formulated for herbs or vegetables. I like to add a handful of perlite or vermiculite to the 2-3 inches of soil in each pot to improve aeration. This small tweak keeps roots happy and prevents waterlogging, which is especially critical for herbs that hate soggy feet.
Harvesting Hack: When harvesting, always snip just above a leaf node—this is where new growth emerges. I’ve found that harvesting in the morning gives you the most flavorful leaves because the essential oils are at their peak. Plus, storing fresh clippings in a jar of water on the counter mimics how florists keep cut flowers fresh, and it works just as well for herbs.
Pro Tips for Indoor Herb Garden Windowsill
- Took me a while to figure these out, so here goes—these tricks will help your windowsill herbs thrive without the gue...
- Container Selection: Terracotta pots are ideal because they wick away excess moisture, but if you use plastic, add a ...
- Lighting Strategy: If your south-facing window isn’t an option, a simple LED grow light on a timer (set for the 12-14...
Frequently asked questions
Got questions about growing herbs on your windowsill? You’re not alone—here are some of the most common ones, answered for quick, stress-free gardening!
What’s the easiest herb to grow on a windowsill?
Start with basil, parsley, or mint—they’re forgiving, fast-growing, and thrive in indirect light. Avoid fussy herbs like dill (needs lots of sun) or cilantro (bolts quickly). For beginners, basil is your best bet: it grows in 4–6 weeks and loves humidity!
How long does it take for windowsill herbs to be harvest-ready?
Most herbs like basil, chives, or thyme sprout leaves in 2–4 weeks, while heartier plants (e.g., rosemary) take 6–8 weeks. Snip outer leaves regularly to encourage bushier growth—just avoid cutting more than 1/3 of the plant at once!
Can I use fluorescent or LED lights instead of natural sunlight?
A grow light (or even a bright full-spectrum LED bulb) works wonders for 12–16 hours/day. Place it 6–12 inches above your herbs—too close = leggy plants; too far = weak growth. Pro tip: Rotate pots weekly for even light exposure.
Why are my herbs turning yellow or wilted?
Yellow leaves? Likely overwatering (check soil moisture—it should dry slightly between waterings). Wilting? Could be underwatering, low humidity, or root rot. Fix it by:
- Watering at the base (not leaves) to prevent fungus.
- Misting herbs daily or placing a tray of water nearby for humidity.
- Ensuring pots have drainage holes to avoid soggy roots.
What’s the best soil for windowsill herbs?
Use a lightweight, well-draining potting mix (avoid garden soil—it compacts). Add perlite or sand (20% mix) to improve airflow. For containers, coconut coir or peat-based mixes work great. Bonus: Repot every 6–12 months to refresh nutrients!
Wrapping up and next steps
Starting an indoor herb garden on your windowsill is easier than you think—and the rewards are fresh, flavorful, and endlessly satisfying! 🌿 With just a few supplies, a little sunlight, and consistent care, you’ll enjoy homegrown herbs year-round, saving money and elevating your meals.
Whether you’re a beginner or a seasoned gardener, this project is a small step toward a greener, healthier lifestyle.
Ready to dive in? Start with one herb—like basil or mint—and let your green thumb grow! Once you’ve mastered the basics, expand your collection or even share cuttings with friends. Happy gardening! 🌱