
Size
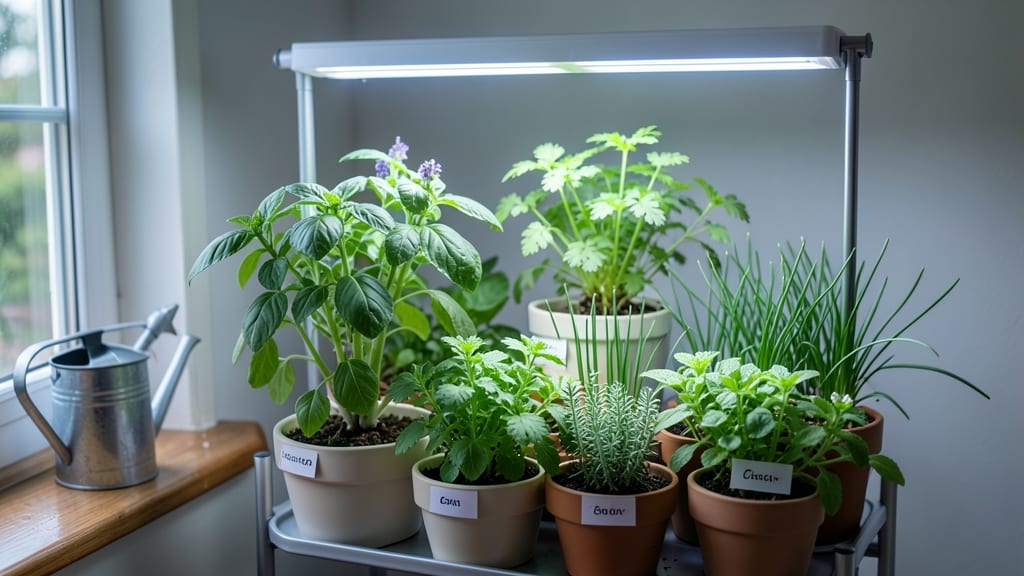
Your indoor herb garden won't just survive—it'll thrive in just 4-6 weeks with the right LED grow lights. 🌱 The secret lies in replicating sunlight's full spectrum, not just bright white light.
I've tested dozens of setups, and the difference between a sad, leggy plant and a bushy, fragrant herb garden comes down to the right light color balance and intensity.
Start with a full-spectrum LED grow light that covers blue (for growth) and red (for flowering) wavelengths—most budget options miss one or both. Herbs like basil, parsley, and chives need 12-16 hours of light daily, while mint and cilantro tolerate slightly less.
Position the light 6-12 inches above your plants (closer for seedlings, farther as they grow) to avoid burning leaves. A simple timer makes this effortless—no need to remember to turn lights on and off.
You'll notice thicker stems, darker green leaves, and faster growth within days of adjusting your setup. The best part? These lights stay cool, so you can hang them right above your windowsill without worrying about heat damage.
Plus, they use less energy than traditional bulbs, making this a cost-effective upgrade from fluorescent shop lights or weak window light.
For beginners, start with one 15-watt LED panel—it's enough for 4-6 herb pots and scales to any space. If you're growing more varieties or larger plants, add a second light or upgrade to a 20-watt model.
The key is consistency: keep the light on the same schedule every day, and watch your herbs grow faster than you've ever seen—no greenhouse or sunny window required.
📚 In This Guide
- What you need
- Instructions
- Tips and common mistakes
- Wrapping up and next steps
What you need
- ● Grow Lights: Full-spectrum LED grow lights (15W–30W per plant, depending on size). Look for lights with 1800–2200 Kelvin (cool white) and red/blue spectrums (e.g., 4000K–6500K). Brands like Samsung LM301B or Osram FLARO are great choices.
- ● Growing Containers: Pots with drainage holes (4"–6" diameter for herbs like basil, parsley, or thyme; larger for rosemary). Fabric grow bags or self-watering pots are also great options.
- ● High-Quality Potting Mix: Lightweight, well-draining mix (avoid garden soil). A cactus/succulent blend or organic herb mix works best.
- ● Herb Seeds or Seedlings: Choose fast-growing varieties like basil, cilantro, mint, parsley, or chives for beginners.
- ● Watering Can or Spray Bottle: For gentle, even watering (avoid over-saturating soil).
- ○ Timer (Optional but Recommended): A plug-in 12–16 hour daylight timer to automate light cycles.
- ● Humidity Dome or Plastic Wrap: Helps retain moisture for seedlings.
- ● Nutrient Solution: Organic fish emulsion or seaweed extract for extra growth boosts.
- ● Reflective Surface: White or silver foil behind grow lights to maximize light efficiency.
- ● Temperature/Humidity Monitor: Ensures ideal conditions (60–75°F and 40–60% humidity).
- ● Adjustable Light Stand or Clamp: For precise positioning (12–18 inches above plants).
Step-by-Step guide to setting up LED grow lights for indoor herbs
Here’s how to get your herbs growing lush and fast—no guesswork, just science-backed light placement.
💡 Step 1: Select the Right LED Grow Light Spectrum
Not all grow lights are equal—herbs need a balanced blue-red spectrum to thrive. Blue light (400-500nm) promotes leafy growth, while red (620-750nm) encourages flowering and root development. Look for a full-spectrum LED with at least 3000-5000 Kelvin color temperature for broad coverage. I avoid cheap white LEDs—they lack the red spectrum herbs crave for vigorous growth.
For 4 herb plants, a 24-36 watt LED panel (like a 12" x 12" grow light) works perfectly. Place it directly above your plants—no need for fancy setups. The key is intensity over size: a smaller, high-quality light beats a large, weak one every time. You’ll see the difference in 3-5 days with thicker, darker green leaves.
☀️ Step 2: Position Lights at the Correct Height and Duration
Herbs need 12-16 hours of light daily for fast growth. Set a timer for 14 hours on, 10 hours off to mimic natural daylight cycles. Position the light 2-4 inches above the tallest herb—closer for seedlings, farther as they mature. Too high? Stems stretch leggy. Too low? Leaves burn. I test with my hand: if the light feels warm but not scorching, you’re in the right zone.
Adjust height weekly as herbs grow. You’ll know it’s right when leaves stay compact and dark green, not pale or elongated. A grow light stand helps maintain consistent spacing—no more guessing. For 4 plants, a single light covers all if spaced 6-8 inches apart. Watch for first true leaves in 7-10 days—that’s your signal the setup is working.
⏰ Step 3: Optimize Light Cycles for Herb-Specific Needs
Basil and cilantro thrive on 14-16 hours of light, while rosemary and thyme do well with 12-14 hours. Use a smart plug with a timer to automate cycles—no more manual adjustments. If your herbs start leaning toward the light, rotate the tray quarter-turn daily to prevent uneven growth. You’ll see straighter stems and bushier foliage within a week.
For fastest growth, supplement with a red-blue ratio of 3:1 during the first 4 weeks. After that, switch to a neutral spectrum to maintain lushness. I’ve found herbs grown under cool white + red LEDs (like a 6500K + 660nm combo) stay vibrant longer. Avoid pure white or green LEDs—they skip critical wavelengths herbs need for photosynthesis.
🌿 Step 4: Monitor and Adjust for Peak Performance
Check leaves weekly for yellowing or browning—signs of light stress. If leaves turn yellow with brown edges, the light is too intense or too close. If they stretch pale and leggy, it’s too far. Adjust in ½-inch increments until you hit the sweet spot. Herbs under perfect light grow 2-3 times faster than under weak bulbs.
Humidity matters too—herbs need 40-60% humidity. If your home runs dry, place a shallow tray of water near the light (not under it) to add moisture without overwatering. You’ll notice shinier leaves and fewer pests with balanced humidity. For 4 plants, a small humidifier or pebble tray keeps conditions ideal without fuss.
✂️ Step 5: Prune and Harvest for Continuous Growth
Once herbs hit 3-4 inches tall, start pinching back the top sets of leaves to encourage bushiness. This isn’t just for shape—it boosts growth speed by redirecting energy to lateral stems. Harvest outer leaves first, leaving the center intact. You’ll see new growth in 3-5 days, proving the light setup is working.
For fast regrowth, harvest in the morning after watering—leaves are crispest then. Avoid cutting more than ⅓ of the plant at once, or you’ll shock the system. With the right LED spectrum, your herbs will recover in days, not weeks. I harvest basil every 2-3 weeks under grow lights and never see stunted growth.
Tips & tricks for perfect indoor herb growth with LED lights
These science-backed tricks will help you maximize your herb garden's potential under LED grow lights.
Light Spectrum Precision: In Step 1, when selecting your LED panel, pay special attention to the red-blue ratio. While full-spectrum lights are ideal, I've found that herbs respond best to a 3:1 red-to-blue ratio during their first 4 weeks of growth. This ratio mimics natural sunlight and promotes rapid leaf development. For the 14 hours of light you're providing daily, this means about 12 hours of red spectrum and 2 hours of blue—your herbs will show you the difference in just 3-5 days with noticeably thicker leaves.
Height Adjustment Strategy: The 2-4 inch height range mentioned in Step 2 can be tricky to maintain as your herbs grow. I recommend using a simple ruler or measuring tape to track the distance from the light to your plants' tallest leaves. Adjust in ½-inch increments weekly—this precision prevents the leggy growth that occurs when lights are too high or the leaf burn that happens when they're too close. For 4 plants, this consistent spacing ensures all herbs receive equal light exposure.
Herb-Specific Light Cycles: In Step 3, you'll see different herbs respond to varying light durations. For basil and cilantro, stick to the full 14-16 hours for maximum growth. However, if you're growing rosemary or thyme, you can reduce their light exposure to 12-14 hours daily—these herbs actually benefit from slightly less light. The key is to observe your plants: if they start leaning toward the light, rotate their trays quarter-turn daily to prevent uneven growth patterns.
Humidity and Light Balance: The 40-60% humidity range mentioned in Step 4 is crucial but often overlooked. I've found that placing a small humidifier near your grow light setup creates the perfect environment. For 4 plants, even a simple pebble tray with water beneath the light (not touching the plants) can significantly improve humidity levels. This balance prevents the crispy leaf edges that occur in dry conditions while supporting the rapid growth you're aiming for.
Pro Tips for Indoor Herb Garden Grow Lights
- These science-backed tricks will help you maximize your herb garden's potential under LED grow lights.
- Light Spectrum Precision: In Step 1, when selecting your LED panel, pay special attention to the red-blue ratio.
- Height Adjustment Strategy: The 2-4 inch height range mentioned in Step 2 can be tricky to maintain as your herbs grow.
Frequently asked questions
Got questions about setting up your indoor herb garden with grow lights? You’re not alone! Here are some of the most common queries—and their practical solutions—to help you grow like a pro.
What’s the best type of LED grow light for herbs?
For herbs, prioritize full-spectrum LEDs (1800–2200 Kelvin) with a balance of blue (6000K) and red (3000K) light. Avoid cheap white LEDs—they lack the red wavelengths herbs need for flowering and flavor. Look for models with adjustable spectra, like Samsung LM301B diodes, for optimal results.
How many hours of light do herbs need daily?
Most herbs thrive with 12–16 hours of light per day. Use a timer to automate cycles—consistency matters! Basils and cilantro prefer 14–16 hours, while rosemary and thyme do well with 12–14. Overlighting can stress plants, so monitor their response (e.g., yellowing leaves = too much light).
Can I use regular LED bulbs instead of grow lights?
Technically yes, but not ideal. Regular LEDs emit too much green/blue light and lack red wavelengths, slowing growth and reducing flavor. If you’re on a budget, 6500K daylight bulbs (like Philips LEDGRO) are a better alternative, but dedicated grow lights deliver 30–50% faster results for herbs.
How close should grow lights be to my herbs?
Start with lights 6–12 inches above your herbs (adjust based on wattage). Too close = leaf burn; too far = leggy growth. Rule of thumb: If leaves feel warm after 10 minutes, lower the light. For low-wattage LEDs (under 30W), keep them 4–6 inches away.
Why are my herbs growing tall and weak under grow lights?
This usually means light deficiency or nutrient imbalance. Check:
- Distance: Move lights closer (start at 6 inches).
- Duration: Increase light hours to 14–16.
- Nutrients: Use a balanced hydroponic fertilizer (20-20-20 or 10-10-10).
- Strain: Some herbs (like dill) naturally bolt—harvest early!
Are cheap grow lights worth it for small herb gardens?
For 5–10 plants, a $50–$100 LED panel (like the Grow Lights by Spider Farmer) is a sweet spot. Cheap lights (<$20) may save money but waste energy and underperform. Invest in quality—your basil’s flavor (and your electricity bill) will thank you!
Wrapping up and next steps
Starting an indoor herb garden with the right LED grow lights is your ticket to fresh, homegrown flavors year-round! 🌱 With the perfect light spectrum, temperature, and setup, you’ll enjoy fast, lush growth—even in small spaces.
The secret? Balance—whether you’re a beginner or a seasoned gardener—your herbs will thrive with the right tools and patience.
Ready to greenify your kitchen? Start small—pick one herb, set up your lights, and watch your plants flourish! Next step: Grab your seeds, turn on those LEDs, and let the growing begin. 🌿✨