
Orchid Care
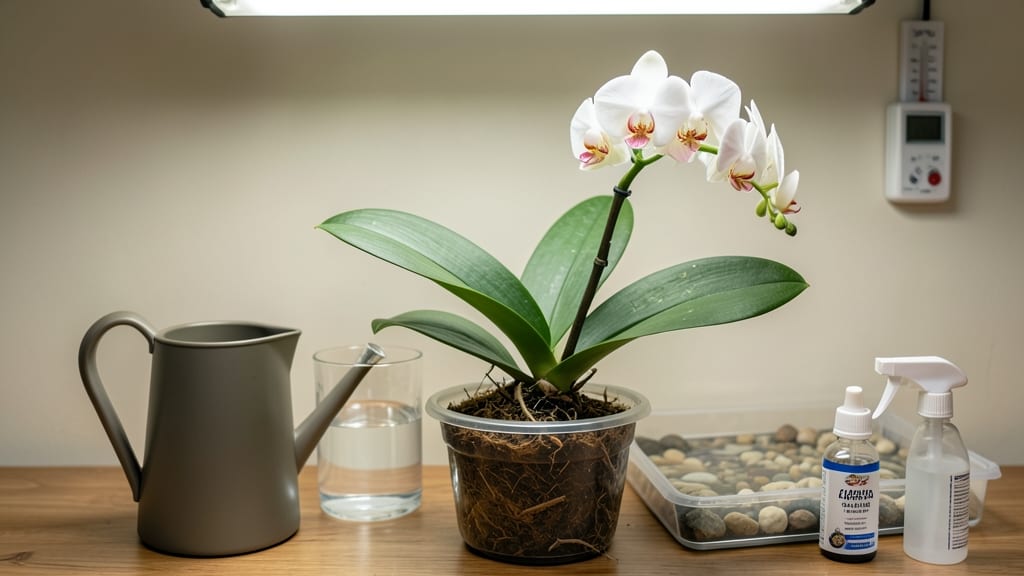
Keeping indoor orchids alive isn’t about luck—it’s about understanding their secrets. 🌸 I’ve nursed back more orchids than I’d like to admit, and the key isn’t complicated: it’s matching their tropical needs to your home environment.
Too much water? They rot. Too little light? They sulk. But get it right, and you’ll have blooms lasting months instead of weeks.
The biggest mistake beginners make is treating orchids like other houseplants. They need bright, indirect light—think east-facing windows or a grow light for 12-14 hours a day. Water only when the roots turn silvery-gray, and use room-temperature water to avoid shocking them.
Most importantly, never let them sit in soggy pots; orchids hate wet feet.
With the right care, your orchids will reward you with vibrant blooms and glossy leaves year-round. The first sign of success? New growth spikes appearing in spring, followed by flower buds forming within weeks. It’s a slow process, but the payoff—those stunning, long-lasting blooms—makes it worth every effort.
Works for Phalaenopsis, Dendrobium, and Cattleya orchids alike, whether you’re dealing with a single plant or a full collection. Here’s how to keep them thriving without the guesswork.
📚 In This Guide
- What you need
- Instructions
- Tips and common mistakes
- Wrapping up and next steps
What you need
- ○ Orchid Pot: A well-draining pot with air holes (plastic or clay, 4-6 inches in diameter). Optional: Slotted pots for better airflow.
- ● Orchid Potting Mix: A chunky, bark-based mix (avoid regular soil!). Brands like Sun Bulb or Sunshine Mix work great.
- ● Watering Can or Spray Bottle: A gentle spray or can with a narrow spout to avoid overwatering.
- ● Humidity Tray or Peat Moss: To maintain 50-70% humidity (especially in dry climates).
- ○ Fertilizer: A balanced orchid fertilizer (20-20-20 or 10-10-10, diluted to half-strength). Optional: Slow-release granules.
- ● Grow Lights (if needed): A full-spectrum LED grow light (12-14 hours/day) for low-light areas.
- ● Pruning Shears or Scissors: Sterilized for trimming dead roots or spikes.
- ● Thermometer & Hygrometer: To monitor temperature (60-80°F) and humidity.
- ● Orchid stake or support for tall varieties.
- ● Antifungal spray (like neem oil) for pest prevention.
- ● Decorative moss or sphagnum for aesthetic + moisture retention.
- ● Automatic mister for consistent humidity.
Step-by-Step guide to keeping indoor orchids thriving
Orchids aren't finicky—they just need the right care routine. Here's how I've kept mine blooming for years.
💧 Step 1: Master the Watering Schedule
Water your orchid only when the top inch of the potting mix feels completely dry. I stick my finger in the pot—if it comes out clean, it's time. Overwatering is the #1 killer, so I always check before adding more moisture. Use room-temperature water to avoid shocking the roots.
When watering, pour until water runs freely from the bottom of the pot. Let it drain completely—orchids hate soggy roots. I empty the saucer after 10 minutes to prevent root rot. In winter, watering may drop to once every 10-14 days, while summer can require weekly watering depending on your home's humidity.
☀️ Step 2: Position for Perfect Light Exposure
Place your orchid near an east-facing window for gentle morning light, or a north-facing window for indirect light all day. Direct midday sun will scorch leaves, so avoid south or west exposures unless you use sheer curtains to diffuse the light.
You'll know the light is right when the leaves stay a vibrant green—not yellowing or developing brown spots. If the leaves turn yellow, it's too much sun. If they stretch pale and leggy, move the plant closer to the light source. A simple trick: rotate the pot a quarter turn weekly so all sides get even exposure.
🪴 Step 3: Maintain Proper Humidity and Airflow
Orchids thrive in humidity levels between 40-70%. If your home runs dry, set the pot on a tray filled with pebbles and water—just make sure the pot sits above the waterline. I also mist my orchids lightly every few days, especially in winter when indoor air gets dry.
Good airflow prevents fungal issues, but avoid placing orchids near vents or drafty windows. A small fan on low speed near the plant (but not directly blowing) helps mimic their natural tropical environment. You'll notice healthier growth when new leaves emerge plump and firm rather than wrinkled or mushy.
✂️ Step 4: Fertilize and Prune for Continued Blooms
Feed your orchid with a balanced, water-soluble fertilizer diluted to half strength every 2-4 weeks during active growth (spring and summer). I switch to a low-nitrogen formula when buds appear to encourage more blooms. Always water the plant before fertilizing to prevent root burn.
After flowering, cut the bloom spike down to just above a node if it's completely brown, or leave it if it's still green—new blooms may grow from the nodes. Remove any yellow or dead leaves with clean scissors to redirect the plant's energy to new growth. You'll see fresh shoots emerge from the base within a few weeks if everything's balanced.
🌱 Step 5: Repot Every 1-2 Years
Repot your orchid when the potting mix breaks down or roots start growing out of the pot. I choose a container just slightly larger than the current one—orchids prefer being slightly root-bound. Use a specialized orchid mix with bark and moss for proper drainage and aeration.
Gently remove the plant, loosen the old potting mix from the roots, and trim any mushy or dark roots with sterilized scissors. Place the orchid in the new pot and fill with fresh mix, securing it so it doesn't wobble. The first watering after repotting should be light to help the roots adjust to their new home.
Tips & tricks for perfect indoor orchid care
Keeping orchids alive isn't rocket science—it's about consistency and paying attention to their subtle cues. Here's what I've learned after years of growing these stunning plants.
Watering Wisdom: The 10-minute drainage rule in Step 1 is crucial—set a timer when you water to ensure complete drainage. I've seen orchids suffer from root rot simply because people forget to empty the saucer. Also, use a clear pot occasionally to peek at the roots: healthy roots should be green or silvery, while rotten ones turn brown and mushy. This visual check helps you adjust your watering schedule before problems start.
Light Exposure Secrets: In Step 2, I notice people often overcorrect when their orchids get too much sun. If you see brown spots on leaves, move the plant immediately—those spots won't heal. For indoor growers without ideal windows, a simple grow light on a timer (12-14 hours daily) works wonders. Place it about 6-12 inches above the plant and adjust based on leaf color. The goal is to mimic that gentle morning light from an east-facing window.
Humidity Hacks: The 40-70% humidity range mentioned in Step 3 can be tricky in dry climates. My go-to trick is grouping orchids together on a humidity tray with pebbles and water—this creates a microclimate. For extra insurance, especially in winter, I run a small humidifier nearby. You'll know it's working when new leaves emerge firm rather than wrinkled. Avoid placing orchids near heating vents, even if they're in humid climates—the dry heat can cause more harm than good.
Fertilizing Finesse: When it comes to the 2-4 week feeding schedule in Step 4, I've found that less is often more. Always dilute that fertilizer to half strength—concentrated formulas can burn delicate orchid roots. I also switch to a quarter-strength solution when buds appear, as the low-nitrogen formula helps prolong blooming. And remember: always water first! Fertilizer burns are irreversible, and they'll show up as brown tips on leaves within weeks.
Pro Tips for Keep Indoor Orchids Alive
- Keeping orchids alive isn't rocket science—it's about consistency and paying attention to their subtle cues.
- Watering Wisdom: The 10-minute drainage rule in Step 1 is crucial—set a timer when you water to ensure complete drainage.
- Light Exposure Secrets: In Step 2, I notice people often overcorrect when their orchids get too much sun.
Frequently asked questions
How often should I water my indoor orchids?
Water your orchids every 7–10 days, but never let them sit in soggy soil. The key is bottom-watering: place the pot in a tray of water for 10–15 minutes, then drain excess. Adjust frequency based on humidity—drier air means more frequent watering. Overwatering kills orchids faster than underwatering!
Why are my orchid leaves turning yellow?
Yellow leaves usually signal overwatering or root rot. Check the roots: healthy ones are green or silver; mushy, black roots mean trouble. Trim the bad ones with sterilized scissors, repot in fresh bark mix, and reduce watering. Brown tips? That’s often dry air—try a humidity tray or pebble tray!
Can I use tap water for my orchids?
Tap water can work, but chlorine and fluoride may harm orchids. If your water is hard or treated, use filtered, rainwater, or distilled water instead. Let tap water sit out for 24 hours to off-gas chlorine, or use a dechlorinator if you’re in a hurry. Orchids are divas—they deserve the best!
How do I get my orchid to rebloom?
Reblooming takes patience! After flowers fade, wait 2–3 months before fertilizing lightly (use a balanced 20-20-20 or orchid-specific formula). Provide 12+ hours of bright, indirect light and maintain temps between 60–80°F. A cool night (55–60°F) for 2–3 weeks can trigger blooming. Bonus: Rotate the pot weekly for even light exposure!
What should I do if pests attack my orchids?
Spot aphids, mealybugs, or scale? Act fast! Wipe leaves with a soapy water (1 tsp mild soap per quart) or use neem oil spray. For stubborn infestations, isolate the plant and treat with insecticidal soap. Prevent pests by keeping humidity moderate (40–70%) and avoiding overcrowded displays.
Pro Tip:
Orchids love circulation—place a small fan nearby (on low!) to mimic their tropical habitat. Just avoid direct drafts from AC/heaters. A gentle breeze = happier orchids!
Wrapping up and next steps
Keeping your indoor orchids alive is all about patience, observation, and love—they thrive when you mimic their natural habitat with the right balance of light, water, and care. Remember, every orchid is unique, so don’t be afraid to experiment and adjust based on what works best for your plant.
With these secrets, your orchids will reward you with vibrant blooms and lush foliage year-round! 🌸
Ready to take the next step? Start by noticing small changes in your orchid’s leaves or roots—this is how you’ll learn its language. Then, share your progress with fellow plant lovers or explore more advanced care tips to keep the magic going!