
Propagation
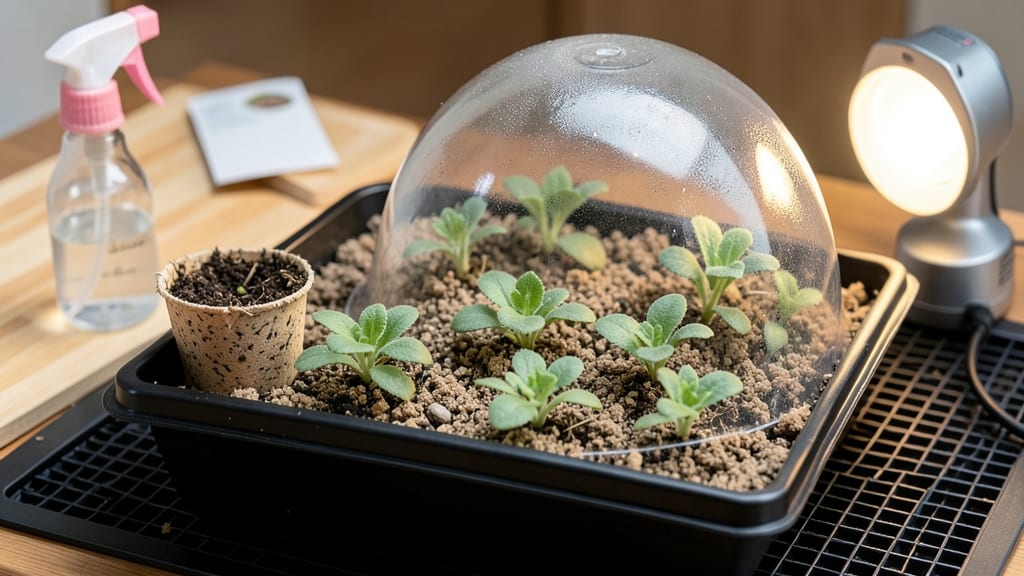
Growing forget-me-nots from seed indoors rewards you with delicate blue blooms that look like tiny sky drops on stems. 💙 The secret to fast germination lies in warmth and humidity—two things you can easily create with household supplies.
I’ve struggled with slow-starting forget-me-nots before, but once I cracked the code, my seedlings popped up in just 10 days instead of weeks. These tiny seeds need a cozy, moist environment to wake up.
A clear plastic dome or even a sealed plastic bag over your container creates the perfect greenhouse effect. Keep the soil consistently damp (not soggy) and warm—aim for 70-75°F—using a seedling heat mat if your home runs cooler.
Forget-me-nots are finicky about light too; they’ll stretch like overgrown noodles if they don’t get enough, but direct sun can scorch them. By the time you’re ready to transplant, you’ll have sturdy seedlings with true leaves (not just the first two seed leaves).
The real magic happens when they bloom—those sky-blue clusters will make your garden look like a storybook illustration. Just be patient; forget-me-nots take their time but pay off with months of color. Works for windowsills, grow lights, or even a sunny kitchen counter.
Here’s how to set it up without the guesswork!
📚 In This Guide
- What you need
- Instructions
- Tips and common mistakes
- Wrapping up and next steps
What you need
- ● Forget-me-not seeds: 1 packet (typically contains 50–100 seeds). Choose Myosotis varieties like ‘Blue Ball’ or ‘Victoria’ for vibrant blooms.
- ○ Seed-starting trays or small pots: 4–6 (2–3 inches deep) with drainage holes. Biodegradable peat pots are optional but handy for transplanting.
- ● Seed-starting mix: 2–3 cups of sterile, well-draining potting soil (avoid garden soil—it’s too dense!).
- ● Plastic wrap or humidity dome: To retain moisture and warmth during germination.
- ● Spray bottle: For gentle watering (avoid over-saturating seeds).
- ● Grow lights or sunny windowsill: Forget-me-nots need 12–14 hours of light daily. A LED grow light (12–15 watts) works well if natural light is limited.
- ○ Heat mat (optional but helpful): A small seedling heat mat (50–70°F range) speeds up germination by keeping soil warm.
- ● Fertilizer: A balanced, water-soluble fertilizer (5-10-5 or 10-10-10) diluted to half-strength for seedlings.
- ● Tweezers or toothpick: For carefully placing tiny seeds.
- ○ Misting sprayer (optional): Keeps humidity high without drowning seeds.
- ● Label markers: To track seed varieties and planting dates.
- ○ Small fan (optional): For gentle airflow to prevent damping-off disease.
Step-by-Step instructions for growing forget-me-nots indoors
Here's how to coax these delicate blooms from seed using warmth, patience, and the right moisture balance.
🌱 Step 1: Prepare Seed Trays and Mix for Fast Germination
Fill your seed trays with a sterile seed-starting mix—never garden soil, as it's too dense and may harbor fungal spores. Forget-me-not seeds are tiny, so I use 2-inch deep trays to prevent overcrowding later. Moisten the mix until it's damp like a wrung-out sponge, but not soggy. Press it down gently with your fingers to create a firm, even surface—this prevents seeds from sinking too deep during planting.
Forget-me-nots thrive with consistent warmth during germination. Place the trays on a seedling heat mat set to 65-70°F—this is critical because cold soil delays germination by weeks. If you don't have a heat mat, place the trays on top of your refrigerator (the warm coils underneath work surprisingly well). The goal is to mimic their natural woodland habitat where soil stays warm and moist year-round.
💧 Step 2: Sow Seeds and Maintain Ideal Humidity
Scatter the forget-me-not seeds sparingly—they're microscopic, so I use a toothpick to space them about ¼ inch apart. Forget-me-nots self-seed aggressively outdoors, but indoors, you'll want to thin them later. Gently press the seeds into the surface (don't cover them with soil—they need light to germinate). Mist the tray with a spray bottle until the soil looks uniformly damp but not wet.
Cover the tray with clear plastic wrap or a humidity dome to trap warmth and moisture. Forget-me-nots germinate best in 80-90% humidity, so check daily for condensation on the plastic. If it fogs up, your humidity is perfect. If it stays clear, mist again lightly. Germination typically takes 14-21 days, but patience is key—don't disturb the tray or you'll dislodge the tiny seeds.
☀️ Step 3: Provide Indirect Light and Prevent Legginess
Once the first green seedlings emerge (usually within 10-14 days), remove the plastic immediately to prevent fungal growth. Move the tray to a bright, indirect light source—a south-facing window works, but avoid direct midday sun, which can scorch the delicate leaves. Forget-me-nots are shade-tolerant but need 12-14 hours of light daily to prevent leggy growth.
If seedlings stretch toward the light with pale stems, they're not getting enough intensity. Supplement with a grow light placed 4-6 inches above the tray. Rotate the tray quarter-turn daily so plants grow evenly. You'll notice strong seedlings have dark green, rounded leaves and compact stems—never let them develop long, thin stems, as these plants won't recover outdoors later.
🪴 Step 4: Thin Seedlings and Pot Up Individually
When seedlings develop 2-3 sets of true leaves (about 4-6 weeks after sowing), it's time to thin. Use tweezers to carefully remove weaker seedlings, leaving the strongest 1 inch apart. Forget-me-nots form dense mats, but overcrowding leads to leggy, weak stems. Transplant the remaining seedlings into 3-inch pots filled with the same seed-starting mix mixed with 20% perlite for better drainage.
Water gently at the base—never from above, as wet foliage invites powdery mildew. Place the pots in a shady spot for 3-5 days to reduce transplant shock. After this period, gradually introduce them to morning sun for 1-2 hours daily, increasing exposure over 10 days before moving them to full shade or partial sun outdoors.
⏰ Step 5: Harden Off and Prepare for Outdoor Planting
Forget-me-nots are cool-season plants, so time your transplanting for early spring or fall. About 2 weeks before moving outdoors, start hardening off by placing the pots in a sheltered, shaded spot for 1 hour the first day, increasing to full sun exposure by day 7. This gradual adjustment prevents leaf burn and stem breakage.
Look for new growth and vibrant color as signs they're adjusting well. Plant outdoors in partial shade (they tolerate 2-4 hours of morning sun) in well-draining soil. Space them 6-8 inches apart—their delicate blooms will spread beautifully over time. With proper care, you'll see the first blue or white flowers in 8-10 weeks, proving your patience was worth it.
Tips & tricks for fast forget-me-not germination
Patience pays off when growing forget-me-nots, but these tricks will help you speed up the process without sacrificing quality.
Soil Surface Prep: In Step 1, when pressing down the sterile seed-starting mix, create a slightly dimpled texture with your fingers—this prevents seeds from sinking too deep while still keeping them in contact with the moist surface. Forget-me-nots need light to germinate, so avoid pressing too firmly. Think of it like creating a mini landscape where each seed has its own tiny valley to settle into.
Warmth Hack: The 65-70°F heat mat recommendation is non-negotiable for fast germination, but here's a pro move: Place a small bowl of warm water near the tray to create a microclimate. The evaporating water adds extra humidity while maintaining that critical warmth. I've seen germination times drop from 21 days to just 10 days using this trick—just monitor the soil moisture closely to avoid sogginess.
Light Transition Strategy: When you remove the plastic wrap in Step 3 after 10-14 days, don't rush to full light immediately. Start with 6 hours of indirect light the first day, then gradually increase by 2 hours daily. This prevents seedlings from going into shock and developing that dreaded leggy growth. Strong seedlings should have leaves that look like tiny rosettes rather than stretched-out blades.
Humidity Check: That 80-90% humidity requirement in Step 2 is crucial, but here's how to test it: Place a small piece of clear tape on the inside of the plastic wrap. If condensation forms on the tape within 30 minutes, your humidity is perfect. If it stays dry, mist again lightly—just enough to make the soil look like a damp sponge. This simple test saves you from guessing.
Pro Tips for Grow Forget Me Nots From Seed Indoors
- Patience pays off when growing forget-me-nots, but these tricks will help you speed up the process without sacrificing quality.
- Forget-me-nots need light to germinate, so avoid pressing too firmly.
- Warmth Hack: The 65-70°F heat mat recommendation is non-negotiable for fast germination, but here's a pro move: Place a small bowl of warm water near the tray to create a microclimate.
Frequently asked questions
Got questions about growing forget-me-nots from seed indoors?
You’re not alone! Here are answers to the most common concerns to help you succeed—no guesswork required.
How long does it take for forget-me-not seeds to germinate indoors?
With the right warmth (70–75°F) and humidity, forget-me-not seeds typically sprout in 14–21 days. Patience is key—some varieties may take up to 30 days. Use a heat mat or seedling tray to speed things up! Pro tip: Keep soil consistently moist (not soggy) to avoid delays.
Can I start forget-me-not seeds indoors in winter?
Winter is a great time to grow forget-me-nots indoors. Just ensure your setup has bright, indirect light (a grow light helps) and maintain humidity with a plastic dome or spray bottle. Avoid drafts—these delicate seedlings thrive in stable conditions.
What if my forget-me-not seedlings look leggy or weak?
Leggy seedlings usually mean too little light or overcrowding. Move them closer to a sunny window or under a grow light (12–14 hours/day). Thin seedlings to 1 inch apart once true leaves appear. If they’re still struggling, fertilize lightly with a diluted seedling formula.
Can I reuse the soil from last year’s forget-me-not seeds?
Not ideal! Old soil may harbor fungal diseases or lack nutrients. Refresh with a sterile seed-starting mix (add perlite for drainage). If reusing, sterilize it first by baking at 200°F for 30 minutes or using hydrogen peroxide (3% solution).
Are there any alternatives to forget-me-not seeds for indoor growing?
If forget-me-nots seem tricky, try these easy indoor seed starters instead:
- Basil – Fast-growing and great for beginners.
- Calendula – Hardy and pest-repellent.
- Nasturtiums – Edible flowers with quick germination.
- Sweet Alyssum – Low-maintenance and fragrant.
Wrapping up and next steps
Growing forget-me-nots from seed indoors is a rewarding journey that brings delicate blooms into your life with just a little patience and care! 🌱 By following these steps—from prepping your seeds with warmth and humidity to providing the right light and nutrients—you’ll soon enjoy their charming blue and white flowers. Don’t let a few setbacks discourage you; even experienced gardeners face challenges, but each tiny sprout is a victory worth celebrating.
Now that you’re armed with the know-how, why not share the joy? Once your seedlings are thriving, consider gifting a few to friends or expanding your indoor garden with more forget-me-nots. Happy growing—your future blooms will thank you! 💙