
Propagation
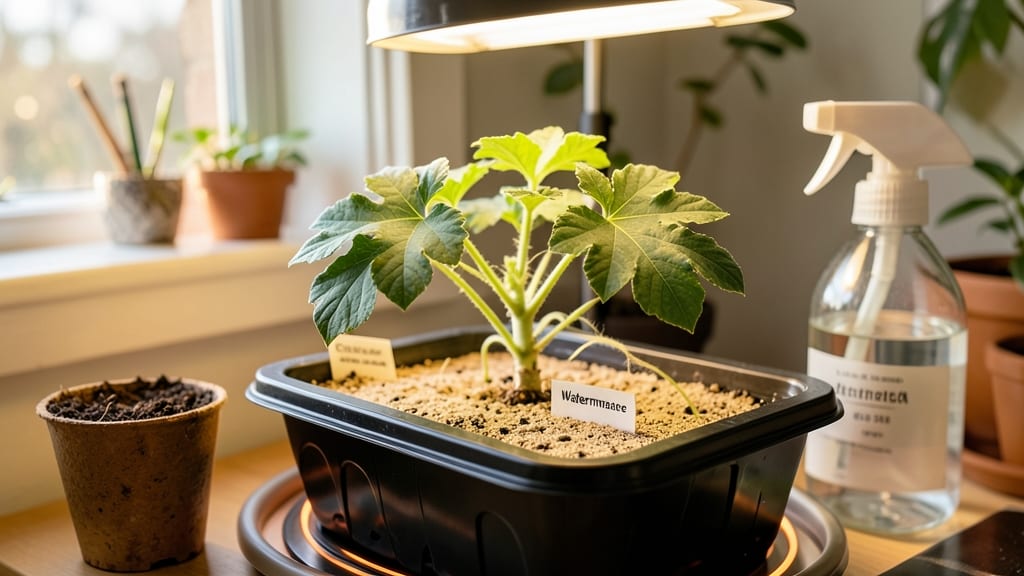
Growing watermelon from seed indoors lets you start the season early with varieties that fit tiny spaces—like the Sugar Baby I grew last year in a 5-gallon bucket. 🌱 The key is choosing compact types and creating the right conditions before transplanting, because regular watermelons sprawl like they own the place (and they kind of do).
You’ll need a warm spot (70-85°F), bright light (grow lights or south-facing window), and containers with drainage. I use seed-starting mix in small pots first, then move to larger containers as roots grow.
The trick is keeping soil consistently moist but not soggy—watermelon roots need air too, or they’ll rot faster than you can say "seedling tragedy."
By late spring, you’ll have vines climbing like crazy and tiny melons forming. The real magic happens when you transplant them outdoors after frost—just give them room to stretch their legs. I’ve seen 3-pound melons from plants started indoors, and they ripen weeks ahead of store-bought.
Works best in zones 3-10, but even apartment balconies can produce if you choose the right variety. The only challenge? Pollination—sometimes you’ll need to hand-pollinate with a paintbrush if bees are scarce. Worth it for that first bite of homegrown sweetness.
📚 In This Guide
- What you need
- Instructions
- Tips and common mistakes
- Wrapping up and next steps
What you need
- ● Watermelon seeds: Choose a compact or dwarf variety (e.g., 'Sugar Baby,' 'Tiny Tim,' or 'Black Diamond'). Buy 3–5 seeds per plant for better germination rates.
- ● Seed-starting trays or pots: 2–4" deep with drainage holes (1–2 per seed). Biodegradable peat pots work great for transplanting later.
- ● High-quality seed-starting mix: Lightweight, sterile, and well-draining (avoid garden soil—it’s too dense!). A 10–20 lb bag should suffice for a small batch.
- ● Grow lights or sunny windowsill: Watermelons need 12–16 hours of light daily. A full-spectrum LED grow light (12–24W) or a south-facing window (6+ hours of direct sun) works best.
- ○ Heat mat (optional but helpful): Keeps soil warm (70–90°F) for faster germination. A 10"x20" mat covers most seed trays.
- ● Spray bottle or watering can: With a gentle misting nozzle to avoid disturbing seeds.
- ● Fertilizer: A balanced, water-soluble fertilizer (5-10-5 or 10-10-10) or a slow-release granular option mixed into the soil.
- ● Support structure (for later): Small tomato cages or stakes (6–12" tall) to help vines climb as they grow.
- ● Humidity dome or plastic wrap to retain moisture during germination.
- ● pH testing kit (ideal soil pH: 6.0–6.8 for watermelons).
- ● Fungicide (like neem oil or copper spray) to prevent damping-off disease.
- ● Grow room or greenhouse (if extending the season in cooler climates).
Step-by-step instructions for growing watermelon from seed indoors
Here's how to coax watermelon vines indoors—without sacrificing space or flavor.
🌱 Step 1: Select Compact Varieties and Prepare Containers
Choose small-fruited, bush-type watermelon varieties like 'Sugar Baby' or 'Tiny Tim'—they thrive in containers and produce 4-8 pound melons instead of 20-pound monsters. Each of your 4 plants will need a 5-gallon container with 12-inch depth to accommodate sprawling roots and vines.
Fill the bottom 2 inches of each container with grow stones or coarse perlite for drainage. This prevents soggy roots, which watermelons despise. Use a sterile seed-starting mix (not garden soil) to avoid disease. I like to add a slow-release fertilizer at planting time—just follow the package rate for container plants.
☀️ Step 2: Sow Seeds at Proper Depth and Warmth
Watermelon seeds need warm soil (80-90°F) to germinate. Place your containers on a seedling heat mat or in a sunny windowsill where temperatures stay above 70°F. Plant 2 seeds per container at a depth of 1 inch, pressing lightly but not compacting the soil.
Cover the pots with clear plastic wrap to retain moisture and warmth. Check daily for condensation—if it's heavy, prop up the plastic slightly to allow airflow. Seeds typically sprout in 7-14 days, but don't give up if they take longer. Watermelons are slow starters but worth the wait.
💧 Step 3: Provide Light and Support for Vigorous Growth
Once seedlings emerge, remove the plastic wrap immediately. Watermelons need full sun (12+ hours daily)—a south-facing window won't cut it. Supplement with a grow light placed 6-12 inches above the plants for 14-16 hours daily. You'll see leggy growth if the light is too far away.
Install trellis supports early—even bush varieties benefit from guidance. Use 5-foot tall tomato cages or heavy-duty wire trellises to train vines upward. This saves space and improves air circulation, reducing disease risk. Water deeply 2-3 times weekly, letting the top 2 inches of soil dry between waterings.
🌿 Step 4: Thin and Fertilize for Strong Vines
When seedlings develop 2 true leaves, thin to the strongest plant per container. Snip the weaker one at the base with clean scissors—don't pull, or you'll disturb roots. Watermelons are heavy feeders, so fertilize every 2 weeks with a balanced liquid fertilizer (10-10-10 or 20-20-20) diluted to half strength.
Watch for male and female flowers—female flowers have tiny melons at their base. Once you spot a female bloom, hand-pollinate by gently brushing it with a paintbrush or transferring pollen from male flowers. This ensures fruit set, especially indoors where bees are absent.
⏰ Step 5: Acclimate and Transplant Outdoors
When nighttime temperatures stay above 55°F and all frost risk has passed, harden off your watermelons by placing them outside in partial shade for 2 hours daily, gradually increasing exposure over 7-10 days. This toughens the vines for outdoor conditions.
Transplant in late spring or early summer, choosing a sunny, sheltered spot with well-draining soil. Bury the container halfway to stabilize it and protect roots from temperature swings. Mulch heavily with straw or black plastic to retain moisture and warmth—critical for fruit development.
Tips & tricks for growing compact watermelons indoors
These game-changing strategies will help you maximize your small-space harvest without sacrificing flavor or yield.
Container Size Matters: While 5-gallon containers work for the specified 4 plants, you can actually squeeze in one extra plant per container if you're willing to thin to just the strongest seedling. Just ensure the container has that critical 12-inch depth—shallow pots will stunt root development. I've seen 6 plants thrive in 5-gallon containers when properly thinned, though yields may be slightly smaller per fruit.
Heat Mat Hack: If you don't have a seedling heat mat, create your own by placing the containers on top of a pile of warm rocks (from a sunny windowsill) or using a low-wattage heat lamp (75W bulb) positioned 12 inches above the pots. The goal is to maintain that 80-90°F soil temperature—watermelon seeds won't germinate below 70°F. Monitor with a soil thermometer to avoid overheating, which can kill seeds.
Light Efficiency: For the critical 14-16 hours of light, consider using a smart grow light timer to automate your setup. Position the light 6 inches away for seedlings and gradually increase to 12 inches as plants mature. I've found that LED grow lights with full-spectrum bulbs are most efficient—they use 30% less electricity than traditional fluorescent lights while delivering better results. Rotate containers daily to prevent lopsided growth.
Pollination Strategy: When hand-pollinating those female flowers, here's what nobody tells you—use a soft makeup brush instead of your finger. It's more precise and avoids transferring oils from your skin that can harm delicate flowers. I also recommend pollinating in the morning hours when humidity is lower, which gives pollen time to set properly before evening moisture arrives. Mark pollinated flowers with a toothpick flag to track which blooms have been handled.
Pro Tips for Growing Watermelon From Seed Indoors
- These game-changing strategies will help you maximize your small-space harvest without sacrificing flavor or yield.
- Container Size Matters: While 5-gallon containers work for the specified 4 plants, you can actually squeeze in one extra plant per container if you're willing to thin to just the strongest seedling.
- The goal is to maintain that 80-90°F soil temperature—watermelon seeds won't germinate below 70°F.
Frequently asked questions
Got questions about growing watermelon from seed indoors? You’re not alone—this method takes patience and precision! Here are answers to the most common queries to help you succeed.
Can I grow watermelon indoors year-round?
While possible, watermelons thrive best with 12+ hours of sunlight daily. Use grow lights (LED or fluorescent) if natural light is limited, but expect smaller yields. In colder months, supplement with warmth (70–90°F) and humidity to mimic summer conditions. Pro tip: Start seeds early (4–6 weeks before last frost) for a head start!
How long does it take for indoor watermelon seeds to sprout?
Germination usually takes 5–10 days at 75–90°F with consistent moisture. Keep soil damp (not soggy) and place seeds in a warm spot (a heat mat helps!). If no sprouts appear after 2 weeks, test seed viability or try fresh seeds—some varieties are slower to germinate.
What’s the best container size for indoor watermelon?
Watermelons need space to sprawl—opt for a 5-gallon container minimum (bigger is better!). Use a fabric grow bag or deep pot with drainage holes. If growing vertically, choose a compact variety (like ‘Sugar Baby’ or ‘Tiny Tim’) and train vines along a trellis or cage.
Why are my indoor watermelon seedlings dying?
Common culprits:
- Overwatering: Yellow leaves or wilting? Let soil dry slightly between waterings.
- Pests: Check for aphids or spider mites (use neem oil if spotted).
- Light deficiency: Leggy, weak stems? Move closer to a sunny window or adjust grow lights.
- Temperature stress: Drafts or cold spots? Keep seedlings in a warm, stable environment.
Fix it fast: Trim damaged leaves, adjust care, and monitor closely!
Will indoor watermelons taste as good as outdoor ones?
Yes—but with a twist! Indoor melons may be smaller and sweeter (less water = concentrated flavor). For best taste, pollinate by hand (use a paintbrush to transfer pollen) and ensure they get enough light. Bonus: Compact varieties like ‘Micro Mini’ pack big flavor in tiny packages!
Wrapping up and next steps
Growing watermelon from seed indoors is a rewarding journey that proves even small spaces can yield big results! With the right compact varieties and a little patience, you’ll soon be enjoying homegrown sweetness—no sprawling garden required. 🌱
Now that you’re armed with tips and tricks, it’s time to take the next step. Start your seeds today, nurture your seedlings with care, and soon you’ll be harvesting juicy, vine-ripened watermelons. Happy growing—your future self (and taste buds) will thank you!