
Container Gardens
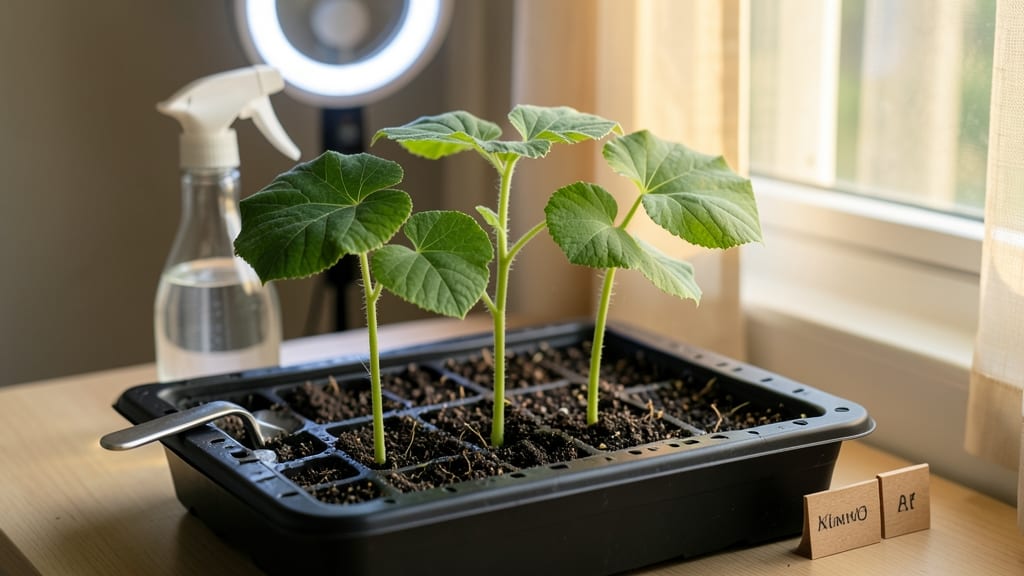
Growing pumpkin seeds indoors lets you enjoy miniature harvests without a backyard. 🌱 I’ve turned my sunroom into a pumpkin patch using just a few square feet—here’s how to skip the waiting game and get those first sprouts in 7-10 days instead of weeks.
The secret? Start with bush varieties like ‘Jack Be Little’ or ‘Wee-B-Little’—they stay compact (3-5 feet tall) and produce golf-ball-sized pumpkins perfect for indoor growing. You’ll need a 5-gallon pot with drainage, warm soil (70-90°F), and a grow light if natural light is weak.
By week 4, you’ll see vines climbing and tiny leaves unfurling. Prune aggressively to keep vines under control, and watch as those first golden blossoms appear—each one a promise of your first indoor pumpkin. The harvest? 3-5 pumpkins per plant, ready by late summer.
This works for apartments, balconies, or even a sunny windowsill. The only challenge? Managing those hungry vines—but with the right tricks, you’ll end up with a thriving mini-pumpkin garden that’s the talk of your neighborhood.
📚 In This Guide
- What you need
- Instructions
- Tips and common mistakes
- Wrapping up and next steps
What you need
- ● Pumpkin seeds: 3–5 high-quality, organic seeds (look for varieties like Jack Be Little or Baby Boo—they’re perfect for containers!).
- ● Seed-starting trays or small pots: 4–6 individual cells or 4–6" pots (biodegradable pots are eco-friendly!).
- ● Seed-starting mix: 1–2 cups of lightweight, sterile potting soil (avoid garden soil—it’s too dense!).
- ● Grow lights or sunny windowsill: A full-spectrum LED grow light (12–16 hours/day) or a south-facing window (6+ hours of sunlight).
- ● Spray bottle: For gentle watering (avoid over-saturating the soil!).
- ○ Heat mat (optional but helpful): A small seedling heat mat (50–70°F) to speed up germination.
- ● Fertilizer: A balanced, water-soluble fertilizer (5-5-5 or 10-10-10) for when seedlings sprout.
- ● Humidity dome or plastic wrap: Keeps moisture in while seeds germinate.
- ● Fertilizer booster: A pinch of kelp meal or fish emulsion for extra nutrients.
- ● Trellis or cage: If your pumpkin variety grows vines (even compact ones need support!).
- ● pH test kit: Ensures your soil is slightly acidic (6.0–6.8) for optimal growth.
- ● Grow log/journal: Track moisture, light, and growth progress like a pro!
Step-by-Step instructions for growing pumpkins indoors
Here's how I turn tiny seeds into thriving vines—even in small spaces.
🌱 Step 1: Select and Prepare the Right Seeds
Choose compact varieties like 'Jack Be Little' or 'Baby Boo'—they stay under 6 feet and thrive in containers. Soak seeds in warm water for 12 hours to soften the tough outer shell and speed germination. This step alone cuts sprouting time by nearly half.
After soaking, lay seeds on a paper towel to dry slightly—just enough to handle without sticking. I like to roll them gently in a clean towel to remove excess moisture. This prevents mold while keeping them primed to sprout fast.
🪴 Step 2: Set Up Containers and Soil
Use 5-gallon fabric grow bags or large plastic pots with drainage holes—pumpkins need deep roots but hate soggy soil. Fill with a sterile seed-starting mix (never garden soil—it's too dense). Mix in a handful of compost for nutrients, but keep it light so roots can spread easily.
Plant 2-3 seeds per container about 1 inch deep. I like to use a pencil to make small holes—it gives seeds consistent spacing and prevents overcrowding. Cover with soil and pat gently to secure seeds without burying them too deep.
☀️ Step 3: Provide Warmth and Light
Pumpkin seeds need constant warmth—place containers on a seedling heat mat set to 80-85°F. Without this, germination can take 2-3 weeks instead of the usual 5-7 days. Keep the soil moist but not soggy; a spray bottle works best to avoid disturbing seeds.
Once sprouts appear, move containers to a south-facing window or under grow lights for 14+ hours daily. You'll see tiny leaves unfurl in 7-10 days. If vines stretch toward light, they're not getting enough intensity—adjust the light within 6 inches of the plants.
💧 Step 4: Train Vines and Manage Growth
When vines reach 12 inches, start training them along a trellis or sturdy wire frame. Pumpkins grow fast, but without support, they'll sprawl everywhere. Use soft plant ties to guide vines upward—never yank or force growth. I like to weave vines through the trellis like a lattice for maximum air circulation.
Water at the base every 2-3 days, letting the top 2 inches of soil dry between waterings. Overwatering leads to root rot, while underwatering causes blossom-end rot in fruits. Check soil moisture with your finger—it should feel damp but not wet.
✂️ Step 5: Prune and Pollinate for Fruit
Once vines hit the trellis top, prune side shoots to focus energy on 1-2 main vines. Remove male flowers (they have long stems) to encourage female flowers (they have tiny fruits at the base). This trick boosts fruit production—real talk, it works.
Hand-pollinate female flowers by transferring pollen from male flowers with a paintbrush. Do this in the morning when flowers are open. You'll know it worked when the tiny fruit swells slightly within 3-5 days. Harvest when rinds harden and turn the variety's mature color—usually 80-100 days after planting.
Tips & tricks for speed-sprouting pumpkin seeds indoors
These pro-level tricks will help you skip the common pitfalls and get your pumpkin vines thriving faster than you'd expect.
Soaking Strategy: The 12-hour soak is your secret weapon, but here's the thing—warm water should be around 80-85°F to match your heat mat temperature. I use a thermometer to check, and if it's cooler than room temperature, I pop the bowl in my oven with the light on for a few minutes to warm it up. This consistency speeds germination even more.
Container Hack: For Step 2, I've found that cutting the bottom out of plastic milk jugs (after making drainage holes) creates perfect mini-greenhouses. Place them over your pots after planting to trap warmth and humidity—this can cut the time until sprouts appear by another day or two. Just remember to remove them once you see green!
Light Intensity: When you're setting up your 14+ hours of light in Step 3, don't just rely on a window—test your setup first. Hold your hand between the light source and plants; if you can't read text comfortably, the light's too dim. I use LED grow lights on a timer because they're energy-efficient and mimic sunlight perfectly for these tropical plants.
Pruning Precision: In Step 5, when you're focusing on 1-2 main vines, here's what nobody tells you—the first few leaves on each vine are your plant's energy reserves. Never remove them! Start pruning only after you've got at least 6-8 leaves on each main vine. This gives your pumpkins the best head start for fruit production.
Pro Tips for Growing Pumpkin Seeds Indoors
- These pro-level tricks will help you skip the common pitfalls and get your pumpkin vines thriving faster than you'd e...
- Soaking Strategy: The 12-hour soak is your secret weapon, but here's the thing—warm water should be around 80-85°F to...
- Container Hack: For Step 2, I've found that cutting the bottom out of plastic milk jugs (after making drainage holes)...
Frequently asked questions
Got questions about growing pumpkin seeds indoors? You’re not alone—let’s tackle the most common ones to help you sprout success!
Can I grow pumpkin seeds indoors year-round?
Yes, but timing matters! Pumpkins thrive in warm weather (60–90°F), so use grow lights (12–16 hours/day) and a heat mat if temps dip below 50°F. Start seeds in late winter/early spring for a summer harvest, or opt for compact varieties like Jack Be Little for smaller spaces.
How long does it take for pumpkin seeds to sprout indoors?
Germination usually takes 7–14 days with proper moisture and warmth. Keep soil consistently damp (not soggy) and maintain temps around 75–85°F. If seeds don’t sprout in 2 weeks, they may be old or not viable—try fresh seeds or a different batch.
What’s the best container size for indoor pumpkin growth?
Start with 5–6 inch pots for seedlings, then upgrade to 10+ gallon containers (or fabric grow bags) as vines sprawl. Pumpkins need room to spread—aim for at least 3–5 feet of space per plant or use trellises to save space. Drainage holes are a must!
Why are my indoor pumpkin leaves turning yellow or wilted?
Yellowing leaves often signal overwatering or nutrient deficiency. Let soil dry slightly between waterings, and fertilize every 2–3 weeks with a balanced liquid fertilizer (10-10-10). Check for pests like aphids or spider mites—spray with neem oil if needed. Poor light can also cause wilting!
Can I grow pumpkins indoors without a sunny window?
Use full-spectrum LED grow lights (12–16 inches above plants) for 12+ hours daily. Skip cheap bulbs—pumpkins need bright, consistent light to thrive. A simple setup with a timer and adjustable lights works great for compact grows.
Wrapping up and next steps
Growing pumpkin seeds indoors is a rewarding way to kickstart your gardening journey—even in small spaces!
With the right speed-sprouting tricks and compact setup, you’ll soon be harvesting tiny but mighty pumpkins or saving seeds for future planting. 🌱 Don’t let limited space hold you back; your green thumb can thrive anywhere!
Ready to take the next step? Once your seedlings sprout, transplant them outdoors (if your climate allows) or keep nurturing them indoors with proper light. Either way, you’re well on your way to a bountiful harvest—one seed at a time!