
Companion Plants
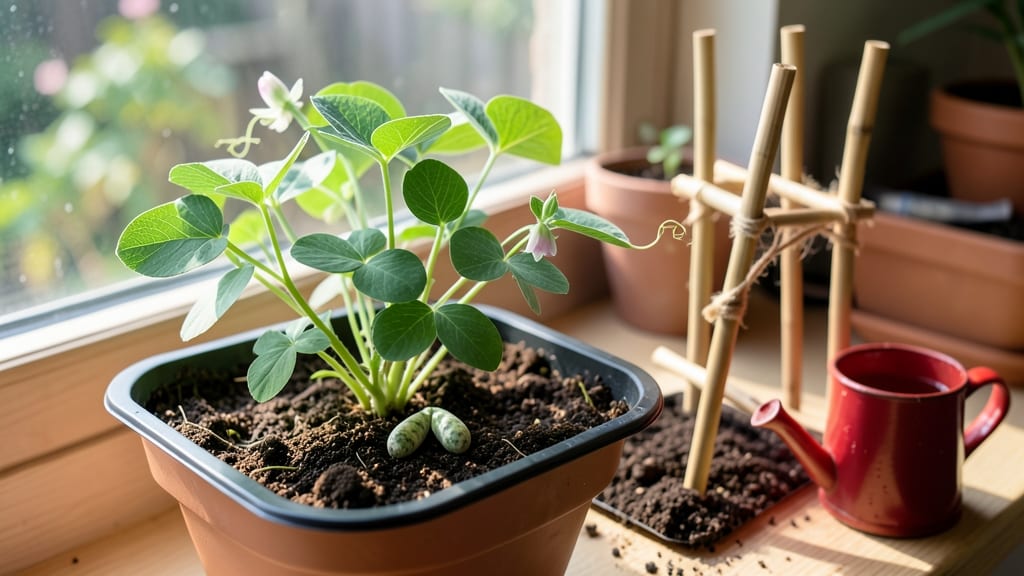
Growing pea plants indoors delivers fast sprouts in just 7-10 days—no greenhouse needed. 🌱 I’ve grown sugar snap peas on my kitchen windowsill for years, and the secret isn’t fancy equipment but matching their outdoor needs to your indoor space.
These cool-weather plants thrive when you replicate their love of fresh air, consistent moisture, and indirect sunlight.
The right setup makes all the difference: a 5-gallon container with drainage holes, loose potting mix, and a simple trellis (even a bent wire coat hanger works). Dwarf varieties like ‘Tom Thumb’ stay compact, while climbing types need vertical support—both produce sweet pods indoors if given enough light.
The key is keeping soil moist but not soggy and rotating the pot weekly for even growth.
Within 3-4 weeks, you’ll harvest crisp, tender peas straight from your windowsill. The flavor rivals store-bought, and you’ll avoid the plastic packaging. My biggest mistake?
Overcrowding seeds—stick to 2-3 per container for better airflow and fewer pests. With proper care, you’ll get continuous harvests for months, even in small spaces.
This method works year-round, but winter light may require a grow light for 12-14 hours daily. If your peas yellow or wilt, check for overwatering or insufficient light—the two biggest indoor pitfalls. Once you master the basics, try succession planting every 2 weeks for a never-ending supply of fresh peas.
📚 In This Guide
- What you need
- Instructions
- Tips and common mistakes
- Wrapping up and next steps
What you need
- ● Pea Seeds: 10–20 sugar snap, snow, or shelling pea seeds (choose dwarf varieties like 'Sugar Sprint' or 'Oregon Sugar Pod' for indoor growing).
- ● Containers: 2–4 5–6 inch deep pots (with drainage holes) or
- ● A long, shallow tray (10+ inches) for climbing varieties (e.g., 12" x 24" plastic bin).
- ● Potting Mix: 2–3 quarts of lightweight, well-draining seed-starting mix (avoid garden soil—it’s too dense!).
- ○ Grow Lights (Optional but Recommended): 1 LED full-spectrum grow bulb (10W–20W) or
- ● A small grow light kit (12–18" above plants for 12–14 hours/day).
- ● Support Structures (for climbing peas): 1–2 bamboo stakes, trellis, or mesh netting (6–12" tall).
- ● Spray Bottle: For gentle watering (peas hate soggy roots!).
- ○ Fertilizer (Optional): 1 tsp balanced organic fertilizer (5-5-5) mixed into soil at planting.
- ● ✅ A sunny windowsill (south-facing ideal) or a warm spot (65–75°F).
- ● ✅ Patience! Peas sprout in 7–14 days (depending on variety).
- ● ✅ Time to check soil moisture daily (peas need consistent dampness, not floods!).
Step-by-step instructions for growing pea plants indoors
Here’s how to coax those fast, vigorous pea sprouts using just a sunny windowsill and a few simple tricks.
🌱 Step 1: Prep Your Containers and Soil for Fast Germination
Use a shallow container—6-inch-wide pots work perfectly for 4 plants—filled with a light, fast-draining mix. I blend 50% potting soil with 50% perlite or vermiculite to keep moisture even but never soggy. Pea roots need oxygen, and heavy soil suffocates them before they even sprout.
Moisten the mix until it’s damp like a wrung-out sponge—no puddles, no dry clumps. Press it down lightly so the surface is firm but not compacted. This ensures seeds stay in place while roots push through easily. A loose mix also prevents rot, which is the #1 killer of indoor pea starts.
🌱 Step 2: Sow Seeds Deeply for Strong Stems
Peas need 1-2 inches of depth—deeper than most seeds—to germinate successfully. Plant 2-3 seeds per pot, spacing them 1 inch apart in a small trench. The extra depth gives roots room to anchor before they break through the soil surface. I use my finger to make the trench, then tap the seeds in gently.
Cover them completely with soil, then water gently with a spray bottle until the surface looks uniformly moist. Pea seeds won’t sprout if they dry out, so keep the soil consistently damp (not wet) until germination. Place the pot in a warm spot (70-75°F)—a sunny windowsill works, but a seedling heat mat speeds things up by 2-3 days.
☀️ Step 3: Trigger Fast Growth With the Right Light
Peas are hungry for light, but they’ll stretch like overgrown noodles if you move them too soon. Wait until sprouts appear (5-7 days), then place the pot in the sunniest window—south-facing is ideal. Rotate the pot a quarter turn daily so stems grow straight instead of leaning toward the light.
You’ll know light is sufficient when leaves stay bright green and compact. If they turn pale or stems elongate rapidly, supplement with a grow light 4-6 inches above the plants for 12-14 hours daily. Leggy peas won’t recover—they’ll flop over and never produce pods.
💧 Step 4: Water and Support for Vigorous Vines
Once true leaves appear (the second set after the initial seed leaves), water when the top inch of soil feels dry. I use a watering can with a fine rose to avoid dislodging soil. Peas hate soggy roots but also won’t thrive if they dry out completely. A self-watering pot keeps moisture steady without guesswork.
When vines reach 6 inches tall, install a 5-foot trellis or tomato cage beside the pot. Peas twine naturally, but without support, they’ll sprawl and break. Gently weave the longest vine around the trellis first, then let the others climb as they grow. This encourages faster, stronger growth and more pods.
⏰ Step 5: Harvest for Continuous Production
Peas mature quickly—expect 60-70 days from seed to harvest. Pick pods when they’re 3-4 inches long and plump, but before the seeds inside get too large. I check every 2-3 days and harvest in the morning when pods are crispest. Pinching off spent flowers redirects energy to new growth, giving you a steady supply.
Here’s the trick for fast regrowth: After harvesting, fertilize lightly with a balanced liquid fertilizer (10-10-10) diluted to half strength. Peas fix their own nitrogen, but a little boost keeps vines producing. Keep the trellis in place until frost—healthy plants will keep climbing and yielding for weeks.
Tips & tricks for growing pea plants indoors
Here's what nobody tells you about growing peas indoors—these tricks make all the difference between slow, leggy plants and fast, vigorous vines.
Soil Mix Matters: That 50/50 blend of potting soil and perlite/vermiculite isn't just random—it's about aeration. Pea roots need oxygen to grow strong, and compacted soil suffocates them. I've seen pea starts rot completely when planted in heavy garden soil. If you don't have perlite, crushed gravel works too, but keep the mix loose. The goal is a texture like damp sand that holds moisture without becoming waterlogged.
Germination Speed Hack: The 70-75°F warmth recommendation isn't arbitrary—it's pea seeds' ideal temperature range. A seedling heat mat isn't essential, but it cuts germination time by 2-3 days. I've found that placing pots on top of refrigerators (where it's warm) works almost as well. The key is consistency—peas need steady warmth to break dormancy. If your home runs cooler, consider a small greenhouse dome over the pot until sprouts appear.
Light Management: Those 12-14 hours of grow light aren't just about duration—they're about intensity. Place the light 4-6 inches above the plants and use a full-spectrum bulb (not just white). I've seen peas stretch to 12 inches tall in just 3 days when they don't get enough light! Rotate the pot daily so all sides get equal exposure. The moment you notice stems elongating rapidly, it's time to supplement with artificial light—leggy peas won't recover.
Harvest Timing: The 3-4 inch pod size recommendation is critical for sweetness. Peas lose flavor quickly once seeds inside start developing. I harvest every morning because pods are crispest then—wait until afternoon and you'll notice a tougher texture. Pro tip: Use a small pair of scissors to snip pods at the stem rather than pulling them. This prevents damaging the vine and encourages more production.
Pro Tips for Growing Pea Plants Indoors
- Here's what nobody tells you about growing peas indoors—these tricks make all the difference between slow, leggy plants and fast, vigorous vines.
- Soil Mix Matters: That 50/50 blend of potting soil and perlite/vermiculite isn't just random—it's about aeration.
- Germination Speed Hack: The 70-75°F warmth recommendation isn't arbitrary—it's pea seeds' ideal temperature range.
Frequently asked questions
Got questions about growing pea plants indoors? You're not alone! Here are some common concerns and quick answers to help you get started with confidence.
Can I grow peas indoors without a garden?
Peas thrive indoors as long as they get 6–8 hours of sunlight (or a grow light) and a sturdy support structure. Use containers with drainage, and opt for dwarf varieties like Sugar Ann or Tom Thumb for compact growth. Just mimic their outdoor needs—cool temps (50–75°F) and consistent moisture.
How long does it take for peas to sprout indoors?
With the right conditions, peas can sprout in 7–14 days! Soak seeds overnight (optional but speeds germination ), plant them 1 inch deep, and keep the soil moist. A heating mat can cut the wait to 5–7 days if you’re impatient. Just be patient—consistency is key!
What if my pea plants look wilty or yellow?
Wilted leaves often mean underwatering or overcrowding. Check soil moisture (top inch should stay damp) and ensure pots have drainage. Yellow leaves? It could be overwatering (root rot) or nutrient deficiency. Feed with a balanced fertilizer (like 10-10-10) every 4–6 weeks, and prune yellowing foliage to redirect energy.
Are there low-maintenance alternatives to fresh peas?
If peas feel tricky, try these indoor-friendly swaps:
- Sugar snap peas – Easier to shell, same sweet flavor.
- Microgreens – Fast-growing (harvest in 1–2 weeks!) and packed with nutrients.
- Radishes – Ready in 3–4 weeks and tolerate cooler indoor temps.
- Green onions – Regrow from scraps in water or soil!
Do peas need cold stratification to grow indoors?
Most indoor pea varieties don’t require stratification (a cold treatment). However, if you’re using heirloom or slow-germinating seeds, soak them in water for 12 hours or place them in the fridge for 24–48 hours before planting. This mimics natural winter conditions and can boost germination rates.
Still stuck? Drop your question in the comments—we’re happy to help your pea patch thrive!
Wrapping up and next steps
Growing pea plants indoors is a rewarding and accessible way to enjoy fresh, homegrown produce—even in small spaces! With just a few simple tools and a sunny windowsill, you can cultivate fast-sprouting peas packed with flavor and nutrients.
Whether you’re a beginner or a seasoned gardener, this method proves that green thumbs aren’t required—just curiosity and care.
Now that you’re ready to start, why not take the next step? Try experimenting with different pea varieties or pair your peas with other companion plants like radishes or lettuce for a thriving indoor garden. Happy growing—your future harvest is waiting! 🌱✨