
Plants
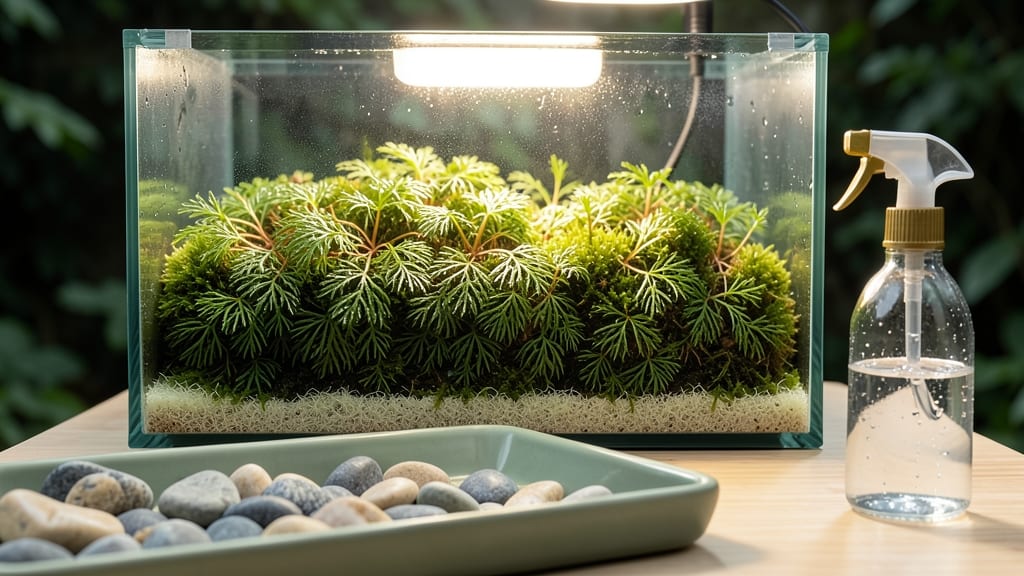
Growing moss indoors turns your space into a mini forest. 🌿 I’ve turned forgotten corners into vibrant green walls using just a spray bottle and a few simple supplies—no fancy equipment needed. Moss thrives in low light, making it perfect for bathrooms, offices, or shady windowsills.
The key is keeping it damp (not soggy) and choosing the right type—like Sheet Moss for living walls or Cushion Moss for terrariums. Most varieties grow slowly, so patience pays off with lush, velvety results.
By week 4, you’ll see vibrant green carpets covering rocks, frames, or even old picture frames. The air feels fresher, and the texture is shockingly soft—like walking through a tiny, indoor meadow. Works in any container, from glass jars to wall-mounted frames. Let’s get started!
📚 In This Guide
- What you need
- Instructions
- Tips and common mistakes
- Wrapping up and next steps
What you need
- ● Moss spores or live moss – Choose from Sheet Moss (Hypnum), Cushion Moss (Leucobryum), or Moss Polytrichum (available at garden centers or online). Pro tip: Start with a small bag (1–2 oz) to test your setup before scaling up! 💡
- ● Growing medium – A mix of peat moss, perlite, or coconut coir (1 part peat to 1 part perlite for drainage). Avoid heavy soil—moss hates soggy roots! 🌡️
- ● Container or substrate – Options include: Glass terrariums (small to medium, 4–12 inches wide)
- ● Ceramic pots with drainage holes (6+ inches in diameter)
- ● Framed shadow boxes or fabric-covered frames (for wall gardens)
- ● Rocks or bark slabs (for a natural, low-maintenance look)
- ● Spray bottle – A fine-mist sprayer (8–16 oz) to keep moss hydrated without drowning it.
- ○ Humidity dome or plastic wrap – A clear lid or wrap to create a humid microclimate (optional but helpful for beginners).
- ● Grow lights – LED or fluorescent lights (12–15 watts) on a timer (12–16 hours/day) if your space lacks indirect light.
- ● Decorative elements – Pebbles, charcoal (for filtration), or small figurines to enhance your moss display.
- ● pH test kit – Moss thrives in acidic to neutral soil (pH 5.0–7.0). Adjust with lime or sulfur if needed.
- ● Moss propagation tools – Tweezers or a small brush for delicate placement.
Step-by-Step instructions for growing moss indoors
Here's how to create a thriving indoor moss garden that stays vibrant without needing sunlight.
🌱 Step 1: Gather the Right Supplies
You'll need a few key items: a shallow tray or container with drainage holes, 1-2 inches of well-draining soil mix (I use a blend of 50% potting soil and 50% perlite for airflow), a spray bottle, and live moss from a garden center or nature trail. Avoid moss with visible dirt or debris—clean pieces establish faster.
I like to use glass terrariums or ceramic planters because they keep humidity high while letting me admire the growth. If your container lacks drainage, drill holes in the bottom to prevent root rot. Line the bottom with a 1-inch layer of small pebbles to improve drainage and prevent compaction.
💧 Step 2: Prepare the Moss for Planting
Rinse the moss under lukewarm water to remove dust or dirt, then let it soak for 10-15 minutes in a bowl of water. This rehydrates the moss and helps it cling to the soil better. Drain it thoroughly—soggy moss won’t root properly. I gently squeeze out excess water with my hands, being careful not to tear the delicate strands.
Spread the 1-2 inches of soil mix evenly over the pebbles, smoothing it out with your fingers. Press lightly so it’s firm but not packed down. The goal is a loose, airy surface that lets water drain quickly. This prevents mold and keeps roots healthy.
☀️ Step 3: Plant and Mist the Moss
Arrange the moss pieces on the soil surface, pressing them gently into place. Overlap edges slightly for a seamless look—this mimics how moss grows naturally in dense mats. Avoid burying it; moss needs light to reach its surface. I like to work in small sections, adjusting as I go until the entire tray looks full.
Mist the moss thoroughly with the spray bottle until the soil feels evenly damp but not soaked. You’ll know it’s right when water beads up on the moss surface but drains through within 30 minutes. Too much water drowns the moss; too little leaves it dry and crispy. Check the soil’s moisture by pressing your finger ½ inch deep—it should feel damp but not wet.
🪴 Step 4: Place in High-Humidity Conditions
Moss thrives in 60-80% humidity, so place your container in a shaded, humid spot—like a bathroom with occasional misting or near a humidifier. Avoid direct sunlight; even indirect light can dry it out. I keep mine on a shelved cabinet in my kitchen, where the air stays moist from cooking.
Mist the moss every 2-3 days or when the top layer feels dry to the touch. You’ll notice new growth within 2-4 weeks—look for tiny, bright green shoots pushing through the mat. If the moss starts to yellow, it’s either too dry or getting too much light. Adjust your placement and misting schedule accordingly.
⏰ Step 5: Maintain and Expand Over Time
Once established, moss needs minimal care—just weekly misting and occasional trimming to keep it neat. Use small scissors to snip overgrown edges or brown patches. I trim mine every 4-6 weeks to encourage fresh growth and prevent it from looking scraggly.
To expand your moss garden, simply tease apart healthy sections and press them into new areas of the tray. Moss spreads quickly once it’s happy, so you’ll have lush coverage in no time. If you notice mold or slimy spots, increase airflow by moving the container or adding a small fan nearby.
Tips & tricks for perfect indoor moss gardens
Creating a thriving indoor moss garden takes patience, but these small details make all the difference between a patchy result and a lush, vibrant display.
Soil Mix Matters: The 50/50 blend of potting soil and perlite in Step 1 is non-negotiable for airflow. If you can't find perlite, substitute with coarse sand or pumice—just avoid fine sand that compacts. I've found that adding a handful of orchid bark (optional) to the mix improves drainage even more. The goal is a texture that feels like damp sponge—firm enough to hold the moss but airy enough to prevent rot.
Moss Selection Tip: Not all moss is created equal! Look for Sheet moss or Cushion moss when shopping—these varieties establish fastest indoors. Avoid moss with brown edges or slimy patches, as these signs indicate poor health. Pro tip: Collect moss from shaded, moist areas like under trees or near streams for the hardiest starts. If you're buying from a garden center, ask for "indoor-friendly" varieties—they're bred to tolerate lower light levels.
Planting Technique: When arranging moss in Step 3, think of it like laying sod. Press the edges firmly into the soil so they make contact with the 1-2 inches of soil mix—this ensures roots develop evenly. I like to work in concentric circles starting from the center, gently overlapping each piece by about ½ inch to create a seamless mat. This mimics how moss grows naturally in dense carpets. The key is patience—don't rush this step, as proper placement prevents bald spots later.
Humidity Hacks: Maintaining 60-80% humidity in Step 4 can be tricky without a humidifier. Place your moss container on a tray filled with pebbles and water (the water level should be below the pebbles). As the water evaporates, it creates a microclimate of humidity around your moss. Another trick: Group plants together—houseplants release moisture through transpiration, which naturally increases humidity. I keep mine near a snake plant or peace lily for extra moisture benefits without needing to mist as often.
Pro Tips for Growing Moss Indoors
- Creating a thriving indoor moss garden takes patience, but these small details make all the difference between a patchy result and a lush, vibrant display.
- Soil Mix Matters: The 50/50 blend of potting soil and perlite in Step 1 is non-negotiable for airflow.
- Moss Selection Tip: Not all moss is created equal!
Frequently asked questions
Got questions about growing moss indoors? You’re not alone—this lush, low-maintenance plant can be tricky to master at first! Here are some of the most common concerns and their simple solutions to help you create your dream indoor moss garden.
Can I grow moss indoors without natural sunlight?
Moss thrives in low-light conditions, making it perfect for indoor spaces. Place your moss in a spot with indirect light (like near a north-facing window) or under grow lights (12-16 hours/day). Avoid direct sun, which can dry it out.
How long does it take for moss to grow indoors?
Patience is key—indoor moss grows slowly, typically taking 4-8 weeks to establish and 3-6 months to fill in a container fully. Factors like humidity, light, and moisture speed up the process. Keep it consistent, and you’ll see progress!
Why is my moss turning brown or dying?
Brown moss usually signals overdrying or poor drainage. Mist it daily, ensure the container has drainage holes, and avoid letting it sit in stagnant water. If it’s still struggling, try a shallow tray of water (like a pebble tray) to boost humidity without soaking the moss.
What’s the best moss for beginners?
Start with Sheet Moss (Hypnum) or Cushion Moss (Leucobryum)—they’re hardy, forgiving, and great for indoor setups. Avoid delicate mosses like Sphagnum unless you’re experienced; they need specific conditions. Check local nurseries or online stores for "beginner-friendly" moss kits!
Can I grow moss in a terrarium or hanging planter?
Yes! Moss loves enclosed spaces like terrariums (just skip the soil—use a moss-specific substrate). For hanging planters, opt for lightweight, breathable materials (like coconut coir or a moss mat). Secure it well—moss can get heavy when wet! Pro tip: Rotate your planter occasionally for even growth.
Is moss safe for pets or kids?
Most moss is non-toxic, but always verify the type you’re using. Avoid moss treated with pesticides or fertilizers. If your pet is a chewer, opt for edible moss (like Reindeer Lichen) or place it out of reach. When in doubt, keep it in decorative containers!
Wrapping up and next steps
Growing moss indoors is a rewarding way to bring nature’s tranquility into your space—no sunlight struggles required! 🌿 With the right materials, patience, and care, you’ll create a thriving, low-maintenance green wall that’s perfect for purifying air and soothing your soul.
Start small, experiment with containers, and soon you’ll be a moss-growing pro.
Ready to dive in? Pick your favorite moss type, gather your supplies, and begin your journey today! Your future lush indoor oasis awaits—just add water and love. 💧✨