
Container Gardens
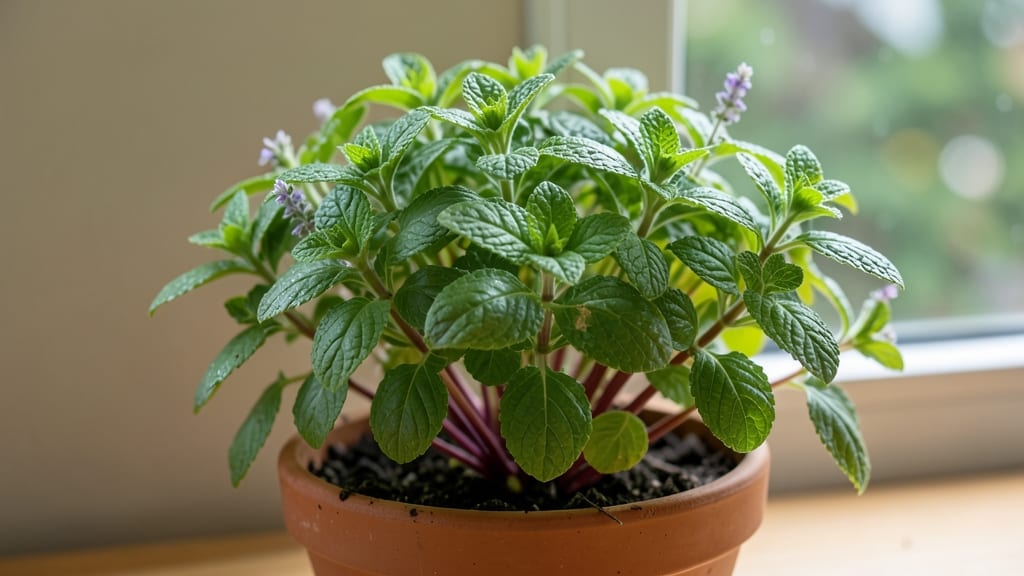
Growing mint indoors is the secret to fresh, fragrant leaves year-round—no backyard needed. 🌿 I’ve turned my kitchen windowsill into a mint factory, and the key is matching its natural love of moisture and shade with the right container and care routine.
You’ll need a pot with drainage holes (mint hates soggy roots), well-draining potting mix, and a spot with 4-6 hours of indirect light—even a north-facing window works. Mint spreads aggressively, so a 6-inch pot is perfect for starters, or use a hanging basket to contain its wanderlust.
By pruning regularly, you’ll encourage bushier growth and prevent leggy stems. Snip the tops just above a leaf pair, and you’ll have fresh mint for teas, cocktails, or crafts within weeks. The smell alone is worth the effort!
Watch for powdery mildew in humid rooms—improve airflow with a small fan—and harvest leaves before they flower for the strongest flavor. This is the one indoor herb that truly pays off with minimal fuss.
📚 In This Guide
- What you need
- Instructions
- Tips and common mistakes
- Wrapping up and next steps
What you need
- ● Mint plant: 1-2 healthy mint cuttings (4-6 inches long) or a small potted mint plant (4-6 inches tall)
- ● Tip: Choose spearmint or peppermint for best indoor results!
- ● Container: 1 medium-sized pot (6-8 inches in diameter) with drainage holes or a shallow tray (if propagating in water)
- ● Material: Terracotta, ceramic, or plastic (avoid metal)
- ● Potting mix: 1 bag (5-10 quarts) of well-draining herb or cactus/succulent mix (or regular potting soil + perlite for aeration)
- ● Watering can or spray bottle (with a fine mist setting)
- ● Pruning shears or clean scissors (for trimming stems)
- ● Grow lights (LED or fluorescent, 12-16 hours/day) if natural light is limited
- ● Peat pellets or coir discs (for hassle-free propagation)
- ● Organic fertilizer (balanced 10-10-10 or liquid seaweed blend)
- ● Mulch (gravel or pebbles) to retain moisture and deter pests
- ● Humidity tray (shallow tray + pebbles + water) for extra moisture-loving mint
How to grow mint indoors for a fresh, year-round supply
Mint thrives indoors with just a few simple steps—here's how to get lush, fast-growing plants that actually stay contained.
🪴 Step 1: Choose the Right Container and Soil
Mint grows aggressively, so use a 6-8 inch deep pot with drainage holes to prevent waterlogging. I always pick terracotta because it breathes and helps prevent root rot. Fill the pot with well-draining potting mix—regular garden soil stays too compacted and suffocates roots.
Add a 1-inch layer of perlite or coarse sand to the bottom for extra drainage. This prevents soggy soil, which mint hates. Pat the mix down lightly so it's firm but not packed—you want roots to spread easily without fighting resistance.
🌱 Step 2: Plant Your Mint Cutting or Seedling
If using a cutting, snip a 4-6 inch stem just below a leaf node and remove the lower leaves. Dip the cut end in rooting hormone (optional but helpful) and plant it 1-2 inches deep in the soil. Press gently around the base to secure it.
For seedlings, plant them at the same depth they were in their nursery pot. Water immediately after planting until moisture seeps from the drainage holes. This settles the soil and removes air pockets around the roots.
☀️ Step 3: Position for Light and Water Consistently
Mint needs 4-6 hours of bright, indirect light daily. A north-facing window or a spot 1-2 feet from a grow light works best. You'll know it's getting enough light when the leaves stay bright green—not pale or yellow.
Water when the top inch of soil feels dry. Stick your finger in—if it's damp, wait another day. Overwatering is the #1 killer of indoor mint. I like to water from the bottom by placing the pot in a tray of water for 10 minutes, then letting it drain completely.
✂️ Step 4: Prune Regularly to Encourage Bushiness
Pinch off the top set of leaves when your mint reaches 4-6 inches tall. This forces the plant to branch out instead of growing tall and leggy. I also trim any yellowing or wilted leaves—this keeps the plant healthy and encourages new growth.
Every 4-6 weeks, give your mint a haircut by cutting back about 1/3 of the plant. This prevents it from getting too woody and keeps the flavor strong. Harvest leaves as needed, but never take more than 1/3 of the plant at once—this keeps it productive.
🌿 Step 5: Keep It Contained and Happy
Mint spreads fast, so if you want to keep it in one pot, trim the roots back by 1/3 every 3-4 months. This prevents the plant from becoming root-bound and struggling. You'll see new growth within a week of trimming.
Fertilize lightly every 6-8 weeks with a balanced liquid fertilizer diluted to half strength. Too much fertilizer burns mint leaves, so less is always better. Watch for signs of over-fertilizing—yellowing leaves or white crust on the soil surface.
Tips & tricks for perfect indoor mint growth
Here's what nobody tells you about keeping mint thriving indoors—these tricks turn good growth into great growth.
Container Selection: While terracotta is my top pick, glazed ceramic pots work too—just make sure they have drainage holes. I've even used hanging baskets with coconut coir liners for vertical growth. The key is the 6-8 inch depth mentioned in Step 1—this gives roots room to spread without getting root-bound. If you're using a shallow container, you'll need to transplant sooner because mint's roots grow aggressively downward.
Light Hack: Those 4-6 hours of bright indirect light can be tricky with standard windows. If your mint starts looking pale, move it closer to the window or supplement with a simple LED grow light. I place mine 6 inches from a 10-watt bulb for 4 hours in the morning and 4 hours in the evening—this mimics natural light cycles and prevents leggy growth.
Pruning Strategy: When you reach Step 4 and pinch those top leaves at 4-6 inches, don't just snip—make your cuts just above a set of leaves where new growth will emerge. This creates bushier plants faster. I also recommend harvesting leaves in the morning when their essential oils are most concentrated. Always leave at least 2-3 sets of leaves on each stem so the plant can continue photosynthesizing.
Fertilizer Timing: The 6-8 week fertilizer schedule works, but I've found mint responds better to a "little and often" approach. Instead of waiting for the full 8 weeks, I fertilize every 10-12 weeks with half-strength organic fish emulsion. This prevents salt buildup in the soil while still providing nutrients. Always water thoroughly before and after fertilizing to prevent root burn.
Pro Tips for Growing Mint Indoors
- Here's what nobody tells you about keeping mint thriving indoors—these tricks turn good growth into great growth.
- Container Selection: While terracotta is my top pick, glazed ceramic pots work too—just make sure they have drainage ...
- Light Hack: Those 4-6 hours of bright indirect light can be tricky with standard windows. If your mint starts looking...
Frequently asked questions
Got questions about growing mint indoors?
You’re not alone! Here are answers to the most common concerns—from speedy growth to pesky pests—so you can keep your mint thriving without the fuss.
How long does it take for indoor mint to grow enough for harvesting?
With the right conditions (bright indirect light, consistent moisture, and warmth), you can start harvesting small sprigs in as little as 4–6 weeks! For fuller, bushier plants ready for regular clipping, aim for 8–12 weeks. The key? Pinch back tips early to encourage branching—think of it like training a tiny, herby bush!
Can I grow mint indoors year-round, or does it need a "rest" period?
Mint is a perennial powerhouse and can grow indoors year-round with proper care! However, if growth slows in winter (due to lower light), boost it with a grow light (12–14 hours/day) or a sunny windowsill. Prune aggressively in fall/winter to keep it compact—it’ll bounce back faster in spring. No hibernation needed!
Why is my indoor mint turning yellow or wilting? Troubleshooting tips!
Yellow leaves? Overwatering is the #1 culprit—mint hates soggy roots. Let the top inch of soil dry out between waterings. Wilting? Check for underwatering or root bound plants (time for a repot!). Brown tips? Low humidity or fluoride in tap water (use filtered water). Pests like spider mites? Wipe leaves with neem oil or rinse with water.
Is it true mint takes over containers? How do I keep it in check?
Mint’s aggressive root system can escape containers quickly. Prevent spread by:
- Planting in a dedicated pot (no sharing soil with other herbs!).
- Pruning regularly—trim ⅓ of the plant every 4–6 weeks.
- Using a deep container (10"+) to encourage root growth downward, not sideways.
What’s the best alternative if I don’t want mint’s strong scent?
If mint’s aroma is too overpowering, try these low-odor indoor herb swaps:
Herb
Uses
Care Tips
Basil
Pesto, salads, pasta
Bright light, water when topsoil is dry
Parsley
Soups, garnishes, tabbouleh
Moderate light, keep soil moist
Chives
Potatoes, omelets, yogurt
Cool temps, water when dry to touch
Wrapping up and next steps
Growing mint indoors isn’t just possible—it’s easy, rewarding, and perfect for fresh flavors year-round! 🌿 With just a few simple steps, you’ll have a thriving herb garden that’s ready to brighten up teas, cocktails, or dishes.
Whether you’re a beginner or a seasoned plant parent, this green thumb adventure is waiting for you.
Ready to dive in? Start by gathering your supplies—then pick a spot, pot, and let your mint magic grow! 🌱 Your kitchen (and taste buds) will thank you.