
Container Gardens
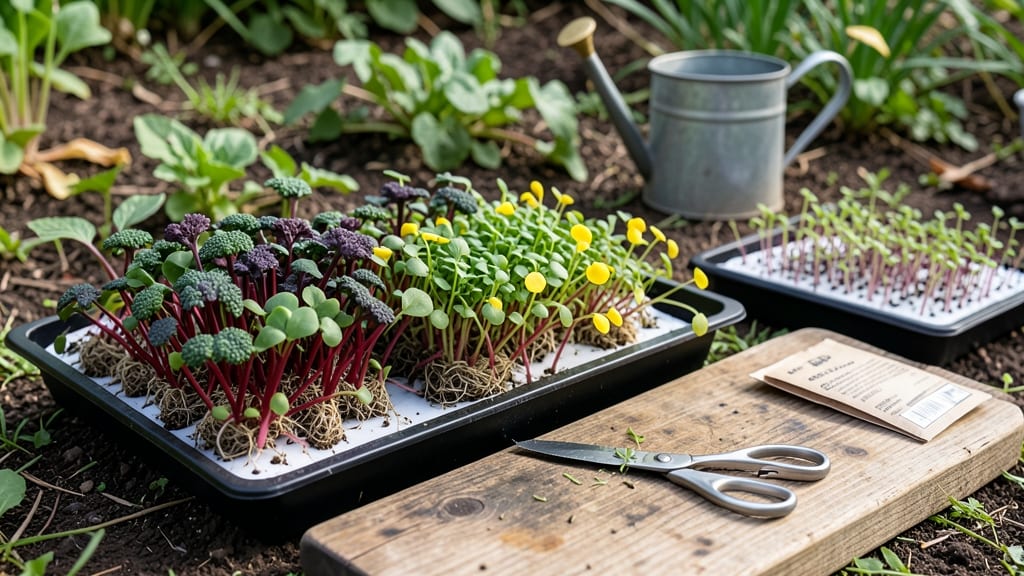
Growing microgreens indoors lets you harvest fresh, nutrient-packed greens in just 10 days—no sunlight required. 🌱 I started with a simple tray and a grow light, and now I grow microgreens year-round, even in my dim apartment.
The secret is in the setup: the right seeds, minimal supplies, and consistent care. You’ll need a shallow tray, growing medium (like coconut coir or paper towels), and a small grow light or sunny windowsill. Microgreens thrive in tight spaces—my setup fits on a kitchen counter.
The process is simple: soak seeds, spread them thin, keep them moist, and watch them grow. By day 10, you’ll have 1-2 inches of vibrant greens ready to snip and eat. They’re packed with flavor and nutrients, and you’ll never buy store-bought sprouts again.
The best part? No weeds, no pests, and no garden required. Avoid overwatering (it’s the #1 killer) and use a fan for airflow to prevent mold. With this method, you’ll get harvest after harvest—perfect for small spaces and busy schedules.
📚 In This Guide
- What you need
- Instructions
- Tips and common mistakes
- Wrapping up and next steps
What you need
- ● Microgreen seeds: 1–2 lbs of high-quality seeds (e.g., broccoli, radish, sunflower, or pea shoots). Choose organic, non-GMO seeds for best results.
- ● Growing trays: 2–4 shallow trays (10"x20" or similar) with drainage holes. Plastic or wooden trays work—just ensure they’re food-safe!
- ● Growing medium: 2–3 inches of organic potting soil or coco coir (sterilized to prevent mold). Avoid garden soil—it’s too dense!
- ● Spray bottle: 1 with a fine mist nozzle (for gentle watering). Avoid over-saturating!
- ● Grow lights: 1–2 full-spectrum LED grow lights (12–16W per tray). Look for 6000K–6500K color temperature for optimal growth.
- ● Timer: 1 adjustable outlet timer (to run lights 14–16 hours/day).
- ○ Seedling mat: 1–2 heating mats (optional but speeds up germination by 20–30%).
- ● Scissors or knife: For trimming microgreens at harvest time.
- ● Humidity dome: 1 clear plastic lid or DIY cover (keeps moisture high during germination).
- ● pH test kit: To check soil pH (ideal range: 6.0–7.0).
- ● Fine mesh screen: For draining excess water post-harvest (prevents soggy greens!).
Step-by-step instructions for growing microgreens indoors
Here's how to grow fast, flavorful microgreens without sunlight—ready to harvest in just 10 days.
🌱 Step 1: Prepare Your Growing Tray and Soil
Start by filling the bottom of your 10x20-inch tray with a ½-inch layer of moistened organic potting soil. Press it down gently but firmly—you want it compact enough to hold seeds but still loose for roots to penetrate. I like to sprinkle a little water over the soil first to help it settle evenly.
Next, spread a ¼-inch layer of organic hemp mats over the soil. These mats act as a natural filter, keeping soil particles out of your microgreens while allowing water to drain properly. Wet the mats lightly with a spray bottle until they're damp but not soaking.
🌱 Step 2: Plant the Seeds Evenly
Sprinkle your ¼ cup of microgreen seeds evenly across the tray. I use a pinch method—gently shake seeds from my fingers while walking my hand over the tray to avoid clumping. For best results, aim for 10-12 seeds per square inch. Cover the seeds with another ¼-inch layer of damp hemp mats.
Lightly mist the top layer with water until the mats are evenly moist. You'll know it's right when the seeds look plump and the mats hold their shape without dripping. Press down very gently with your palm to ensure good seed-to-mat contact—this helps prevent uneven germination.
☀️ Step 3: Provide Grow Lights and Maintain Temperature
Place your tray under a full-spectrum LED grow light positioned 6 inches above the seeds. Microgreens need 14-16 hours of light daily, so set a timer if your light isn't on a smart schedule. I keep mine on a 16-hour cycle for maximum growth speed.
Keep the growing area at a steady 65-75°F. If your space runs cooler, a small space heater or heat mat under the tray can help. Check the soil daily—it should stay consistently moist but never soggy. Mist the top layer lightly if the mats feel dry to the touch.
💧 Step 4: Monitor and Thin as Needed
After 3-4 days, you'll see tiny sprouts pushing through the mats. This is when I remove the top layer of mats—just peel them back gently. The seedlings will be delicate, so I use a soft paintbrush to guide any stragglers upright if they're leaning.
If any areas look too crowded (you'll see seedlings growing right on top of each other), use a small pair of scissors to trim the tallest ones at the base. This ensures all plants get enough light and nutrients. Keep the light 6 inches above the greens and adjust as they grow taller.
✂️ Step 5: Harvest at Peak Freshness
Your microgreens are ready to harvest when they reach 1-2 inches tall and have developed their first true leaves. Use clean, sharp scissors to cut just above the soil line, leaving the roots behind. This method keeps the tray ready for another planting immediately.
Rinse the greens gently under cool water to remove any soil particles, then pat dry with a clean towel. Store them in an airtight container in the fridge for up to 5 days. For best flavor, use them within 2-3 days—they're at their most vibrant right after harvesting.
Tips & tricks for perfect indoor microgreens
Here's what nobody tells you about growing these nutrient-packed greens indoors without sunlight.
Light Positioning: Those 14-16 hours of light matter, but placement is everything. Keep the full-spectrum LED grow light 6 inches above the seeds at all times—even as your microgreens grow taller. I adjust the height every 2-3 days by gently lifting the light to maintain this distance. Too close and you'll scorch them; too far and they'll stretch leggy.
Temperature Matters: The 65-75°F range is ideal, but consistency is more important than hitting the exact number. If your space runs cooler, place a small heat mat under the tray to maintain warmth. I've seen germination slow dramatically when temps drop below 60°F—seeds need that warmth to activate properly. A simple thermometer near your setup helps monitor this.
Thinning Technique: When you see those crowded seedlings in Step 4, use a small pair of scissors to trim the tallest ones at the base rather than pulling them out. This prevents disturbing the roots of neighboring plants. I like to work in small sections, trimming just enough to create space for air circulation—this reduces the risk of mold and promotes even growth.
Harvesting Timing: The 1-2 inch height guideline is perfect, but don't wait until they're fully 2 inches if you're eager to eat them. Microgreens at 1 inch are still packed with nutrients and flavor. I harvest mine at 1.5 inches for the best balance of tenderness and nutrition. Just make sure they've developed those first true leaves—this is your cue they're ready!
Pro Tips for Growing Microgreens Indoors
- Here's what nobody tells you about growing these nutrient-packed greens indoors without sunlight.
- Light Positioning: Those 14-16 hours of light matter, but placement is everything. Keep the full-spectrum LED grow li...
- Temperature Matters: The 65-75°F range is ideal, but consistency is more important than hitting the exact number. If ...
Frequently asked questions
Got questions about indoor microgreen growing? You’re not alone—here are answers to the most common ones!
How long does it take to grow microgreens indoors?
Most microgreens are ready to harvest in 7–14 days after sprouting, depending on the variety. Fast growers like radish or broccoli take about 10 days, while slower ones like sunflower may need 2 weeks. Start checking for harvest cues (like first true leaves) around day 7!
Do I need grow lights, or can I use regular household lights?
Household lights (like incandescent bulbs) won’t cut it—microgreens need 12–16 hours of light daily. Opt for LED grow lights (full-spectrum) or fluorescent bulbs (like T5s) placed 6–12 inches above trays. Skip the dim lamp—your greens will stretch and weaken!
What’s the best way to water microgreens without overdoing it?
Keep soil consistently moist but not soggy. Mist lightly 2x/day or use a spray bottle to avoid drowning seeds. For deeper trays, water from the bottom (place them in a shallow tray of water for 10 mins, then drain). Overwatering = mold risk! Let the top inch dry slightly between waterings.
Can I reuse the growing trays or soil for another batch?
Trays? Yes! Wash with hot, soapy water and disinfect with a 10% bleach solution (rinse well). Soil? No—discard it after harvest to prevent mold or pests. Fresh, sterile soil (or coconut coir) ensures healthy regrowth. Pro tip: Label trays to track varieties!
Why are my microgreens turning yellow or moldy?
Yellowing? Likely overwatering or poor drainage. Mold (fuzzy spots)? Too much moisture + low airflow. Fix it by:
- Reducing water (let soil dry slightly between sessions).
- Improving airflow (use a small fan or open windows).
- Thinning crowded trays (if seedlings are touching).
Act fast—mold spreads quickly!
Wrapping up and next steps
Growing microgreens indoors is a game-changer—it’s fast, rewarding, and packed with nutrition! With just a few supplies and minimal effort, you can harvest fresh, vibrant greens in under two weeks, no sunlight required.
Whether you’re a beginner or a seasoned gardener, this method proves that homegrown goodness is always within reach.
Ready to take the next step? Start small—try a single tray of your favorite microgreens, like peppermint radish or sunflower shoots, and watch your confidence (and harvests!) grow.
Soon, you’ll be experimenting with flavors, sharing with friends, or even turning your newfound skills into a side hustle. Your kitchen garden awaits—let’s grow! 🌱✨