
Container Gardens
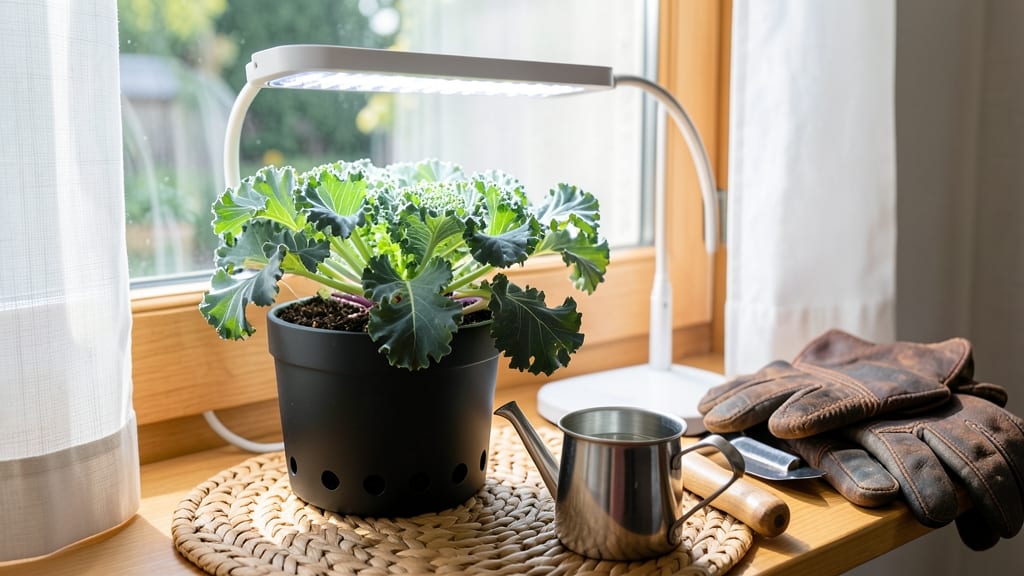
Growing kale indoors means crisp, homegrown greens year-round—no backyard needed. 🌱 I’ve grown kale in my sunless apartment for three winters straight, and the secret isn’t fancy setups but smart light, soil, and timing.
Most people assume you need a greenhouse, but I’ve done it with a simple grow light and a 5-gallon pot.
The real game-changer? 4 hours of light daily—not the 12+ hours you’d think. Kale thrives on cool weather and short days, so I use a basic LED bulb on a timer. You’ll need well-draining soil, a container with drainage holes, and patience (harvest starts in 4-6 weeks).
The first leaves are tender enough to eat raw, while mature ones hold up in salads or sautéed dishes.
Here’s the best part: no pests, no weeds, and no weather worries. My kale stays lush and sweet, even when outdoor temps drop. The trick is keeping soil moist (not soggy) and fertilizing lightly every 3-4 weeks. Overwatering is the #1 killer—kale hates wet feet.
Perfect for small spaces, balconies, or windowsills. Once you master this, you’ll never buy store-bought kale again. Let’s get those seeds sprouting!
📚 In This Guide
- What you need
- Instructions
- Tips and common mistakes
- Wrapping up and next steps
What you need
- ● Container: A 5–10 gallon pot (or deeper) with drainage holes—kale loves space to grow! Plastic, fabric, or ceramic all work.
- ● Growing Medium: A high-quality potting mix (avoid garden soil). Look for a blend labeled for vegetables or seed starting.
- ● Seeds or Seedlings: Seeds: 10–20 kale seeds (choose compact varieties like Dwarf Blue Curled or Winterbor).
- ● OR Seedlings: 3–5 healthy starter plants (transplant after 4–6 weeks).
- ● Grow Lights: A full-spectrum LED grow light (12–24W) or fluorescent bulb (T5 or T8). Position it 6–12 inches above plants for 4+ hours daily.
- ● Watering Can or Spray Bottle: A gentle spray nozzle keeps soil moist without overwatering.
- ● Fertilizer: A balanced liquid fertilizer (10-10-10 or 5-5-5) or organic compost tea for nutrient boosts.
- ● Drainage Tray: A shallow tray to catch excess water and prevent root rot.
- ● A humidity dome or plastic wrap to retain moisture while seedlings sprout.
- ● Self-watering system (like a wick or reservoir) for hands-off care.
- ● pH testing kit to ensure soil is slightly acidic (6.0–7.0 is ideal for kale).
- ● Support stakes or cages if growing tall varieties (though most compact types don’t need them).
- ● Air purifier or small fan to improve airflow and prevent mold.
Step-by-step instructions for growing kale indoors
Here's how to grow hearty kale indoors with minimal light—no fancy setup required.
🪴 Step 1: Choose the Right Container and Soil
Pick a container with drainage holes that's at least 6 inches deep for each plant. I use 8-inch pots for better root space and stability. Fill the bottom with 1 inch of perlite to improve drainage—kale hates soggy feet. Then add 2-3 inches of high-quality potting mix (not garden soil) and moisten it until damp but not dripping.
Press the soil down lightly so it's firm but not packed. Kale roots need good contact with the soil to anchor properly. If your mix feels too dry after pressing, add a little more water—it should hold together when squeezed but not crumble.
🌱 Step 2: Plant Seeds at the Correct Depth
Sow 2-3 seeds per pot at a depth of about ¼ inch—just twice the width of the seed. Planting too deep slows germination, and kale seeds are tiny. Space them 1 inch apart in the pot to avoid crowding. Cover lightly with a sprinkle of additional soil, then mist gently with water until the surface looks evenly moist.
Place the pots in a warm spot (65-75°F) until germination. A seedling heat mat helps if your home runs cooler. You'll see tiny green sprouts in 5-10 days. Once they emerge, remove the weakest seedling to leave just one strong plant per pot—this prevents competition for nutrients.
☀️ Step 3: Provide Light and Maintain Humidity
Kale thrives with 4-6 hours of bright light daily, but it won’t bolt in low light like lettuce. Place your pots near a south-facing window or under a grow light (LED bulbs work best). If using natural light, rotate the pots quarter-turn daily so plants grow straight instead of leaning.
Keep the soil evenly moist—not soggy, not dry. Stick your finger 1 inch deep into the soil; if it feels dry, water until moisture reaches 2 inches down. Kale is forgiving but won’t grow well if the soil dries out completely. A humidity tray (pebbles + water under the pot) helps if your home is dry.
🌿 Step 4: Fertilize and Prune for Continuous Harvest
After 4 weeks, start feeding with a balanced liquid fertilizer (like 10-10-10) diluted to half strength. Apply every 2 weeks to keep leaves lush. Kale loves nutrients but won’t tolerate salt buildup, so always rinse the soil lightly after fertilizing.
Harvest outer leaves when they reach 4-6 inches tall, cutting just above a set of smaller leaves. This encourages bushier growth. If your kale flowers (bolts), it’s time to harvest the whole plant—young leaves are still edible, though bitter. Prune any yellowing leaves immediately to redirect energy to new growth.
⏰ Step 5: Troubleshoot and Extend the Harvest
Watch for pests like aphids—they love kale! Spray off gently with water first. If they persist, use neem oil (diluted as directed). Yellow leaves? Usually means too much water or not enough light. Adjust your care and the plant will bounce back within a week.
To keep harvesting for months, replace old plants every 8-10 weeks. Start new seeds in the same pot after harvesting the previous batch—kale’s deep roots will find space. With this cycle, you’ll have fresh greens year-round, even in dim corners.
Tips & tricks for perfect indoor kale growth
Here's what nobody tells you about growing kale indoors that'll make all the difference between scraggly stems and lush, harvestable leaves.
Container Depth Matters: While 6-inch pots work, I've found that 8-inch pots give kale roots the space they need to establish strong anchors. Kale has a deep taproot—don't skimp on depth! If you're using shallower containers, you might see slower growth or plants that topple over when harvesting.
Germination Warmth Hack: Kale seeds need consistent warmth to sprout reliably. If your home stays below 65°F, invest in a small seedling heat mat—it's a game-changer for germination rates. I've seen seeds take twice as long to sprout when kept in cooler spots. Place the pots on the heat mat until you see those first green shoots, then remove it to avoid overheating the young plants.
Light Rotation Secret: That daily quarter-turn rotation isn't just about looks—it's about preventing your kale from growing lopsided. Kale will lean dramatically toward any light source. I set a timer on my phone to remind me to rotate the pots every morning. This ensures even growth and prevents leaves from developing uneven shapes that make harvesting messy.
Fertilizer Timing Tip: The 4-week mark is when kale really starts to need nutrients, but I've learned to wait until the plants have at least 4-6 true leaves before fertilizing. This prevents overloading young plants with salts that can actually stunt their growth. Always dilute that fertilizer to half strength—kale is tough but not salt-tolerant like some other greens.
Pro Tips for Growing Kale Indoors
- Here's what nobody tells you about growing kale indoors that'll make all the difference between scraggly stems and lu...
- Container Depth Matters: While 6-inch pots work, I've found that 8-inch pots give kale roots the space they need to e...
- Germination Warmth Hack: Kale seeds need consistent warmth to sprout reliably. If your home stays below 65°F, invest ...
Frequently asked questions
Got questions about growing kale indoors? You’re not alone! Here are some of the most common concerns—and their answers—to help you cultivate thriving, homegrown greens with ease.
How much light does kale really need if I only have 4 hours a day?
Kale thrives with 4–6 hours of bright, direct light daily—think south-facing windows or a grow light 6–12 inches away. If leaves yellow or stretch (bolting), supplement with a full-spectrum LED for 12–14 hours total. Rotate plants weekly for even growth!
How long does it take for indoor kale to be ready to harvest?
Baby leaves are ready in 3–4 weeks, while full-size plants take 6–8 weeks. Harvest outer leaves first to encourage regrowth—just snip with scissors! For continuous harvests, succession-plant seeds every 2–3 weeks.
Why is my indoor kale turning bitter or tough?
Bitter flavors often stem from too much heat or light stress. Keep temps between 60–70°F and avoid direct sun (which burns leaves). For tender kale, harvest younger leaves or try Lacinato (Dinosaur) varieties—they’re milder and more forgiving indoors.
Can I grow kale indoors without soil? Hydroponics or soil?
Yes! Kale grows well in soil (pots with drainage), but also thrives in hydroponic systems (like deep-water culture) or coco coir. Just ensure roots stay moist and nutrients are balanced. Soil mix? Use a light potting blend with compost for best results.
What pests should I watch for, and how do I prevent them?
Indoor kale rarely faces pests, but aphids, spider mites, or fungus gnats can appear. Prevent them with:
- Neem oil spray (weekly preventive)
- Sticky traps for gnats
- Isolate new plants for 2 weeks
Wrapping up and next steps
Growing kale indoors is a rewarding way to enjoy fresh, nutrient-packed greens year-round—even with just 4 hours of sunlight daily! 🌱 With the right setup, patience, and care, you’ll soon be harvesting vibrant leaves for salads, smoothies, or sautés. Whether you’re a beginner or a seasoned gardener, this method proves that homegrown goodness is always within reach.
Ready to take the next step? Start by planting your first seed or transplanting a young kale today—your future self (and taste buds!) will thank you. Happy growing! 🌿