
Container Gardens
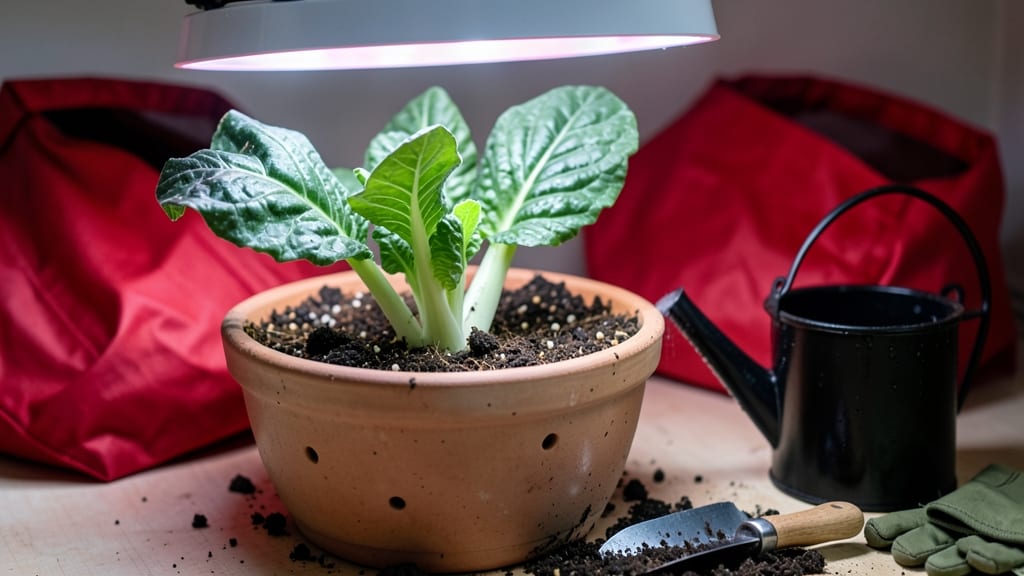
Growing bok choy indoors delivers crisp, baby greens in just 4 weeks—no garden required. 🌱 I learned the hard way that store-bought bok choy can’t compete with homegrown, so I set up a simple indoor system that works even in apartments.
The secret? A balance of LED light, consistent moisture, and the right container setup.
You’ll need a 5-7 gallon container (or deep pot), well-draining potting mix, and a basic LED grow light on a timer. Bok choy thrives in cool temps (60-70°F) and high humidity—just mist the leaves daily if your home feels dry.
Unlike finicky greens, bok choy forgives minor mistakes, making it perfect for beginners.
By week 3, you’ll snip harvest-ready baby leaves for salads, stir-fries, or steaming. The plants stay productive for 6-8 weeks with proper care, giving you a steady supply of fresh greens year-round. No pests, no weeds, just crisp stems and tender leaves whenever you crave them.
Works in kitchens, sunrooms, or even basements with proper lighting. The only challenge? Avoiding overcrowding—space plants 6 inches apart to prevent bolting. Ready to grow your own? Here’s how to set it up right the first time.
📚 In This Guide
- What you need
- Instructions
- Tips and common mistakes
- Wrapping up and next steps
What you need
- ● Bok choy seeds: 10–20 seeds (choose baby bok choy or baby pak choi for faster harvests).
- ● Growing container: 5–7" deep pot (minimum) with drainage holes (e.g., 10" nursery pot or self-watering planter).
- ○ Optional: 2–3" deep tray for seed starting (if pre-sprouting).
- ● High-quality potting mix: 2–3 cups of seed-starting mix or well-draining organic soil (avoid garden soil—it compacts!).
- ● LED grow light: Full-spectrum LED bulb (15–25W) or clip-on grow light (e.g., 12"–18" width coverage).
- ● Pro tip: Adjust height to 2–4" above seedlings (closer = more light, but avoid burning!).
- ● Spray bottle (with water) for gentle seedling hydration.
- ● Fertilizer: Required: Balanced liquid fertilizer (5-5-5 or 10-10-10, diluted to half-strength).
- ○ Optional: Slow-release granules (e.g., osmocote) mixed into soil at planting.
- ● Humidity dome or plastic wrap to retain moisture during germination.
- ● Plant labels and a marker to track varieties.
- ● Small hand trowel for transplanting seedlings.
- ○ Thermometer/hygrometer (optional, for monitoring ideal temps: 60–70°F).
- ● Grow light timer (to automate 12–16 hours of light/day).
Step-by-Step instructions for growing bok choy indoors
Here's how to grow crisp, fast bok choy in just 4 weeks using LED lights and minimal space.
🌱 Step 1: Prepare Containers and Seed Starting Mix
Choose 4-inch deep containers with drainage holes—bok choy roots need room to spread but won't tolerate soggy soil. I use plastic nursery pots because they're lightweight and stackable. Fill each container with 1 cup of sterile seed-starting mix per serving, leaving ½ inch below the rim for watering.
Press the soil down gently to remove air pockets, then moisten it thoroughly with warm water until it feels like a damp sponge. Bok choy seeds germinate best in consistently moist soil, so avoid letting it dry out during planting. I like to tap the container on the table once to settle the soil evenly—this prevents uneven seed depth, which can cause staggered germination.
🌱 Step 2: Sow Seeds at the Right Depth
Plant 3-4 seeds per container at a depth of just ¼ inch—any deeper and they'll struggle to push through. Use your finger to make small dimples in the soil, then place seeds inside and cover lightly with additional mix. Bok choy seeds are tiny, so I tap the seed packet gently to release them one at a time—planting too many in one hole leads to weak, crowded seedlings.
After sowing, mist the surface with a spray bottle until the soil looks evenly damp but not glistening. The goal is to keep seeds moist without creating a soggy layer that could rot them. Place the containers in a warm spot (70-75°F)—a seedling heat mat works wonders for speeding up germination, which typically occurs in 5-7 days. Watch for the first sprouts to emerge, then thin to the strongest seedling per container.
☀️ Step 3: Provide Consistent Light for Fast Growth
Once seedlings appear, move them under a full-spectrum LED grow light positioned 4-6 inches above the plants. Bok choy needs 12-14 hours of light daily to grow quickly and stay compact. I adjust the light height as the seedlings grow—keeping it too close causes leggy stems, while too far away slows development. You'll know the light is right when seedlings grow 1-2 inches tall in 5-7 days with deep green leaves.
Rotate the containers a quarter turn every 2 days to prevent leaning toward the light. This ensures even growth and sturdy stems. If you notice leaves turning pale or stretching excessively, your light is too far away—bring it closer immediately. Bok choy matures fast, so maintaining consistent light is key to avoiding bitter flavors in the harvest.
💧 Step 4: Water and Fertilize for Crisp Texture
Water the seedlings when the top inch of soil feels dry, using room-temperature water to avoid shocking the roots. I water from the bottom by placing containers in a tray of water for 10-15 minutes, then letting them drain completely. This method prevents soil splash on leaves, which can spread disease. Bok choy prefers evenly moist soil but hates soggy conditions—yellowing leaves are your first sign of overwatering.
After 2 weeks, when seedlings have 3-4 true leaves, fertilize lightly with a half-strength liquid fertilizer (like fish emulsion or seaweed extract). This boosts growth without overwhelming the plants. I fertilize every 2 weeks thereafter, always watering the soil first to prevent root burn. The faster the leaves grow, the more crisp your bok choy will be at harvest.
⏰ Step 5: Harvest at Peak Maturity
Bok choy is ready to harvest in 4-5 weeks when the leaves reach 6-8 inches tall and the stems are ½ inch thick. Cut the outer leaves first, leaving the inner growth to continue producing. This "cut-and-come-again" method extends your harvest by 2-3 weeks. I use clean scissors to snip just above a leaf node, which encourages new growth from that point.
For baby bok choy, harvest when leaves are 4-6 inches tall—these tender leaves are perfect for stir-fries and salads. If you let the plant mature fully, the stems will thicken and the leaves will turn bitter. To keep production going, fertilize again after the first harvest and maintain the same light and watering routine. With proper care, one container can yield 3-4 harvests before the plant bolts.
Tips & tricks for perfect indoor bok choy growth
Growing crisp bok choy indoors isn't rocket science, but these small details make all the difference between wimpy seedlings and restaurant-quality greens.
Seedling Selection: After the 5-7 day germination period in Step 2, don't rush to thin your seedlings. Wait until they have at least 2 true leaves and are about 1 inch tall. Use clean scissors to snip at soil level rather than pulling—this prevents disturbing the roots of remaining plants. I've found that keeping the strongest seedling per container (rather than all 3-4) gives you more robust growth in the 4-week timeline. The extra plants you remove make great compost or can be transplanted if you're feeling ambitious.
Light Adjustment: The 12-14 hours of daily light in Step 3 is crucial, but don't just set it and forget it. Bok choy grows surprisingly fast—you'll notice leaves reaching for the light within just 5-7 days. Adjust your LED light height every 3-4 days as the plants grow, keeping it 4-6 inches above the tallest leaves. Too close causes leggy growth, while too far away leads to pale, weak stems. I keep a small ruler handy to measure—this precision pays off when you harvest crisp, compact heads rather than spindly shoots.
Fertilizer Timing: The instructions mention fertilizing at 2 weeks with half-strength liquid fertilizer, but here's what nobody tells you: bok choy responds best to frequent, light feedings rather than heavy doses. After that initial 2-week feeding, I fertilize again at 3 weeks using just a quarter-strength solution. This prevents nutrient burn while still promoting that fast growth we want. Think of it like training for a sprint—short bursts of energy keep you moving quickly without burning out.
Harvest Strategy: When harvesting in Step 5, don't just grab any leaves—target the outer leaves first, working your way inward. This "cut-and-come-again" method extends your harvest by 2-3 weeks, giving you multiple harvests from one container. For baby bok choy, I harvest when leaves reach 4-6 inches, using clean kitchen scissors to make precise cuts just above leaf nodes. This encourages new growth from that exact point, giving you a continuous supply of tender greens throughout the 4-week cycle.
Pro Tips for Growing Bok Choy Indoors
- Growing crisp bok choy indoors isn't rocket science, but these small details make all the difference between wimpy se...
- Seedling Selection: After the 5-7 day germination period in Step 2, don't rush to thin your seedlings. Wait until the...
- Light Adjustment: The 12-14 hours of daily light in Step 3 is crucial, but don't just set it and forget it. Bok choy ...
Frequently asked questions
Got questions about growing bok choy indoors? You’re not alone—this fast-growing green can be tricky if you’re new to container gardening! Here are answers to the most common questions to help you avoid pitfalls and enjoy a bountiful harvest.
How much light does bok choy need indoors?
Bok choy thrives with 12–16 hours of bright light daily. If using LED grow lights, position them 6–12 inches above the plants and keep them on a timer. Without enough light, leaves will turn yellow or stretch leggy. A sunny south-facing window works too, but supplement with grow lights in winter for best results.
Can I grow bok choy year-round indoors?
Yes! Bok choy grows quickly (3–4 weeks to harvest), so you can plant new batches every 2–3 weeks for a continuous supply. Just ensure consistent light, moisture, and warmth (65–75°F). In hot climates, use a fan to prevent bolting (flowering too soon), and in cold months, adjust light intensity to avoid leggy growth.
What if my bok choy bolts or flowers?
Bolting (sending up a flower stalk) usually happens due to heat stress, uneven watering, or insufficient light. To prevent it, keep soil consistently moist (not soggy), avoid temperature spikes above 80°F, and ensure strong light. If it bolts, harvest the leaves before the stalk thickens—they’re still edible and tender!
How often should I water bok choy indoors?
Water when the top inch of soil feels dry—typically every 2–3 days, depending on humidity. Overwatering causes root rot, while underwatering leads to bitter leaves. Use a moisture meter or stick your finger in the soil to check. A tray with pebbles and water (for humidity) helps maintain steady moisture without drowning the roots.
Can I grow other greens like baby kale or spinach the same way?
Bok choy’s growing conditions work well for other leafy greens like spinach, arugula, or baby kale. However, note their light and temperature preferences: spinach tolerates cooler temps (50–65°F), while arugula grows faster in cooler conditions. Adjust light duration (10–12 hours for spinach) and monitor for pests like aphids, which love tender greens.
Wrapping up and next steps
Growing bok choy indoors is a rewarding and efficient way to enjoy fresh, homegrown greens year-round—without needing a sprawling garden. With just a few supplies, consistent light, and patience, you’ll harvest crisp, flavorful leaves in just four weeks.
Whether you’re a beginner or a seasoned gardener, this method proves that small spaces can yield big results!
Now that you’re ready to start, plant your first seeds today and watch your indoor garden thrive! Need extra inspiration? Try experimenting with other fast-growing greens like mizuna or spinach next. Happy growing! 🌱✨