
Container Gardens
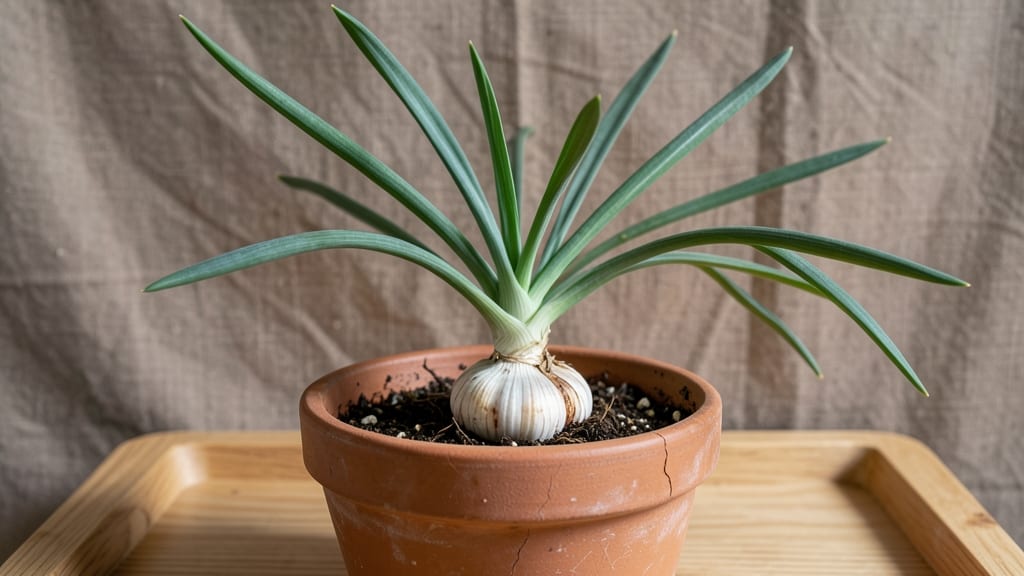
Growing the garlic indoor plant lets you harvest fresh cloves year-round without needing a garden. 🌱 I’ve grown garlic in pots for five winters straight, and the secret lies in choosing the right variety—softneck garlic thrives indoors because it doesn’t need vernalization (that’s a fancy word for cold treatment).
The first step is picking a container with drainage, filling it with well-draining soil, and planting individual cloves just like you would outdoors.
You only need 4-6 hours of indirect light daily—an east-facing window or a grow light works perfectly. Water sparingly: once every 2-3 weeks when the top inch of soil feels dry.
Overwatering is the #1 killer of indoor garlic. The real magic happens in 3-4 months, when you’ll see tall green shoots and, eventually, small bulbs forming underground.
Harvest when the lower leaves turn brown but the top ones stay green—this usually happens in late spring or early summer. Cure the bulbs in a dry, dark place for 2-3 weeks before storing.
The flavor is milder than store-bought but far fresher, and you’ll never run out of cloves for cooking. Even in small apartments, this method delivers.
Troubleshooting is simple: yellow leaves mean too much water, and slow growth means more light. If your garlic bolts (sends up a flower stalk), it’s still edible—just harvest the scapes for flavorful garlic greens.
This method works for any indoor space, and once you try it, you’ll never buy garlic from the store again.
📚 In This Guide
- What you need
- Instructions
- Tips and common mistakes
- Wrapping up and next steps
What you need
- ● Garlic bulbs: 1–2 organic, untreated bulbs (preferably hardneck varieties like Silverskin or Artichoke for best indoor results). Choose bulbs with firm, plump cloves.
- ● Containers: 1–2 shallow pots (6–8 inches deep) with drainage holes. Terracotta or ceramic works best to prevent rot.
- ● Potting mix: 1 bag of well-draining, sterilized soil blend (e.g., 50% potting soil + 50% perlite or sand). Avoid garden soil—it’s too dense!
- ● Drainage material: Small pebbles or broken pottery pieces (¼ inch layer) for the pot’s base.
- ● Watering can: With a narrow spout for precise hydration.
- ● Pruning shears: For trimming leaves or dividing bulbs later.
- ● Humidity tray: A shallow tray with pebbles and water to boost moisture (especially in dry climates).
- ● Grow lights: LED or fluorescent (12–16 hours/day) if natural light is <12 hours/day.
- ● Fertilizer: Balanced liquid fertilizer (5-5-5 or 10-10-10) for occasional feeding.
- ● Thermometer/hygrometer: To monitor ideal temps (60–70°F) and humidity (50–70%).
How to grow garlic indoors for year-round harvests
Here's my foolproof method for growing robust garlic indoors—no greenhouse or bright windowsill required.
🌱 Step 1: Select and Prepare Garlic Cloves
Choose hardneck garlic varieties like Rocambole or Purple Stripe—they adapt best to indoor conditions. Break apart a whole bulb and separate the cloves, ensuring each has a small root base still attached. Discard any soft or damaged cloves—they won’t sprout reliably.
Soak the selected cloves in lukewarm water for 12 hours to soften the papery outer skin. This step speeds germination and prevents rot later. After soaking, let them dry on a paper towel for 1 hour before planting. The drying step prevents fungal issues that thrive in damp soil.
🪴 Step 2: Choose Containers and Soil
Use 6-inch deep pots with drainage holes—garlic roots need room to grow downward. I recommend terracotta because it breathes better than plastic and helps prevent overwatering. Fill each pot with a mix of 50% potting soil and 50% perlite for drainage.
Plant each clove 2 inches deep, pointy end up, about 4 inches apart in the pot. Press the soil gently around the cloves but don’t compact it—garlic roots need loose soil to spread. If using a larger pot, space cloves in a grid pattern to mimic outdoor planting.
💧 Step 3: Water and Provide Consistent Conditions
Water the pots until water drains freely from the bottom holes—garlic hates soggy soil. After that, keep the soil evenly moist but never soggy. I check moisture by sticking my finger 1 inch deep; if it feels dry, it’s time to water again.
Place the pots in a spot with indirect light—garlic tolerates lower light than most plants. A north-facing window or under a grow light (12 hours daily) works best. Avoid direct sun, which can scorch the leaves. Maintain room temperature (65-75°F)—garlic grows best in stable conditions.
⏰ Step 4: Monitor Growth and Fertilize Lightly
After 4-6 weeks, you’ll see green shoots emerge. Once leaves reach 6 inches tall, feed the plants with a balanced liquid fertilizer (10-10-10) diluted to half strength. I fertilize every 4 weeks during the growing season to encourage bulb development.
Watch for yellowing leaves—this usually means overwatering or poor drainage. If leaves flop over, the pot may need more perlite or better drainage. Garlic grows slowly indoors, so be patient. With proper care, you’ll see scape stalks (flowering stems) in 8-10 months, signaling bulbs are nearly ready.
✂️ Step 5: Harvest and Store for Future Use
When lower leaves turn brown (usually 9-12 months after planting), it’s time to harvest. Gently dig up the bulbs with a fork, being careful not to bruise them. Let them dry in a shady, well-ventilated area for 2 weeks before storing.
Save the largest, healthiest bulbs to replant next season. Store the rest in a cool, dark place (like a pantry) for up to 6 months. Indoor-grown garlic may be smaller than outdoor varieties, but it’s just as flavorful—and you’ll never run out of fresh cloves!
Tips & tricks for perfect indoor garlic cultivation
These insider tricks will help you coax the most flavorful harvest from your indoor garlic plants—even when space and light are limited.
Variety Selection: Rocambole and Purple Stripe hardneck varieties are your best bets for indoor growing. These adapt better to lower light conditions than softneck varieties. I've found they produce slightly smaller bulbs but with more intense flavor—perfect for cooking.
Soaking Strategy: The 12-hour lukewarm water soak isn't just about softening the skin—it's a germination accelerator. I like to use filtered water and add a drop of hydrogen peroxide to prevent bacterial growth during this critical step. After soaking, that 1-hour drying period is non-negotiable; it's what prevents those pesky fungal infections that can ruin your entire crop.
Container Considerations: While terracotta is ideal, you can use plastic pots in a pinch—just be extra vigilant about drainage. The 50/50 soil-perlite mix is crucial for preventing root rot, which is garlic's biggest indoor enemy. I've had success using coconut coir instead of perlite for those with limited access to gardening supplies, though it retains slightly more moisture.
Light Management: Garlic's tolerance for lower light is impressive, but don't push it. If you notice leaves stretching excessively (a sign of light deprivation), supplement with a basic LED grow light for 12 hours daily. Position it about 6 inches above the plants—closer than that can scorch the delicate leaves, while farther away won't provide enough intensity.
Pro Tips for Garlic Indoor Plant
- These insider tricks will help you coax the most flavorful harvest from your indoor garlic plants—even when space and...
- Variety Selection: Rocambole and Purple Stripe hardneck varieties are your best bets for indoor growing. These adapt ...
- Soaking Strategy: The 12-hour lukewarm water soak isn't just about softening the skin—it's a germination accelerator....
Frequently asked questions
Got questions about growing your own garlic indoor plant? Here are some of the most common ones—plus straightforward answers to help you succeed!
Can I grow garlic indoors year-round, or do I need a seasonal break?
Yes! Garlic thrives indoors year-round if you provide consistent, indirect light (6–8 hours daily) and cooler temperatures (60–70°F). Skip the summer heatwave—garlic goes dormant in extreme warmth. Rotate pots occasionally for even light exposure.
How do I know if my garlic plant is getting enough light?
Watch for leggy stems or pale leaves—signs of light deprivation. Place it near a south-facing window or supplement with a grow light (12–14 hours/day). If leaves turn yellow, it may be overwatered or underlit. Adjust accordingly!
Does garlic need a cold period to grow bulbs?
Yes! Even indoors, garlic benefits from a 4–6 week "winter" chill (40–50°F) to trigger bulb formation. Use a cool basement or fridge (with humidity) for 6–8 hours daily, then return to room temp. Skip this step? You’ll get greens but fewer bulbs.
What’s the easiest garlic variety for beginners?
Start with softneck garlic (e.g., ‘Silverskin’ or ‘Artichoke’)—it’s hardier, disease-resistant, and grows well in containers. Hardneck varieties (like ‘Rocky’ or ‘German Red’) need more care but produce flavorful bulbs. Check seed packets for "container-friendly" labels!
Why are my garlic leaves turning brown or mushy?
Brown tips? Overwatering or fungal issues (like white rot) are likely culprits. Let soil dry 2 inches deep between waterings, and avoid wet foliage. For mushy stems, trim affected areas and repot in sterile, well-draining soil. Boost airflow with a small fan!
Can I grow other alliums (like chives or onions) alongside garlic?
Chives, green onions, and leeks
make great indoor companions—they share similar light/water needs. Just space pots 4–6 inches apart to prevent crowding. Avoid planting shallots nearby; they compete aggressively for nutrients.
Wrapping up and next steps
Growing a garlic indoor plant is a rewarding way to enjoy fresh, flavorful harvests year-round—even with minimal sunlight! 🌱 Whether you're a seasoned gardener or just starting, this low-maintenance method proves that you don’t need a sun-drenched garden to cultivate your own green gold.
With the right setup and a little patience, you’ll soon be savoring homegrown garlic in your favorite dishes.
Ready to take the next step? Start by gathering your supplies, follow the simple steps, and watch your garlic thrive! Your kitchen—and taste buds—will thank you. 😊