
Container Gardens
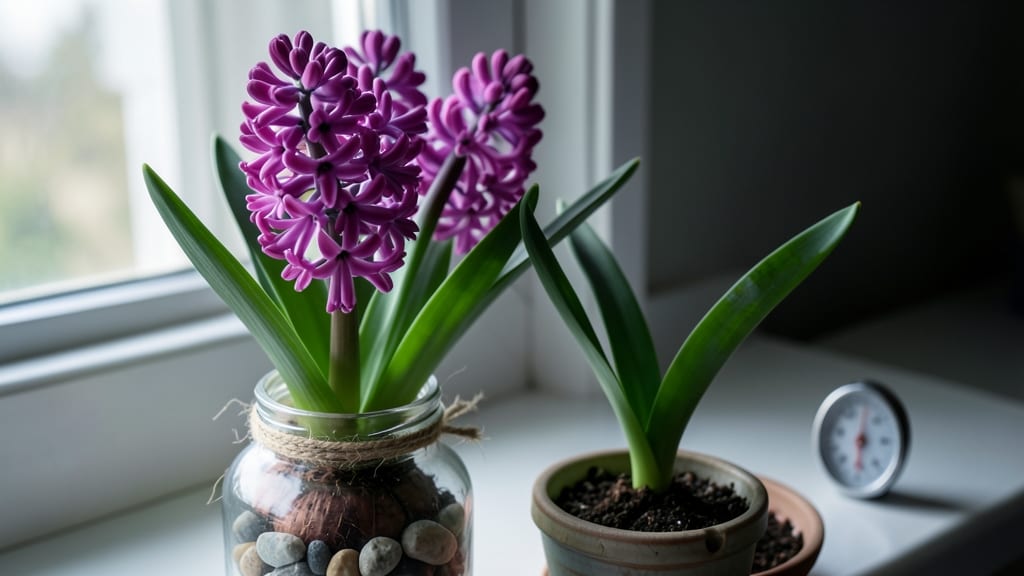
Forcing tulip bulbs indoors turns your winter into a burst of spring color—8 weeks of patience pays off with blooms that brighten gray days. 🌷 I’ve forced bulbs for years, and the secret isn’t complicated: it’s about mimicking nature’s timing with the right containers, soil, and light.
Most people overthink it, but the basics—cool storage, proper potting, and gradual warmth—are all you need to coax those blooms indoors.
The magic starts with paperwhite narcissus or tulips (hyacinths work too), a shallow container, and potting mix that drains well. Skip the fancy setups—even a repurposed vase or old bucket works.
After 12-16 weeks of chilling (your fridge’s crisper drawer does the trick), plant the bulbs close together, roots down, and keep them in a dark, cool spot until shoots appear. That’s when the real fun begins: moving them to light and watching them wake up.
By week 6, you’ll see green tips poking through the soil, and by week 8, those buds will open—right on your kitchen table or mantel. The scent alone makes it worth the wait, but the real reward is seeing something alive and vibrant when everything outside is dormant.
Just avoid overwatering (bulbs rot faster than you’d think) and give them bright, indirect light to keep stems strong.
This works for any winter, whether you’re in a tiny apartment or a drafty house. Try forcing bulbs in glass jars for a whimsical centerpiece or terracotta pots for a rustic look.
The key is consistency—once you’ve done it once, you’ll never buy cut flowers for spring again. Ready to give it a try?
📚 In This Guide
- What you need
- Instructions
- Tips and common mistakes
- Wrapping up and next steps
What you need
- ● Tulip bulbs: 3–5 large, healthy bulbs (choose varieties like ‘Darwin Hybrid,’ ‘Parrot,’ or ‘Fosteriana’ for vibrant blooms).
- ● Container: A shallow, wide pot (6–8 inches deep) with drainage holes (e.g., ceramic, terracotta, or plastic).
- ● Potting mix: Well-draining, peat-based mix (or add perlite/sand for aeration). Avoid garden soil—it’s too dense!
- ○ Gravel or pebbles: Small stones (½ inch) for drainage (optional but recommended for moisture control).
- ● Watering can or spray bottle: For gentle hydration (no soggy bulbs!).
- ● Bright, indirect light source: A south- or east-facing window or a grow light (12–14 hours/day) for consistent blooms.
- ○ Cooling period (optional but critical): A dark, cool space (35–45°F) like a garage or fridge for 8–12 weeks.
- ● Bulb chilling mat: For precise temperature control during the cold phase.
- ● Decorative pebbles or moss: To cover bulbs for a polished look (great for gifts!).
- ● Fertilizer: A balanced, water-soluble fertilizer (5-10-5) to boost blooms after forcing.
- ● Humidity tray: A pebble tray under the pot to increase moisture in dry air.
- ● Floral preservative: Once cut, add to vases to extend vase life.
Step-by-step instructions for forcing tulip bulbs indoors
Here's how to coax vibrant tulips indoors—no green thumb needed, just patience and the right setup.
🌱 Step 1: Select and Prep the Bulbs
Choose firm, plump tulip bulbs (4 inches in diameter) that haven’t been refrigerated yet—these are typically sold in fall. I like to pick Darwin Hybrid or Parrot tulips for their bold colors and sturdy stems. Gently remove any dried outer skins with your fingers; don’t use tools, or you’ll risk damaging the bulb’s base.
Inspect each bulb for soft spots or mold—discard any that feel squishy or smell off. Healthy bulbs should feel solid and heavy for their size. Place them in a paper bag (not plastic) and store in a dark, cool spot (like a garage or basement) at 35-45°F for 10-12 weeks. This mimics winter dormancy and is critical for flowering.
🪴 Step 2: Set Up the Forcing Container
Use a shallow, wide container (like a ceramic bowl or plastic tray) with drainage holes if possible. Fill the bottom with 3-4 inches of pebbles or gravel—this ensures excess water drains away and keeps the bulb’s base dry. I like to use river rocks because they’re sterile and stay in place.
Add 2-3 inches of well-draining potting mix (avoid garden soil—it’s too dense) on top of the pebbles. Press it down lightly so the surface is level but not compacted. The mix should feel like a damp sponge—squeeze it gently, and it should hold together without dripping. Place the container where it won’t get disturbed; tulips hate being moved once they start rooting.
💧 Step 3: Plant and Water the Bulbs
Position the bulbs neck-up (about half their height should be above the soil line). Space them 1-2 inches apart so stems won’t crowd later. Gently press the mix around the bulb to secure it—don’t pack it down, or you’ll smother the roots. If using a clear vase, place the bulb so the neck is just below the rim for easy watering later.
Water lightly until the mix feels evenly moist to the touch, but not soggy. The goal is to moisten the soil around the bulb without soaking it. Place the container in a dark, cool spot (like a closet or under a cabinet) for 4-6 weeks. Check the soil weekly—it should stay slightly damp, never wet. Overwatering now will rot the bulb before it blooms.
☀️ Step 4: Trigger Growth with Light and Warmth
After 4-6 weeks, you’ll see green shoots emerging—this is your cue to move the container to a bright, indirect light spot (like a sunny windowsill). Keep the temperature between 60-65°F during the day and 55-60°F at night. If your home runs warmer, place a small fan nearby to prevent the stems from getting leggy.
Water sparingly—just enough to keep the soil from drying out completely. You’ll know it’s time when the top inch feels dry to the touch. Avoid wetting the bulb itself; use a spoon to direct water to the soil around the edges. Within 2-3 weeks, you’ll see buds forming—this is when the magic happens, and your patience pays off.
⏰ Step 5: Enjoy and Extend the Blooms
The moment the first buds open, move the container to a cooler spot (like a shaded porch or basement) to prolong the display. Tulips forced indoors typically bloom for 1-2 weeks. To keep them looking fresh, trim stems at an angle and place them in a vase with fresh water—change the water every 2-3 days and recut the stems to extend their life.
After blooming, let the foliage die back naturally—don’t cut it until it turns yellow and crispy. This process feeds nutrients back into the bulb for next year. If you want to replant outdoors, wait until after the last frost and plant the bulbs in full sun with well-draining soil. With care, they’ll often rebloom the following year.
Tips & tricks for perfect indoor tulip blooms
Patience pays off when forcing tulips indoors—here's how to avoid common pitfalls and get the best results.
Temperature Matters: The 35-45°F storage range is non-negotiable for the 10-12 week dormancy period. If your garage or basement runs warmer than 45°F, consider using a refrigerator set to its coldest setting (but not the crisper drawer—it's too humid). I've seen bulbs rot when stored too warm, so monitor closely. A simple thermometer in the storage spot helps track conditions accurately.
Container Selection: While any shallow container works, I recommend using a ceramic bowl with drainage holes for the best results. The 3-4 inches of pebbles at the bottom should be clean river rocks—not just any gravel, as some types contain salts that can damage roots. For clear vases, choose ones with a wide base to support the bulb's weight and provide stability as stems grow.
Light Transition: When moving bulbs to light after 4-6 weeks, don't rush the process. Start with bright, indirect light for the first week, then gradually increase direct sunlight. Sudden exposure can cause stems to scorch. I've seen tulips develop brown patches when moved too quickly to full sun—take it slow for healthier growth.
Watering Wisdom: The key to watering is consistency. During the 4-6 week dark period, check soil moisture weekly by pressing your finger 1 inch deep—it should feel slightly damp, like a wrung-out sponge. Once shoots appear, water only when the top inch feels dry, and always direct water to the soil edges to keep bulbs dry. Overwatering at any stage is the #1 reason bulbs fail to bloom.
Pro Tips for Forcing Bulbs Indoors
- Patience pays off when forcing tulips indoors—here's how to avoid common pitfalls and get the best results.
- Temperature Matters: The 35-45°F storage range is non-negotiable for the 10-12 week dormancy period. If your garage o...
- Container Selection: While any shallow container works, I recommend using a ceramic bowl with drainage holes for the ...
Frequently asked questions
Got questions about forcing tulip bulbs indoors? Here are some of the most common ones—and their answers—to help you grow stunning winter blooms with ease!
Can I force any tulip bulb indoors?
Not all tulips thrive indoors! Look for species tulips (like Tulipa greigii or Tulipa fosteriana) or Darwin Hybrid varieties—they’re the best for forcing. Avoid fancy hybrid tulips (like parrot or double blooms), as they’re bred for outdoor gardens and may not rebloom well.
How do I know when my bulbs are ready to plant?
Plant your bulbs 6–8 weeks before you want them to bloom (e.g., by mid-November for Christmas blooms). Most bulbs arrive dormant in fall—just check for firmness and no signs of sprouting. If they’ve already sprouted, plant them immediately!
Why aren’t my tulips blooming?
Missing blooms? Common culprits include:
- Not enough chill time: Tulips need 12–16 weeks of 40–50°F (4–10°C) to trigger blooms. Use a fridge or cool basement if your home isn’t cold enough.
- Too much light too soon: Wait until green shoots appear (2–3 inches) before moving to bright light.
- Overwatering: Bulbs rot in soggy soil. Water sparingly until sprouts emerge, then keep soil lightly moist.
Can I reuse tulip bulbs for next year?
Yes, but with caution! After forcing, plant bulbs outdoors in spring for a second bloom the following year. They may not be as vibrant, but you’ll save money. Discard soft or shriveled bulbs—they won’t rebloom.
What’s the best container for forcing tulips?
Use shallow, wide containers (like ceramic bowls or window boxes) with drainage holes. Avoid deep pots—they trap moisture and risk rot. Line the bottom with pebbles or broken pottery for extra drainage. Pro tip: Add a layer of sphagnum moss over bulbs to retain moisture while they chill!
Wrapping up and next steps
Forcing tulip bulbs indoors is a rewarding way to bring early spring color into your home—without the wait! 🌷 With the right bulbs, containers, and a little patience, you’ll enjoy vibrant blooms in just 8 weeks.
Whether you’re a beginner or a seasoned gardener, this project is simple, budget-friendly, and perfect for adding cheer to winter.
Ready to dive in? Grab your bulbs, pick a sunny spot, and start forcing today! Once your tulips bloom, why not experiment with other spring bulbs like daffodils or hyacinths? Happy gardening! 🌱