
Container Gardens
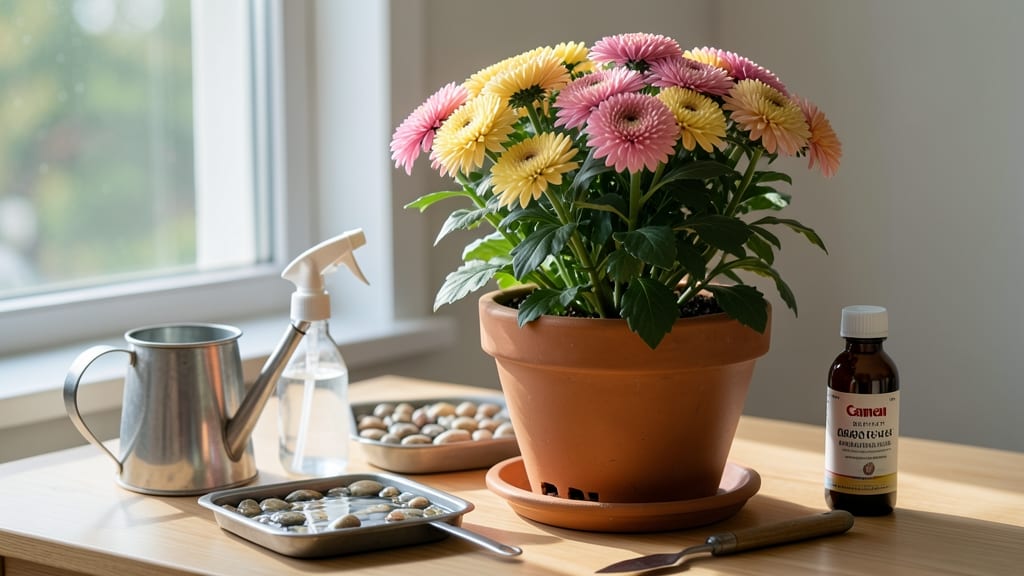
Caring for mums indoors brightens any space with their cheerful blooms—but keeping them thriving year-round takes a few simple tricks. 🌼 I’ve nursed my own mums through multiple winters, and the secret isn’t complicated: it’s about light, pruning, and a little patience. These hardy plants reward you with weeks of color if you match their needs.
Start with bright, indirect light—think east-facing windows or a grow light 12 inches away. Water when the top inch of soil feels dry, and use well-draining soil to avoid soggy roots.
Most problems (like leggy stems or yellow leaves) come from too little light or overwatering, so adjust your routine as the seasons change.
The real magic happens with pruning. After blooms fade, trim back stems to encourage fresh growth, and give your mums a haircut in early spring to shape them up. With the right care, they’ll reward you with new blooms by late summer—just like fresh-cut flowers, but forever.
This method works for any variety, whether you’re growing them in pots by the window or as a centerpiece. The key is consistency—once you find their rhythm, they’ll thrive for years. Let’s get those stems sturdy and those blooms lasting!
📚 In This Guide
- What you need
- Instructions
- Tips and common mistakes
- Wrapping up and next steps
What you need
- ● Mum plants: 3–6 healthy container-friendly mum varieties (e.g., 'Bonanza,' 'Mambo,' or 'Bright Lights'). Choose dwarf or compact types (12–18" tall) for indoor spaces.
- ● Containers: 2–4 drainage-hole-equipped pots (5–7" diameter per plant). Use terracotta, ceramic, or fabric grow bags for airflow.
- ● Potting mix: 1–2 bags of well-draining, peat-free mix (e.g., African violet or succulent blend). Avoid heavy garden soil!
- ● Pruning tools: 1 pair sharp, sterilized pruning shears (or clean scissors).
- ● 1 small hand saw (for stubborn stems).
- ● Fertilizer: 1 bottle balanced liquid fertilizer (10-10-10 or 20-20-20, diluted to half-strength).
- ○ Growing lights (optional): 1–2 LED grow lights (12–15 watts per plant) for low-light windows.
- ● 1 humidity tray (pebble tray + water) to combat dry indoor air.
- ● 1 spray bottle for misting leaves (if humidity is <30%).
- ● 1 pH testing kit to monitor soil acidity (ideal: 6.0–7.0).
- ● 1 plant label maker to track varieties and pruning dates.
- ● 1 small fan for gentle airflow (reduces pests).
Step-by-Step guide to caring for mums indoors
You can keep these fragrant beauties thriving year-round with the right light, water, and pruning routine.
🌱 Step 1: Position for Bright, Indirect Light
Place your mums near an east- or west-facing window where they receive 6-8 hours of bright, indirect light daily. South-facing windows work too, but filter the light with a sheer curtain to prevent leaf scorch. You'll notice the leaves turning pale or stretching toward the window if they're not getting enough light—that's your cue to move them closer.
If natural light is limited, supplement with a grow light positioned 12-18 inches away for 12-14 hours daily. LED grow lights are ideal because they emit less heat, which mums dislike. Rotate the plant a quarter turn weekly so it grows evenly instead of leaning toward the light source.
💧 Step 2: Water Consistently Without Overdoing It
Check the soil moisture by sticking your finger 1 inch deep—if it feels dry, it's time to water. Mums prefer their soil to stay evenly moist but not soggy. Water thoroughly until you see moisture trickle from the drainage hole, then empty the saucer to prevent root rot. Overwatering is the fastest way to kill mums indoors, so always err on the side of slightly drier soil.
Reduce watering in winter when growth slows. You'll know you're watering correctly when the top ½ inch of soil dries out between waterings. If the leaves start to yellow or droop, you're likely overwatering. Adjust your routine until you find the balance—healthy mums should feel slightly firm when pressed, not mushy or bone-dry.
✂️ Step 3: Prune for Bushier Growth and Fragrance
After flowering, trim back the spent blooms by cutting the stems ¼ inch above a leaf node with clean, sharp scissors. This encourages the plant to redirect energy into producing new flowers instead of seeding. I like to do this every 2-3 weeks during the growing season to keep my mums blooming continuously. Avoid cutting into the woody stems—focus on the green growth only.
In late fall, give your mums a harder prune by cutting back ⅓ of their height. This mimics their natural dormancy period and helps them rebound stronger in spring. Remove any yellow or damaged leaves at the same time. Pruning might seem drastic, but you'll see fresh, vibrant growth within 3-4 weeks—it's worth the wait for that lush, fragrant comeback.
☀️ Step 4: Maintain Ideal Temperature and Humidity
Keep your mums in a space where temperatures stay between 60-70°F during the day and 55-60°F at night. Drafts from doors or windows, as well as heating vents, can stress the plant. If you notice the leaves curling or wilting, move the plant away from the heat or cold source immediately. Mums are sensitive to sudden temperature swings, so consistency is key.
Increase humidity slightly by placing the pot on a tray filled with pebbles and water, ensuring the pot doesn't sit directly in the water. Mist the leaves lightly in the morning, but avoid doing this in the evening—wet foliage overnight invites fungal diseases. You'll know the humidity is right when the leaves stay plump and green, not crispy or sticky.
🪴 Step 5: Fertilize Lightly for Continuous Blooms
Feed your mums every 4-6 weeks during the growing season (spring through fall) with a balanced, water-soluble fertilizer diluted to half-strength. Over-fertilizing burns the roots and causes leaf damage, so always follow the package instructions carefully. I use a 10-10-10 or 20-20-20 formula because it provides equal parts nitrogen, phosphorus, and potassium for healthy foliage and blooms.
Stop fertilizing in late fall and winter when the plant enters its dormant phase. You'll see the difference in growth—mums fertilized in winter often develop weak, leggy stems and fewer blooms. Resume feeding in early spring as new growth appears, and you'll be rewarded with fuller, more fragrant flowers all season long.
Tips & tricks for perfect indoor mum care
Between us, keeping mums thriving indoors isn't rocket science—but these small tweaks make all the difference.
The Light Factor: Pay attention to those 6-8 hours of bright light in Step 1, but here's the thing: window placement matters more than you think. North-facing windows often don't provide enough light, even with supplements. If your mums start stretching toward the window (a condition called etiolation), it's time to move them closer or add that grow light. Trust me on this—those leggy stems won't recover.
Pruning Precision: When you're doing that ¼ inch above the leaf node in Step 3, use a clean, sharp pair of scissors or pruners. Dull blades crush stems and invite disease. I sterilize my tools with rubbing alcohol between plants to prevent cross-contamination. And here's what nobody tells you—if you're pruning for fragrance, focus on removing the oldest blooms first. Newer flowers often have more intense scent!
Temperature Troubleshooting: Those 60-70°F daytime and 55-60°F nighttime ranges in Step 4 are non-negotiable, but sudden drafts can wreck your progress. I've learned this the hard way after watching mums wilt dramatically when a window was opened too quickly. Keep them at least 3 feet away from doors, windows, or vents. If your home runs hot, consider a small fan on low speed to improve air circulation without creating drafts.
Fertilizer Finesse: The 4-6 week feeding schedule in Step 5 works perfectly, but timing matters. Always fertilize in the morning so the roots have time to absorb nutrients before evening. And here's my pro move: I mix my fertilizer with water in a spray bottle and lightly mist the soil surface. This prevents fertilizer burn while still delivering nutrients—especially helpful if your mums are in small pots with limited soil volume.
Pro Tips for Caring For Mums Indoors
- Between us, keeping mums thriving indoors isn't rocket science—but these small tweaks make all the difference.
- The Light Factor: Pay attention to those 6-8 hours of bright light in Step 1, but here's the thing: window placement ...
- Pruning Precision: When you're doing that ¼ inch above the leaf node in Step 3, use a clean, sharp pair of scissors o...
Frequently asked questions
Got questions about keeping your mums indoors thriving? You’re not alone—indoor gardening can be tricky! Here are some of the most common concerns and quick solutions to keep your fragrant blooms happy year-round.
Can mums survive indoors for more than one season?
With proper care, yes! Mums are perennials in many climates, but indoors, they’ll need consistent light (12+ hours daily) and cooler temps (60–65°F). After blooming, trim spent flowers and reduce watering to encourage dormancy. In spring, repot and fertilize to revive them for another season. Pro tip: Rotate their position near a south-facing window to prevent leggy growth.
Why are my indoor mums wilting even though I water them?
Overwatering or poor drainage is often the culprit! Ensure pots have drainage holes and use well-draining soil. Water only when the top inch feels dry—mums hate soggy roots. Check humidity too; dry indoor air can stress them. A pebble tray or occasional misting helps. If leaves yellow, it’s likely overwatering; brown edges? Too dry.
How do I extend their blooming time indoors?
Blooms last longer with bright, indirect light and cooler temps (avoid drafts or heat vents). Deadhead spent blooms regularly to encourage new flowers. A balanced fertilizer (like 10-10-10) every 4–6 weeks keeps them energized. For extra longevity, move them to a cooler room at night—mums mimic seasonal changes!
What’s the best indoor alternative if mums struggle?
If mums prove finicky, try easier indoor bloomers like:
- African violets: Thrives in low light, blooms year-round.
- Kalanchoe: Drought-tolerant with vibrant flowers.
- Orchids: Low-maintenance and elegant.
How do I troubleshoot pests on indoor mums?
Check undersides of leaves for spider mites, aphids, or whitefly. Isolate the plant and wipe leaves with a damp cloth. For stubborn pests, use neem oil (mix 1 tsp with 1 quart water) or insecticidal soap. Boost humidity to deter mites—mums love 50–60% humidity. Quarantine new plants to prevent outbreaks!
Wrapping up and next steps
Caring for your mum plants indoors isn’t just about keeping them alive—it’s about nurturing little bursts of nature that brighten every season! 🌿 With the right pruning techniques, lighting, and a dash of love, your mums will thrive year-round, filling your space with vibrant colors and fresh fragrance.
Remember, consistency is key, so check in on them regularly and adjust as needed.
Ready to take your indoor gardening to the next level? Start small—pick one plant to experiment with this week! Whether it’s tweaking your pruning routine or adjusting their cozy spot, every little step makes a difference. Happy growing! 🌸