
Container Gardens
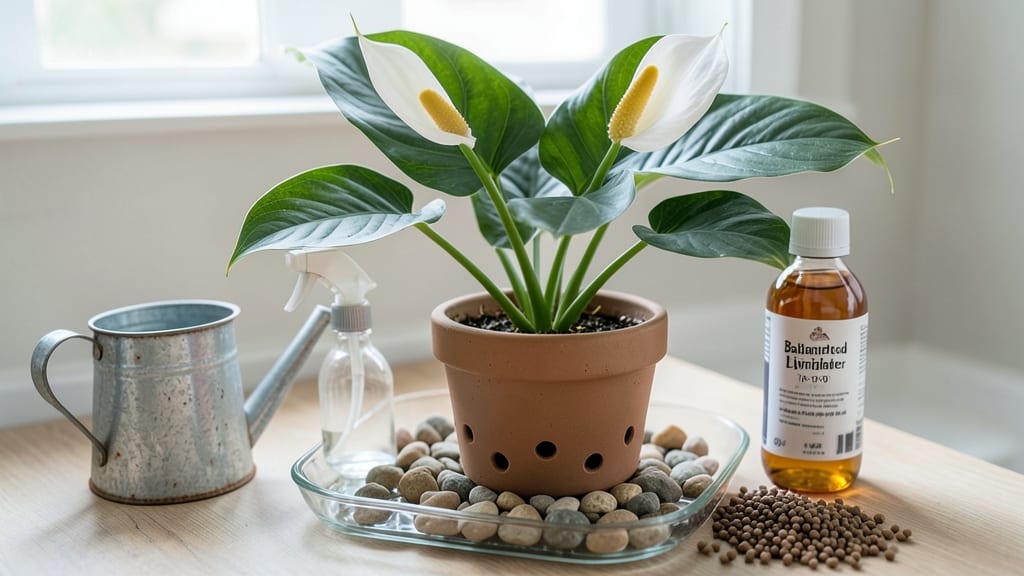
The care of calla lilies indoors thrives with just three simple tricks I learned after my first plant lasted only two months. 💚 The secret isn't complicated—it's about matching their natural habitat with your home environment, from bright indirect light to consistent moisture that keeps their roots happy without drowning them.
You'll need a pot with drainage, well-draining potting mix, and a spot near a window where they get morning sun and afternoon shade. Most people overwater, which causes yellow leaves or root rot—so stick your finger in the soil first.
These plants love humidity too, so misting or a pebble tray helps when your home feels dry.
With the right care, you'll see those striking blooms appear within 8-12 weeks and keep producing them all season long. The foliage stays glossy and upright, adding dramatic texture to any indoor space. Even in low-light conditions, they'll reward you with growth—just adjust your expectations slightly.
Whether you're a beginner or a seasoned plant parent, these tricks work for any indoor setup. The key is consistency—once you nail the basics, your calla lilies will become the showstopper of your home decor. Let's get those roots settled!
📚 In This Guide
- What you need
- Instructions
- Tips and common mistakes
- Wrapping up and next steps
What you need
- ● Calla lily rhizomes or potted plants: Choose healthy, disease-free rhizomes (or a pre-potted plant) from a trusted nursery. Pro tip: Look for firm, plump rhizomes with visible growth points!
- ● Well-draining potting mix: A blend of 50% peat or coconut coir, 30% perlite or pumice, and 20% compost (or a pre-mixed orchid/calla mix). ✨ Avoid heavy garden soil—it causes root rot!
- ● Pot with drainage holes: A 6–8 inch container (1–2 rhizomes per pot) made of terracotta or ceramic. 💡 For larger rhizomes, opt for a 10–12 inch pot.
- ● Distilled or rainwater: Tap water can contain chemicals that harm callas. Use filtered or collected rainwater instead.
- ● Balanced liquid fertilizer (10-10-10 or 20-20-20): Diluted to ½ strength for feeding.
- ● Spray bottle: For misting leaves and maintaining humidity.
- ● Pruning shears or clean knife: For trimming dead foliage or spent blooms.
- ● Grow lights (LED or fluorescent): If your space lacks bright, indirect light (12+ hours/day).
- ● Humidity tray or pebble tray: Fill a shallow tray with water and pebbles to boost moisture levels.
- ● Mulch (orchid bark or sphagnum moss): Top the soil lightly to retain moisture and deter weeds.
- ● Support stakes or trellis: For tall varieties like Calla palustris (though most callas don’t need them!).
Step-by-Step instructions for caring for calla lilies indoors
Here’s how to keep your calla lilies thriving indoors with minimal fuss—no green thumb required.
🌱 Step 1: Place Them in Bright, Indirect Light
Calla lilies adore bright light but hate direct sun, which scorches their lush leaves. Position them near an east-facing window or within 3 feet of a west-facing one. South-facing windows work too, but filter the light with a sheer curtain to prevent leaf burn. You’ll know they’re happy when the foliage stays deep green and the stems remain sturdy.
If your home lacks natural light, supplement with a grow light placed 12-18 inches above the plant for 12-14 hours daily. Watch for leggy growth (long, sparse stems)—that’s your cue to move them closer to the light or increase exposure.
💧 Step 2: Water When the Top Inch of Soil Feels Dry
Calla lilies prefer consistently moist but never soggy soil. Stick your finger 1 inch deep—if it feels dry, it’s time to water. Use room-temperature water and pour slowly until it drains from the bottom of the pot. Empty the saucer afterward to prevent root rot, a common killer of indoor callas.
Here’s the thing—callas are sensitive to fluoride in tap water, which can cause brown leaf tips. If your water tastes strongly of chlorine or leaves spots on surfaces, let it sit out for 24 hours before using or opt for filtered water. You’ll notice healthier, glossier leaves within a few weeks.
✂️ Step 3: Fertilize Lightly During Active Growth
Feed your calla lilies every 4-6 weeks during spring and summer with a balanced, water-soluble fertilizer diluted to half strength. Over-fertilizing leads to salt buildup, which burns roots and causes yellowing leaves. Mix the fertilizer in a watering can and apply it as you water—this ensures even distribution without shocking the plant.
Skip fertilizing in fall and winter when growth slows. Instead, focus on keeping the soil lightly moist and the light levels steady. You’ll see new leaves emerge in spring as a sign that your plant is ready to resume active growth.
🪴 Step 4: Refresh the Soil and Repot Every 2-3 Years
Calla lilies become root-bound quickly, which stunts their growth and reduces flowering. Repot in early spring when you notice roots circling the pot or growing out of the drainage holes. Choose a container just 1-2 inches larger in diameter—too much space encourages leggy growth and weak stems.
Use fresh, well-draining potting mix (a blend of peat moss, perlite, and compost works well). Gently loosen the roots before placing the plant in its new home. Water thoroughly after repotting to help the soil settle and reduce transplant shock. Your calla will reward you with stronger stems and more vibrant blooms the following season.
☀️ Step 5: Encourage Blooming with Proper Rest
Calla lilies need a 8-10 week rest period after flowering to rebloom. Once the leaves yellow and die back, reduce watering to just enough to keep the soil slightly moist. Move the plant to a cooler spot (55-60°F) with minimal light for the dormant phase. This mimics their natural cycle and ensures a robust comeback.
Resist the urge to prune dead leaves until they’ve fully browned—this helps the plant redirect nutrients. After 8-10 weeks, resume regular care, and you’ll see fresh growth within 2-3 weeks. Patience here pays off with bigger, showier blooms next season.
Tips & tricks for perfect indoor calla lily care
Between us, these simple tricks will keep your calla lilies looking stunning year-round without the guesswork.
Lighting Strategy: In Step 1, if you notice your calla's leaves stretching toward the light (a sign of legginess), rotate the pot a quarter turn every week. This ensures even growth and prevents the plant from leaning toward one light source. For grow lights, I’ve found LED bulbs with a full spectrum work best—they mimic natural sunlight and reduce that sad, elongated growth pattern.
Watering Wisdom: The "top inch dry" rule in Step 2 is your best friend, but here’s what nobody tells you—use your finger to test moisture in the morning. Early morning soil is cooler and gives a more accurate reading than checking after watering. Also, if your calla’s leaves start curling at the edges, it’s often a sign of underwatering, not overwatering. Adjust your schedule accordingly.
Fertilizing Fine-Tuning: When you’re fertilizing every 4-6 weeks in Step 3, consider alternating between a balanced fertilizer and one higher in phosphorus (like a 10-30-20 blend) during blooming season. The extra phosphorus promotes more vibrant flowers. Just remember to always dilute to half strength—callas are sensitive to salt buildup, which shows up as crispy brown edges on leaves.
Repotting Rescue: In Step 4, if you’re unsure whether your calla needs repotting, gently remove it from its current pot and check the roots. If you see a dense network of roots circling the bottom, it’s time to upgrade. Pro tip: Add a handful of orchid bark to your potting mix—it improves drainage and mimics the calla’s natural tropical habitat, leading to healthier roots and more blooms.
Pro Tips for Care Of Calla Lilies Indoors
- Between us, these simple tricks will keep your calla lilies looking stunning year-round without the guesswork.
- Lighting Strategy: In Step 1, if you notice your calla's leaves stretching toward the light (a sign of legginess), ro...
- Watering Wisdom: The "top inch dry" rule in Step 2 is your best friend, but here’s what nobody tells you—use your fin...
Frequently asked questions
Got questions about keeping your calla lilies thriving indoors? You’re not alone! Here are some of the most common concerns—plus quick fixes to keep those stunning blooms happy year-round.
How often should I water my indoor calla lilies?
Water your calla lilies only when the top 1–2 inches of soil feel dry—usually every 5–7 days. Overwatering is their #1 enemy, as it causes root rot. Use room-temperature water and ensure pots have drainage holes to prevent soggy soil. Pro tip: Stick your finger in the soil to check moisture levels!
Can calla lilies survive winter indoors?
Calla lilies are perennial and thrive indoors year-round with the right care. In winter, reduce watering slightly (let the soil dry out more between waterings) and avoid drafty spots. Keep them in bright, indirect light—like a south- or east-facing window—to prevent leggy growth. Bonus: They’ll reward you with blooms even in colder months!
Why are my calla lilies’ leaves turning yellow?
Yellow leaves usually mean overwatering or poor drainage. Check for mushy roots or a foul smell—if so, trim the damaged roots and repot in fresh, well-draining soil. If the soil is dry, your plant might just need more water (but don’t overdo it!). Quick fix: Move to a brighter spot and adjust your watering routine.
How do I encourage more blooms on my indoor calla lilies?
For maximum blooms, give your calla lilies bright, indirect light (6+ hours daily) and a balanced liquid fertilizer every 4–6 weeks during spring and summer. After blooming, trim spent stalks but leave the leaves—they feed the plant for next season! Fun fact: A little root-bound stress (like being slightly pot-bound) can also trigger more flowers!
Are calla lilies toxic to pets?
Yes, calla lilies are toxic to cats and dogs if ingested, causing oral irritation, drooling, or vomiting. Keep them out of paw’s reach or opt for pet-safe alternatives like peace lilies (though they look different). If your pet nibbles, contact your vet or the ASPCA Poison Control immediately.
Wrapping up and next steps
Caring for calla lilies indoors is all about light, water, and patience—three simple tricks that unlock their stunning, year-round beauty! 🌿 With the right pot, soil, and a little attention to their unique needs (like avoiding soggy roots or drafty spots), you’ll enjoy their elegant blooms for seasons to come.
Now that you’re armed with the know-how, why not grab a calla lily or two and turn your space into a lush, indoor oasis? Happy growing!
Next step: Pick your favorite variety—like the classic Zantedeschia aethiopica or a vibrant Calla 'Black Star'—and start your indoor garden adventure today! 🌸