
Planting
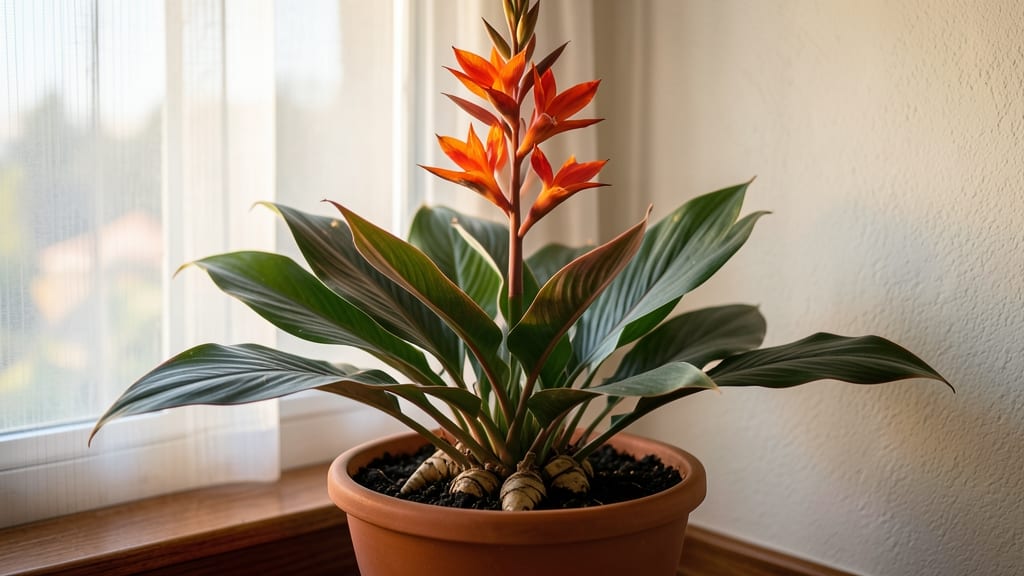
Growing canna plants indoors brings bold tropical drama to any space—even without a sunny yard. 🌿 I’ve kept mine thriving for years by mimicking their natural jungle environment, and the secret lies in the right container, light, and care routine that prevents those floppy stems.
The key is bright, indirect light (think east or south-facing windows) and a well-draining potting mix that stays moist but never soggy. Cannas hate dry roots, so I water when the top inch feels dry, and I add a saucer of pebbles to boost humidity—no fancy equipment needed.
By winter, you’ll still see glossy leaves and occasional blooms, though growth slows. The foliage alone makes a statement—think oversized, velvety leaves in deep greens or burgundy, perfect for adding drama to living rooms or sunrooms. This works for apartments, offices, or greenhouses—just adjust light with grow bulbs if needed.
Let’s get those tropical vibes going indoors!
📚 In This Guide
- What you need
- Instructions
- Tips and common mistakes
- Wrapping up and next steps
What you need
- ● Canna rhizomes: 1–3 healthy, firm rhizomes (size: 2–4 inches in diameter). Look for fresh, plump ones with visible growth buds.
- ● Containers: 1–2 pots with drainage holes (size: 12–18 inches in diameter and depth). Terracotta or fabric pots work best for airflow.
- ● Well-draining potting mix: 3–5 gallons of a blend designed for tropical plants (e.g., 60% peat moss, 20% perlite, 20% compost). Avoid heavy garden soil.
- ● Drainage materials: Small pebbles, gravel, or broken pottery (1–2 inches deep) to prevent root rot.
- ● Watering can or spray bottle: With a gentle spray nozzle for hydration control.
- ● Fertilizer: Balanced liquid fertilizer (10-10-10 or 20-20-20) or slow-release granules (follow package instructions).
- ● Grow lights or sunny window: A south- or west-facing window (6+ hours of light/day) or a full-spectrum LED grow light (12–14 hours/day).
- ● Humidity tray: A shallow tray filled with pebbles and water to boost moisture levels (especially in dry climates).
- ● Support stakes or cages: For taller varieties (e.g., Canna 'Wyoming' or 'Tropical Sun') to prevent flopping.
- ● Soil moisture meter: To monitor hydration without overwatering.
- ● Mulch: Pine bark or coconut coir to retain moisture and regulate temperature.
- ● Pruning shears: For trimming dead leaves or spent blooms.
Step-by-Step instructions for growing canna plants indoors
Here's how to bring bold, tropical cannas indoors without losing their show-stopping drama.
🪴 Step 1: Select the Right Container and Soil Mix
Cannas need room to grow, so choose a container that's at least 12-14 inches deep and 14-16 inches wide for each plant—these tropical stunners develop thick rhizomes and broad leaves. I use terracotta pots because they breathe better than plastic and help prevent root rot, which can creep up fast in cannas.
Fill the bottom third with a chunky mix of orchid bark or perlite to improve drainage. Then add a high-quality potting mix that's rich in organic matter. Cannas love moisture but hate soggy feet, so I blend mine with 20% coconut coir for extra water retention without compacting. The soil should feel like a damp sponge—not wet or dry.
🌱 Step 2: Plant Rhizomes at the Right Depth and Spacing
Cannas grow from rhizomes, not seeds, and planting them correctly is key. Place your rhizome with the eye (growth bud) facing upward, about 2-3 inches below the soil surface. If you're unsure which side is up, the eye looks like a small bump or a tiny hole—it's where the shoots emerge. I like to plant 2-3 rhizomes per container, spaced 4-6 inches apart, since they multiply quickly.
Cover the rhizome lightly with soil, leaving the top third exposed to light. This encourages the rhizome to grow upward rather than rotting underground. Water gently but thoroughly after planting, letting excess water drain away completely. Cannas need moisture, but they'll rot if left sitting in saucers of water.
☀️ Step 3: Place in Bright, Indirect Light and Water Consistently
Cannas crave light but can't handle harsh midday sun indoors—think of it like a tropical sunbather avoiding a burn. Position your container near a south- or east-facing window where it gets 4-6 hours of bright, indirect light daily. If your home is dim, supplement with a grow light 12-18 inches away for 10-12 hours per day. You'll know the light is right when the leaves stay deep green and the stems stay sturdy.
Water when the top 2 inches of soil feel dry. Stick your finger in the soil—if it's dry past your first knuckle, it's time to water. Cannas drink deeply, so I water until it runs out the drainage holes, then empty the saucer. Overwatering is the fastest way to kill cannas, so always check the soil before watering again.
💧 Step 4: Fertilize and Encourage Lush Growth
Feed your cannas every 4-6 weeks with a balanced liquid fertilizer (like 10-10-10) diluted to half strength. I start fertilizing once the plants show 4-6 new leaves—this is when they're hungry for growth. Cannas are heavy feeders, so don't skimp! You'll see the difference in vibrant foliage and taller stems within a few weeks.
Rotate the container a quarter turn weekly so the plant grows evenly toward the light. Cannas can get leggy if they stretch toward a single light source, so this keeps them compact and bushy. Pinch back the tips of the tallest stems when they reach 12 inches tall to encourage branching. This trick works wonders for fuller, more dramatic plants.
✂️ Step 5: Prune and Overwinter for Next Season
When the growing season winds down (usually late fall), cut back the foliage to 6 inches tall once it turns yellow. This helps the rhizome store energy for next year. Leave the rhizome in the pot and reduce watering to every 2-3 weeks during dormancy. Keep the container in a cool, dark spot (around 50-60°F) until spring.
In early spring, bring the canna back to its sunny spot and resume watering. You'll often see new shoots emerging within 2-3 weeks. This is your cue to fertilize lightly and watch your canna burst back to life. With proper care, the same rhizome can thrive indoors for years, putting on a bold show every season.
Tips & tricks for perfect indoor canna plants
Let me save you from the heartbreak of droopy cannas—these tricks will keep your tropical stunners thriving all year.
Container Breathability Matters: Terracotta pots are my go-to because they wick away moisture, but if you use plastic, add extra perlite to the mix. The key is preventing root rot—cannas hate soggy feet! I also drill a few extra drainage holes in the bottom if my pot doesn't have enough. This is especially important in Step 1 when you're setting up that chunky drainage layer.
Rhizome Planting Hack: After placing your rhizome with the eye facing up (Step 2), I like to press the soil around it gently but firmly. This creates better soil-to-rhizome contact for faster root development. Pro tip: If your rhizome looks shriveled, soak it in water for 10-15 minutes before planting—it'll plump up and establish roots quicker.
Lighting Troubleshooting: For that crucial 4-6 hours of bright indirect light (Step 3), I've found that east-facing windows work best in summer when the sun is less intense. In winter, supplement with a grow light on a timer for those 10-12 hours—just keep it 12-18 inches away to avoid burning the leaves. You'll notice the difference in leaf color within days!
Fertilizer Timing Secret: When you start fertilizing every 4-6 weeks (Step 4), I recommend doing it right after watering. This ensures the nutrients get absorbed immediately rather than sitting on dry soil. And here's what nobody tells you—if your canna gets leggy despite good light, it might need more frequent feeding. Try fertilizing every 3 weeks instead of 4-6.
Pro Tips for Canna Plant Indoors
- Let me save you from the heartbreak of droopy cannas—these tricks will keep your tropical stunners thriving all year.
- Container Breathability Matters: Terracotta pots are my go-to because they wick away moisture, but if you use plastic...
- Rhizome Planting Hack: After placing your rhizome with the eye facing up (Step 2), I like to press the soil around it...
Frequently asked questions
Got questions about growing canna plants indoors? You’re not alone!
Here are answers to the most common concerns—from lighting to pests and beyond.
Can canna plants survive indoors year-round?
Yes! With the right setup—bright, indirect light (like a south-facing window or grow lights), high humidity, and warm temperatures (65–85°F)—cannas can thrive indoors. Just expect slower growth and smaller blooms compared to outdoor conditions. Pro tip: Rotate pots weekly for even light exposure!
How long does it take for indoor cannas to bloom?
Indoor cannas may take 6–12 months to bloom, depending on light, care, and plant age. Young plants (under 1 year) often focus on foliage first. Boost blooms by fertilizing monthly with a balanced formula (10-10-10) and ensuring they get 12+ hours of light daily.
What pests should I watch for with indoor cannas?
Common culprits include spider mites (tiny webs on leaves) and mealybugs (cottony clusters). Keep humidity high (50%+) to deter mites, and wipe leaves with neem oil or insecticidal soap if pests appear. Preventative tip: Quarantine new plants for 2 weeks!
Can I grow cannas from seed indoors?
Start seeds in warm, moist soil (70–80°F) under grow lights. Germination takes 2–4 weeks. Seedlings need gentle care—keep soil damp but not soggy. Transplant to larger pots once they’re 4–6 inches tall. Bonus: Hybrid cannas are easier to grow from tubers!
Why are my indoor canna leaves turning yellow?
Yellow leaves usually signal overwatering (check soil moisture—top 1–2 inches should dry out) or nutrient deficiency (feed every 4–6 weeks). Brown edges? It’s likely low humidity or fluoride buildup from tap water. Try distilled water and a pebble tray for humidity!
Wrapping up and next steps
Growing a canna plant indoors is a rewarding way to bring bold, tropical energy into your space year-round—no greenhouse required! 🌿 With the right container, light, and care, these showstoppers thrive even in cozy homes.
Whether you’re drawn to their dramatic foliage or the promise of summer-like vibes, your indoor jungle is just a few steps away.
Ready to dive in? Start by choosing your variety and gathering supplies, then follow the care tips to keep your canna happy and flourishing. Pro tip: Snap a photo of your plant’s progress—you’ll love tracking its growth! 📸✨