
Planting
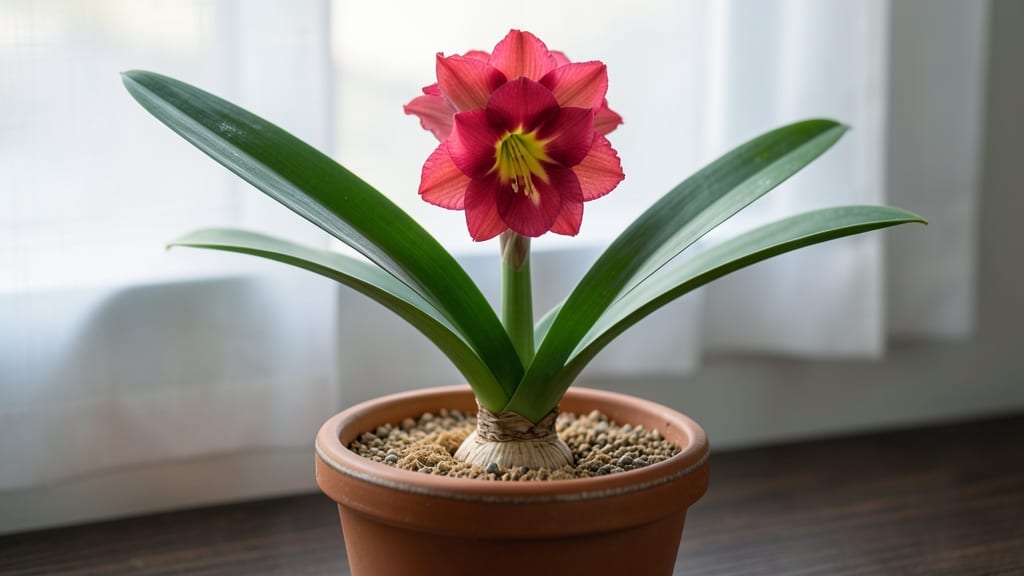
Growing amaryllis indoors turns your living room into a tropical showstopper with those bold, dramatic blooms. 🌸 I've learned the simple tricks that make the difference between a plant that flops and one that rewards you with flowers every year—no green thumb required.
The secret starts with the right pot, soil, and light. Too much water or the wrong spot, and you'll get sad, skinny stems. But get these basics right, and your amaryllis will send up a 3-foot-tall stalk of flowers that lasts for weeks.
Even better? With proper care, the same bulb will bloom again next season. You'll end up with a plant that thrives on neglect (just don't drown it) and puts on a show when other houseplants are barely holding on.
The blooms come in vibrant reds, pinks, and whites, and the foliage stays lush all year. Here's how to keep yours blooming reliably, from bulb to flower and back again—no mysterious gardening skills needed.
📚 In This Guide
- What you need
- Instructions
- Tips and common mistakes
- Wrapping up and next steps
What you need
- ● 1-2 amaryllis bulbs (Choose healthy, firm bulbs, 8-12 inches in diameter for best results).
- ● Well-draining potting mix (A blend of cactus/succulent soil + perlite/pumice—avoid garden soil).
- ● 1-2 pots (Choose shallow, wide containers with drainage holes—6-8 inches in diameter for one bulb, 10+ inches for two).
- ● Drainage material (Small pebbles, gravel, or broken pottery shards for the pot’s base).
- ● Watering can or spray bottle (With a narrow spout to avoid overwatering).
- ● Bright, indirect light source (A south- or east-facing window or a grow light for 12-14 hours/day).
- ● Fertilizer (Balanced 20-20-20 liquid fertilizer or slow-release bulb food).
- ● A humidity tray (To boost moisture levels if your home is dry).
- ○ Support stakes or a small trellis (For tall blooms—optional but stylish!).
- ● Decorative pot cover or saucer (To catch excess water and add flair).
- ● Thermometer/hygrometer (To monitor ideal temps (65–75°F) and humidity).
- ● Pruning shears (For trimming dead foliage or spent blooms).
Step-by-step instructions for growing amaryllis indoors
Here's how to coax those dramatic blooms from a dormancy-loving bulb with minimal fuss.
🌱 Step 1: Select and Prepare Your Amaryllis Bulb
Choose a firm, dry bulb with no soft spots or mold—these are your telltale signs of rot. I always look for bulbs with a diameter of at least 3 inches since smaller ones often produce weaker blooms. Remove any dried roots or papery skin from last season's growth with your fingers or a clean knife.
Soak the bulb in lukewarm water for 1 hour before planting. This jumpstarts hydration and helps break any dormancy. You'll notice the base starts to feel heavier as it absorbs moisture. Planting a pre-soaked bulb gives you a 2-week head start on blooms compared to dry planting.
🪴 Step 2: Plant in the Right Container and Soil Mix
Use a pot that's only 2-3 inches wider than your bulb's diameter—too much space leads to weak stems. I prefer terracotta pots because they wick away excess moisture, preventing root rot. Add a layer of 1 inch of gravel or perlite at the bottom for drainage, then fill the pot halfway with a mix of potting soil and perlite (50/50 ratio).
Position the bulb so its base sits halfway buried in the soil, with the top third exposed. This exposed section encourages new root growth while keeping the bulb stable. Press the soil gently around the bulb—don't pack it down tightly, or you'll restrict root expansion. Water lightly until moisture reaches 1 inch deep.
☀️ Step 3: Provide Bright Light and Consistent Watering
Place your amaryllis in a spot with bright, indirect light—think east or west-facing window. Direct midday sun can scorch leaves, but too little light means weak stems and tiny blooms. Rotate the pot a quarter turn weekly so the plant grows evenly toward the light.
Water when the top 2 inches of soil feel dry to the touch. Amaryllis bulbs store moisture, so overwatering is the #1 killer. I use the "finger test" daily after the first sprouts appear—if your finger comes out clean, wait another day. Once buds form, increase water slightly to support the heavy blooms.
🌿 Step 4: Encourage Blooming with Proper Care
When the flower stalk emerges, it's time to feed. Use a balanced liquid fertilizer (10-10-10) diluted to half strength every 2 weeks until blooming. You'll see the stalk grow 2-3 inches per week—this is normal and exciting. Support tall stems with a small stake if needed, especially in drafty spots.
Keep the soil consistently moist but never soggy during this phase. The blooms will last 7-10 days, but the real magic happens after: let the foliage grow for 6-8 weeks post-bloom to recharge the bulb for next season. Yellowing leaves after blooming? That's normal—just trim them back when they brown completely.
⏰ Step 5: Transition to Dormancy for Next Year's Blooms
After 6-8 weeks of foliage growth, reduce watering gradually. Let the leaves yellow and die back naturally—this signals the bulb to store energy. When all foliage is brown and the pot feels light, withhold water completely for 8-10 weeks. Store the pot in a cool (50-60°F), dark place like a closet.
Check the bulb monthly during dormancy. If you see any green shoots, bring it back into light and resume watering. This happens if the bulb didn't get enough rest. After 8-10 weeks, bring it back to bright light and water sparingly until new growth appears—your cycle begins anew.
Tips & tricks for perfect amaryllis indoor care
Here's what nobody tells you about keeping your amaryllis thriving through every season.
Bulb Selection Tip: When choosing your bulb, gently squeeze it—it should feel firm like a ripe avocado. I've learned the hard way that bulbs with soft spots or moldy areas won't bloom properly, no matter how well you care for them. Also, look for bulbs with a diameter of at least 3 inches; smaller ones often produce weaker stems and fewer blooms. This is where most people go wrong—they skip the inspection step and end up disappointed.
Soaking Secret: That 1-hour soak in lukewarm water isn't just about hydration—it's about breaking dormancy. I've found that bulbs soaked for exactly this time show new root growth within 3-5 days, while dry-planted bulbs can take up to 2 weeks. Pro tip: Use room temperature water, not cold, as cold water can shock the bulb. After soaking, let any excess water drain completely before planting to prevent rot.
Pot Size Matters: The 2-3 inch wider pot rule is crucial because amaryllis bulbs need just enough space to anchor themselves without being overwhelmed. I've seen people use oversized pots that lead to weak stems and poor blooming. For a 3-inch bulb, a 5-inch pot is perfect. Terracotta pots are ideal because they breathe better than plastic, helping prevent root rot—just make sure to water them more frequently since they dry out faster.
Light Positioning: East or west windows are perfect for amaryllis, but if you only have south-facing windows, use a sheer curtain to diffuse the intense midday sun. I've noticed that plants in south windows with no protection often develop brown patches on their leaves. The quarter-turn weekly rotation ensures even growth—this small habit makes a huge difference in how symmetrical your plant becomes. Don't skip it!
Pro Tips for Amaryllis Plant Indoors
- Here's what nobody tells you about keeping your amaryllis thriving through every season.
- Bulb Selection Tip: When choosing your bulb, gently squeeze it—it should feel firm like a ripe avocado. I've learned ...
- Soaking Secret: That 1-hour soak in lukewarm water isn't just about hydration—it's about breaking dormancy. I've foun...
Frequently asked questions
Got questions about keeping your amaryllis plant indoors thriving? You’re not alone! Here are answers to the most common concerns—from blooming tips to troubleshooting—so you can enjoy those showstopping flowers all year.
How often should I water my indoor amaryllis?
Water your amaryllis only when the top 1–2 inches of soil feel dry. Overwatering is the #1 killer—aim for every 7–10 days in winter (when it’s dormant) and every 5–7 days in spring/summer during active growth. Use well-draining soil and a pot with drainage holes to prevent soggy roots.
Why isn’t my amaryllis blooming?
Blooms need a dormancy period (6–8 weeks of cooler temps, ~50–60°F, and minimal water). If your plant skips blooming, it might be getting too much light, nutrients, or water year-round. Try moving it to a bright, indirect spot (like an east-facing window) and reduce watering in fall/winter. Patience pays off—some bulbs take 2–3 years to rebloom!
What’s the best temperature for an indoor amaryllis?
Amaryllis loves warmth but hates extreme heat or cold drafts. Ideal temps are 65–75°F during the day and 55–60°F at night. Avoid placing it near AC vents, heaters, or cold windows. If your home gets below 50°F, the bulb may enter dormancy prematurely, delaying blooms. A sunny windowsill (not direct scorching sun) is perfect!
Can I replant my amaryllis in a bigger pot?
Yes, but only every 2–3 years—or when roots circle the pot. Choose a container 1–2 inches larger in diameter (too big = soggy soil). Spring is the best time to repot after blooming. Use fresh, well-draining potting mix (cactus/succulent mix works great) and trim any mushy roots. Give it 2–3 weeks to adjust before fertilizing.
How do I fix yellow leaves or brown tips?
Yellow leaves often mean overwatering (let soil dry out more between waterings), while brown tips usually signal low humidity or fluoride in tap water. Try these fixes:
- Overwatering: Let the soil dry completely before watering again.
- Underwatering: Increase humidity with a pebble tray or humidifier.
- Water quality: Use filtered or rainwater if your tap water is hard.
- Fertilizer burn: Flush the soil with water and reduce fertilizer to half-strength.
Pro Tip:
Need a low-maintenance alternative? Try hippeastrum hybrids—they’re even easier to rebloom than classic amaryllis! Just mimic the same care, and you’ll get bigger, bolder flowers with less fuss.
Wrapping up and next steps
Growing an amaryllis plant indoors is a rewarding journey that brings bold, vibrant blooms into your home—even when winter chills outside!
With the right bulb, bright light, and a little patience, you’ll enjoy stunning flowers year after year. Don’t let challenges discourage you: every gardener faces a few hiccups, but your amaryllis will thank you for the love and care.
Ready to take the next step? Experiment with different varieties or share your success with fellow plant lovers! Snap a photo of your blooming beauty and tag #IndoorAmaryllis—we’d love to see your progress. Happy growing! 🌱✨