
Container Gardens
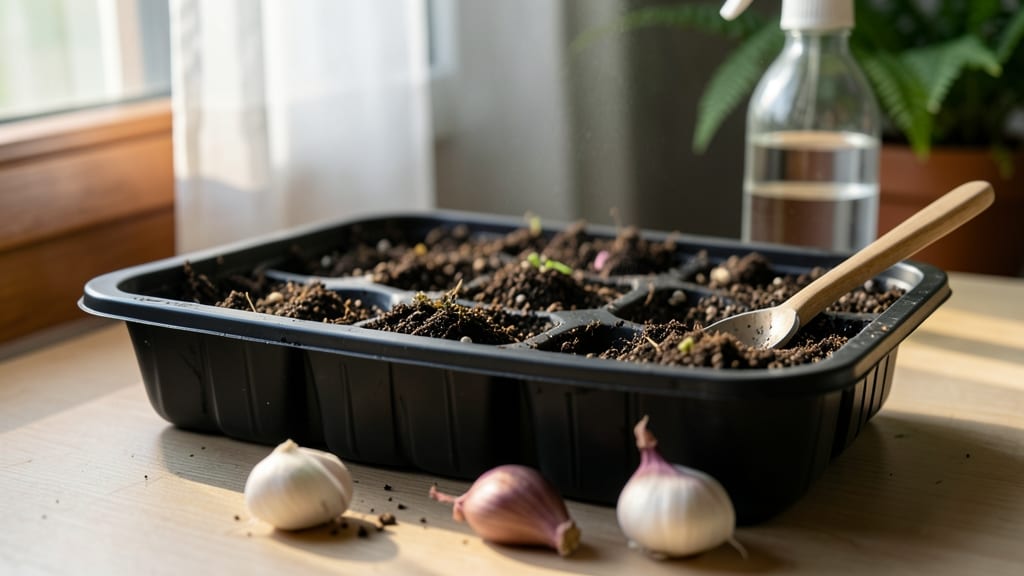
Planting garlic cloves indoors transforms a sunny windowsill into a green shoot factory—no yard required. ✨ I’ve turned kitchen scraps into lush, edible garlic greens in just 3 weeks, and the process is simpler than you’d think. The key?
Matching the right container, soil, and light to what garlic actually needs—not what you assume it does. You’ll need a shallow container (at least 6 inches deep), well-draining potting mix, and cloves from a hardneck variety (the ones with the papery skins).
Skip the softneck grocery store garlic—it’s bred for storage, not sprouting. Plant the cloves pointy end up, just 1 inch deep, and keep the soil lightly moist but never soggy. That’s it for the basics.
Within 10-14 days, you’ll see tiny green shoots poking through the soil, and in 3 weeks, you’ll be snipping fresh garlic greens for salads or soups. The flavor is mild but unmistakably garlicky, and you’ll get 3-4 harvests before the plant flowers. No bulb?
No problem—this is all about the greens. The biggest mistake? Overwatering or crowding the cloves. Space them 2 inches apart and use a container with drainage holes. If the soil stays damp too long, rot sets in faster than sprouts.
But get it right, and you’ll have a year-round garlic supply that costs pennies per harvest.
📚 In This Guide
- What you need
- Instructions
- Tips and common mistakes
- Wrapping up and next steps
What you need
- ● Garlic cloves: 6–10 large, unpeeled cloves (organic preferred for best results). Choose hardneck varieties (like Rocambole or German White) for indoor growing.
- ● Container: A shallow pot (6–8 inches deep) with drainage holes. Minimum size: 12 inches in diameter for 6 cloves (scale up for more).
- ● Potting mix: Well-draining, sterile mix (e.g., 50% potting soil + 50% perlite or coarse sand). Avoid garden soil—it’s too dense!
- ● Drainage tray: A shallow tray or saucer to catch excess water.
- ● Spray bottle: For gentle watering (avoid over-saturating the soil).
- ● Grow lights (LED or fluorescent) if natural light is 14–16 hours of light daily.
- ● Fertilizer: A balanced, water-soluble fertilizer (5-5-5 or 10-10-10) diluted to half-strength. Use once every 4–6 weeks.
- ● Humidity dome or plastic wrap: To retain moisture while sprouts emerge (remove after 2–3 weeks).
- ● Twine or small stakes: For supporting scapes (if growing hardneck varieties) later in the season.
Step-by-Step instructions for planting garlic cloves indoors
Here's how to coax strong, vibrant garlic sprouts indoors—no greenhouse needed.
🌱 Step 1: Select and Prepare Your Garlic Cloves
Choose hardneck garlic varieties for indoor growing—they adapt better to cooler conditions. Break apart a bulb and separate the individual cloves, leaving the papery skin intact. Discard any cloves that look shriveled or soft. I like to soak the cloves in lukewarm water for 12 hours before planting—this softens the outer skin and kickstarts germination.
After soaking, let the cloves dry briefly on a paper towel. This prevents rot when you plant them. Place them flat-side down in a shallow tray or directly into your container. The pointed end should face upward—this is where the shoot will emerge. If you're unsure which end is up, don't worry; garlic is forgiving, and even if planted upside down, it will eventually correct itself.
🪴 Step 2: Choose Containers and Planting Medium
Use a shallow container with drainage holes—6-inch-wide pots work well for 4 cloves. I prefer a mix of 50% potting soil and 50% perlite or coarse sand for drainage. Fill the container to within 1 inch of the rim and moisten the soil until it feels like a damp sponge—neither soggy nor bone-dry.
Plant each clove 2 inches deep, spacing them 2 inches apart in rows if using a larger container. Press the soil gently around each clove to ensure good contact. The cloves don’t need light yet, so cover the container loosely with a plastic bag or clear lid to retain moisture and warmth. Place it in a spot with 60-65°F temperatures, like a sunny windowsill or under a grow light.
💧 Step 3: Monitor Moisture and Light for Sprouting
Check the soil every 3-4 days—it should stay consistently moist but not waterlogged. Mist the surface lightly if the top feels dry to the touch. You’ll see tiny green shoots emerge in 10-14 days, signaling successful germination. Once sprouts reach 2-3 inches tall, remove the plastic cover to prevent fungal growth.
Move the container to a spot with bright, indirect light (a south-facing window or under 12-14 hours of grow light daily). Leggy sprouts mean your light is insufficient—adjust the setup immediately. At this stage, water only when the top ½ inch of soil feels dry. Overwatering now will drown delicate roots.
☀️ Step 4: Encourage Strong Growth and Harden Off
When shoots reach 6-8 inches tall and develop 3-4 leaves, it’s time to harden them off for outdoor transplanting. Place the container outside in a sheltered spot for 1-2 hours daily, gradually increasing exposure over 7-10 days. This acclimates the plants to wind and sunlight, preventing shock when moved to the garden.
During hardening, reduce watering slightly—garlic prefers drier conditions as it matures. If your last frost date is approaching, transplant the cloves directly into garden beds or larger containers. Space them 4-6 inches apart in well-draining soil. Mulch heavily with straw to retain moisture and regulate soil temperature.
Tips & tricks for perfect indoor garlic sprouts
Here's what I learned after growing garlic indoors for years—these tricks make all the difference between wimpy sprouts and bold, healthy growth.
Soaking Secret: That 12-hour lukewarm water soak in Step 1 isn't just optional—it's where the magic happens. The warm water softens the papery skin while kickstarting the germination process. I've found that using filtered water prevents mineral buildup that could inhibit growth. After soaking, pat the cloves completely dry with a paper towel; any lingering moisture can cause rot when planted.
Container Intelligence: While 6-inch pots work well for 4 cloves, don't overcrowd. Each clove needs its own space to develop properly. For larger containers, maintain the 2-inch spacing between cloves—this prevents competition for nutrients. I've had success using old yogurt containers with drainage holes punched in the bottom, but make sure they're clean and sanitized first. The soil mix of 50% potting soil and 50% perlite is ideal because it prevents compaction while still holding moisture.
Lighting Strategy: The 12-14 hours of daily light in Step 3 is non-negotiable for strong growth. If your natural light is insufficient, invest in a basic grow light—even a simple LED bulb will work. Position it 6-12 inches above the plants and adjust as they grow. I notice the biggest difference when plants get consistent light from the start rather than waiting until they're leggy. When you see those first tiny green shoots after 10-14 days, it's a great time to transition to brighter light conditions.
Temperature Watch: Maintaining that 60-65°F range is crucial, especially during the first 3 weeks. If your home tends to run cooler, place a small space heater nearby (safely!) or use a heating mat designed for seed starting. Conversely, if your space gets too warm, move the container to a cooler spot. I've seen garlic sprouts bolt (flower prematurely) when exposed to temperatures above 70°F during this critical growth phase. A simple thermometer near your growing setup helps monitor conditions without guesswork.
Pro Tips for Planting Garlic Cloves Indoors
- Here's what I learned after growing garlic indoors for years—these tricks make all the difference between wimpy sprou...
- Soaking Secret: That 12-hour lukewarm water soak in Step 1 isn't just optional—it's where the magic happens. The warm...
- Container Intelligence: While 6-inch pots work well for 4 cloves, don't overcrowd. Each clove needs its own space to ...
Frequently asked questions
Got questions about growing garlic indoors?
You’re not alone—this method is full of surprises! Here are answers to the most common queries to help you crush those cloves into flavorful success.
Can I grow garlic indoors year-round?
Yes! Indoor garlic thrives in controlled environments, but it’s best to start between September and November for a spring harvest. If you try year-round, use grow lights (12–16 hours/day) and maintain temps between 60–70°F. Just avoid direct winter sun, which can overheat your plants.
How long does it take for garlic to sprout indoors?
With the right setup, you’ll see sprouts in 1–3 weeks! Keep soil moist (not soggy) and place containers in bright, indirect light. Patience pays off—harvest scallions (green shoots) in 4–6 weeks, or wait 8–10 months for full bulbs if you’re growing hardneck varieties.
What if my garlic cloves rot or mold?
Rot or mold usually means too much moisture or poor drainage. Use a well-draining potting mix (like cactus/succulent blend) and ensure pots have drainage holes. Let the top inch of soil dry out between waterings. If mold appears, trim affected areas and increase airflow with a small fan.
Can I use store-bought garlic for planting?
Nope! Store-bought garlic is treated to prevent sprouting. Instead, grab organic, untreated bulbs from a garden center or online. Look for plump, firm cloves—avoid soft or sprouted ones. Pro tip: Save your best homegrown bulbs for next year’s indoor garden!
What if my indoor garlic grows tall but no bulb forms?
This happens when garlic gets too much light or warmth too early. Indoor garlic needs cool nights (50–60°F) to form bulbs. Try moving pots to a cooler spot (like a basement) at night or use a fan to mimic outdoor conditions. If you only want greens, harvest the shoots—no bulb needed!
Wrapping up and next steps
Growing garlic indoors is a rewarding adventure that brings fresh, flavorful harvests right to your kitchen! With just a few cloves, some patience, and the right setup, you’ll enjoy bold green sprouts in as little as 3 weeks—perfect for culinary experiments or gifting to fellow plant lovers. 🌱
Now that you’re armed with the know-how, why not take the next step? Try experimenting with different varieties, like rocks or purple stripe garlic, or even share your newfound skills with friends. Happy planting—your future meals (and taste buds) will thank you! 🧄✨