
How To
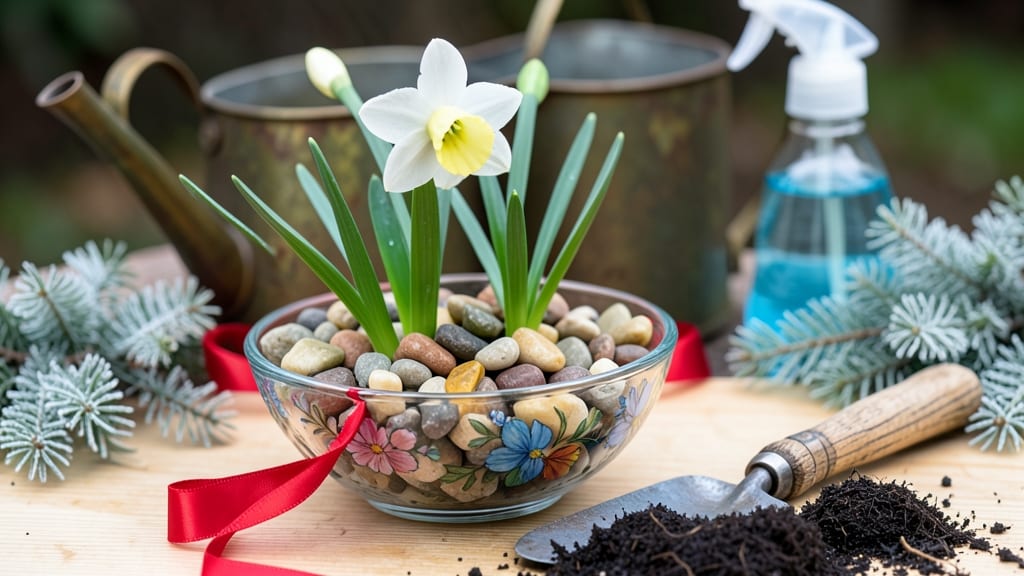
To plant paperwhites indoors, you’ll need just three things: bulbs, shallow containers, and patience — these fragrant blooms pop up in 6 weeks with almost no sunlight.
Picture this: your kitchen table transformed into a winter garden, filled with the sweet scent of paperwhites 🌱 blooming like a secret. No greenhouse, no fancy setup—just a few bulbs and a sunny windowsill (or even a grow light).
Most people assume indoor plants need constant care, but paperwhites prove otherwise. They thrive in minimal soil, even in water-only setups, and their roots grow fast. The trick? Keeping them moist without drowning them.
Below, I’ll walk you through the easiest method—from picking the right container to troubleshooting weak stems—so you can enjoy fragrant blooms by the holidays (or anytime, really).
Step-by-step guide to planting paperwhites indoors for fast blooms
Paperwhites offer a fragrant, low-maintenance way to bring spring indoors year-round. Unlike traditional bulbs, they don’t need soil—just water and indirect light. With the right approach, you’ll see blooms in just 6 weeks, even on a windowsill.
The key lies in proper bulb selection, container prep, and consistent moisture—all of which we’ll cover step by step.
I’ve grown paperwhites for holiday centerpieces and winter cheer, and the secret to their success is simplicity and patience. These bulbs thrive in shallow containers with pebbles or water, eliminating soil-related issues like mold or pests.
Whether you’re a beginner or a seasoned gardener, this foolproof method ensures vibrant blooms without sunlight or complicated care.
Before you start, gather your supplies: paperwhite bulbs, a shallow container (glass jars or bowls work best), pebbles or gravel, and room-temperature water. Avoid overcrowding—space bulbs 1 inch apart for optimal airflow. Now, let’s dive into the step-by-step planting process that guarantees success.
🌱 Your 6-Step Paperwhite Planting Guide
-
Step 1: Choose Healthy Bulbs
Select plump, firm bulbs with no soft spots or mold. Smaller bulbs may still bloom but will produce fewer stems. Store them in a cool, dry place until ready to plant. -
Step 2: Prepare Your Container
Use a shallow, wide container (3-4 inches deep). Add a 1-inch layer of pebbles for drainage. Skip soil—paperwhites root in water! -
Step 3: Plant Bulbs Correctly
Place bulbs base-down, ½ inch apart. They should sit half-buried in pebbles, with their tips exposed. This mimics their natural habitat. -
Step 4: Add Water Gently
Fill the container with room-temperature water until it covers half the bulb. Avoid submerging the tips—this causes rot. Change water weekly to prevent bacteria. -
Step 5: Place in Bright, Indirect Light
Position your container near an east or west window for 4-6 hours of light daily. Avoid direct sun, which scorches stems. A grow light 6 inches away works if natural light is lacking. -
Step 6: Watch for Blooms in 6 Weeks!
Roots will appear in 1-2 weeks, followed by green shoots. Once stems reach 3-4 inches, buds will form. Keep water consistently moist—never soggy—to encourage long-lasting blooms.
One common mistake is overwatering, which leads to mushy bulbs or mold. If you notice slimy water or foul smells, drain and refresh immediately. Another pitfall is planting too deeply, which stunts growth. Always keep the neck of the bulb exposed to air.
For extra fragrance, place your paperwhites near a warm, sunny spot (like a kitchen window). The scent intensifies in warmth and humidity. If stems bend toward light, rotate the container daily to keep them straight. This ensures showstopping centerpieces without weak, lopsided blooms.
After blooming, don’t toss the bulbs! Let them rest for 6 weeks in a dry spot, then replant for next season’s flowers. With minimal effort, you’ll enjoy year-round paperwhite blooms—no greenhouse required!
Pro tip: Add a teaspoon of sugar to the water to boost blooming. The bulbs will thrive faster with this simple energy boost, especially in low-light conditions. Just avoid overdoing it—too much sugar causes rot.
Now that your paperwhites are planted, focus on consistent care. Check water levels daily and trim any yellowing leaves to redirect energy to blooms. In just 6 weeks, you’ll have a fragrant, flower-filled indoor garden—no outdoor space needed! 🌸
Best containers and soil mix for indoor paperwhite success
Paperwhites thrive indoors with minimal soil—sometimes no soil at all! The key is creating the right balance of drainage and humidity to encourage strong root growth. Unlike outdoor bulbs, these fragrant narcissus varieties don’t need rich soil—they just need air circulation and consistent moisture.
Whether you prefer classic glass jars or a pebble tray, each method has unique advantages for your indoor garden.
Traditional gardeners often use shallow bowls with pebbles or sphagnum moss to mimic their natural Mediterranean habitat. But did you know you can grow paperwhites in just water? This method eliminates soil-borne diseases and makes monitoring roots effortless.
Let’s compare the best container options and soil-free alternatives to help you choose what works best for your space and style.
For soil-based options, if you prefer traditional planting, use a lightweight potting mix with perlite or sand to prevent compaction. The secret is avoiding heavy garden soil—paperwhites hate soggy roots.
Mix equal parts cactus/succulent mix and perlite for perfect drainage. Pro tip: Add a handful of orchid bark to improve aeration and mimic their natural rocky soil.
Regardless of your chosen method, drainage is non-negotiable. Paperwhites rot quickly in waterlogged conditions. If using soil, ensure the container has drainage holes or place it on a saucer with pebbles.
For water-only methods, change the water weekly to prevent bacterial growth. This simple habit keeps your bulbs healthy and blooming on schedule.
Humidity is the final puzzle piece. Paperwhites love 60-70% humidity, which you can achieve by grouping containers together or placing them on a humidity tray. A quick fix?
Mist the bulbs lightly every 2-3 days—just enough to mimic their coastal Mediterranean origins. Your fragrant blooms will thank you with longer stems and brighter flowers.
Remember, paperwhites are one-and-done annuals, but with the right container and care, you’ll enjoy their intoxicating scent year after year. Whether you’re a minimalist with glass jars or a traditionalist with pebbles, these methods all deliver fast, fragrant blooms with minimal fuss. Happy planting!