
Container Gardens
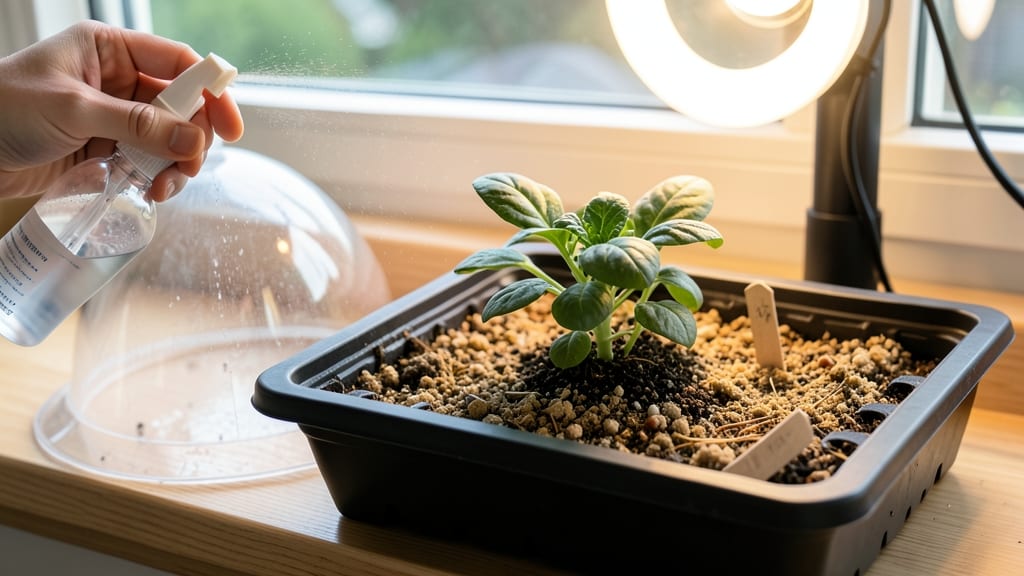
Starting spinach seeds indoors means crisp, homegrown greens in just 4-6 weeks—no more wilted store-bought bags. 🌱 The trick is keeping soil consistently moist without drowning the tiny roots, and lightweight trays make all the difference for easy handling.
You’ll need shallow trays, seed-starting mix, and a spray bottle for gentle watering. Spinach loves cool temps (60-70°F) and indirect light, but too much heat or direct sun will bolt your plants before they even sprout. I’ve learned the hard way that patience is key—these seeds germinate slower than lettuce.
Once you see those first true leaves, you’ll be hooked on the sight of bright green seedlings reaching for the light. They’re ready for transplant in about 4 weeks, and with the right care, you’ll harvest tender leaves in under 2 months from seed.
This method works for any spinach variety, from baby leaf types to heat-tolerant giants. The secret? Moisture control and avoiding overcrowding—two mistakes that’ll kill your crop faster than anything else.
📚 In This Guide
- What you need
- Instructions
- Tips and common mistakes
- Wrapping up and next steps
What you need
- ● Spinach seeds: Choose a variety like Baby’s Leaf Hybrid or Tyee (2–3 packets, ~50–100 seeds total).
- ● Lightweight seed trays or containers: 1–2 shallow trays (4–6" deep) with drainage holes, or repurposed containers (e.g., egg cartons, plastic takeout boxes).
- ● Seed-starting mix: 1 bag (1–2 qt) of sterile, peat-free potting soil (e.g., Pro-Mix or FoxFarm Seedling Mix).
- ● Grow lights or sunny windowsill: A full-spectrum LED grow light (12–16 hrs/day) or a south-facing window (6+ hrs of sunlight).
- ● Spray bottle: 1 (8–16 oz) with a fine mist nozzle for gentle watering.
- ● Plastic wrap or humidity dome: 1 sheet (for moisture-locking).
- ● Labels & markers: Small labels + waterproof marker to track planting dates.
- ● Heating mat (70–75°F) to speed germination.
- ● Fertilizer: Balanced liquid fertilizer (5-5-5 or 10-10-10) diluted to half-strength.
- ● Thermometer/hygrometer to monitor soil temp (60–75°F ideal).
- ● Tweezers for precise seed placement.
- ● Small fan (for airflow to prevent damping-off).
Step-by-Step instructions for starting spinach indoors
Here’s how to get crisp, healthy spinach seedlings off to the perfect moist start—no wilting or leggy stems in sight.
🌱 Step 1: Prepare Lightweight Trays and Soil
Fill your lightweight seed-starting trays with a sterile seed-starting mix—never garden soil, which compacts and blocks roots. I like to press the mix gently into the cells so it’s firm but not packed, then water it until it’s evenly moist but not soggy. The goal is a damp sponge texture; squeeze a handful and it should hold together without dripping.
Spinach seeds are tiny, so I use a fine-mesh strainer to sift the mix into the trays for even distribution. This prevents clumps that could bury seeds too deep. Leave about ¼ inch of space at the top of each cell for watering later—spinach hates soggy bottoms.
🌱 Step 2: Sow Seeds Evenly and Cover Lightly
Scatter 2-3 seeds per cell—spinach germinates easily, so thinning later is a breeze. Press them gently into the soil with your fingertip, just enough to make contact. Cover with a thin layer of mix (no more than ⅛ inch deep), or they’ll take forever to sprout. A light mist with a spray bottle keeps the surface moist without disturbing the seeds.
I tap the tray gently on the table to settle everything, then place it in a sealed plastic bag for 24 hours. This tricks the seeds into thinking they’re in a humid microclimate, which speeds up germination. Check daily—condensation inside the bag is your cue that moisture levels are perfect.
💧 Step 3: Maintain Consistent Moisture and Warmth
Remove the bag once seeds sprout (5-10 days), and keep the soil consistently moist—never let it dry out, but don’t drown it either. Bottom-watering (placing the tray in ½ inch of water for 10 minutes) prevents surface crusting that can suffocate tiny seedlings. You’ll know it’s right when the soil looks dark and damp but not wet.
Spinach thrives at 60-65°F, so a sunny windowsill or seedling heat mat works. Avoid heat sources above 75°F, or the seeds will bolt (go to flower) before you can transplant. Watch for the first true leaves—those are the second set after the initial cotyledons—and that’s when you’ll start seeing real progress.
☀️ Step 4: Provide Gentle Light and Prevent Legginess
Move seedlings to a bright, indirect light spot immediately after germination. A south-facing window is ideal, but if yours isn’t sunny enough, supplement with a grow light 4-6 inches above for 12-14 hours daily. Spinach hates stretching, so keep the light close—if stems grow longer than 2 inches before leaves form, it’s too far away.
Rotate the tray quarter-turn daily so plants grow straight, not lopsided. You’ll spot leggy seedlings as thin, pale stems with leaves spaced far apart. Strong seedlings have short, sturdy stems and deep green color. Thin to the strongest seedling per cell once they’re 1 inch tall, using scissors to avoid disturbing roots.
⏰ Step 5: Harden Off Before Transplanting
Two weeks before your last frost date, start hardening off by placing seedlings outside in partial shade for 1 hour daily. Gradually increase time and sun exposure over 7-10 days
Transplant on a cool, cloudy day to reduce shock. Bury seedlings deeper than they grew in trays—spinach has hollow stems that’ll root along the buried portion. Water deeply at the base, and you’ll have baby greens ready for harvest in just 3-4 weeks.
Tips & tricks for perfect spinach seedlings
Here's how to avoid common pitfalls and give your spinach the ideal start—without the guesswork.
Soil Prep Secret: When pressing the sterile seed-starting mix into your trays, aim for a texture that holds together when squeezed but doesn't crumble. This prevents the mix from compacting when you water it later. I like to add a pinch of perlite to the mix (about 10% by volume) to improve drainage—spinach roots need air just as much as moisture. This simple adjustment prevents that dreaded "soggy bottom" look that can kill seedlings before they even sprout.
Germination Hack: The 24-hour humidification trick in Step 2 is a game-changer, but here's what nobody tells you—place a small piece of cardboard under the sealed bag to create a slight air gap. This prevents condensation from dripping onto your seeds, which can cause rot. Check the bag daily by lifting the corner slightly—if condensation is heavy, you've got perfect humidity. If it's dry, add a few drops of water to the soil and reseal.
Lighting Insight: For that 12-14 hour daily light requirement, position your grow light so the seedlings' tops just brush against it. This creates a natural light gradient that encourages even growth. I use a simple timer on my grow light to automate the cycle—no more forgetting to turn it on or off. If you notice seedlings leaning toward one side of the tray, rotate the tray a quarter-turn daily to prevent lopsided growth.
Thinning Technique: When thinning to the strongest seedling per cell at the 1-inch mark, use clean scissors to snip at soil level rather than pulling. This minimizes root disturbance to your remaining plant. I like to water the tray thoroughly first—moist soil makes the thinning process cleaner and reduces stress on the plants. The key is patience: wait until you see true leaves forming before thinning, as the initial cotyledons aren't strong enough to support the plant alone.
Pro Tips for Starting Spinach Seeds Indoors
- Here's how to avoid common pitfalls and give your spinach the ideal start—without the guesswork.
- Soil Prep Secret: When pressing the sterile seed-starting mix into your trays, aim for a texture that holds together ...
- Germination Hack: The 24-hour humidification trick in Step 2 is a game-changer, but here's what nobody tells you—plac...
Frequently asked questions
Got questions about starting spinach seeds indoors? You’re not alone! Here are some of the most common concerns—and their straightforward answers—to help you grow a thriving spinach crop from seed.
When is the best time to start spinach seeds indoors?
For most climates, start spinach seeds indoors 6–8 weeks before your last expected frost date. Spinach grows quickly, so avoid starting too early—it can bolt (go to seed) faster in warm conditions. Check your local frost dates for precision!
How do I keep my spinach seedlings from drying out or molding?
Spinach seeds need consistent moisture but hate soggy soil. Use a moisture-locking tray or clear dome to retain humidity, and mist seeds lightly with water (avoid overhead watering). Ensure trays have drainage holes to prevent root rot. A humidity tray with pebbles and water underneath works wonders!
What’s the ideal temperature for germinating spinach seeds?
Spinach thrives in cool temperatures (60–70°F for germination, 55–65°F for growth). Use a seedling heat mat if your home runs warm, or place trays in a cool, bright spot like a sunny windowsill. Avoid heat sources—spinach bolts faster in warmth!
Can I use regular potting soil, or do I need something special?
Start with a lightweight, seed-starting mix (like a peat-based or coco coir blend) for best results. Avoid garden soil—it’s too dense and can compact, stunting seedling growth. Mix in a bit of perlite or vermiculite for aeration if your mix feels heavy.
Why are my spinach seedlings leggy or weak?
Leggy seedlings usually mean too little light. Move trays within 2–3 inches of a grow light or sunny window immediately. If they’re already stretched, try hardening off them early by gradually exposing them to outdoor light (in shade) to toughen them up before transplanting.
Wrapping up and next steps
Starting spinach seeds indoors is a rewarding way to jumpstart your garden—especially with the right lightweight trays and moisture-locking tricks. 🌱 Whether you’re a beginner or a seasoned gardener, these steps ensure strong, healthy seedlings ready for transplanting.
Once your spinach is thriving, the next logical step? Hardening off those seedlings before moving them outside for a bountiful harvest!
🌿 Ready to Grow?
Grab your supplies, follow the tips, and soon you’ll be enjoying fresh, homegrown spinach—packed with nutrients and pride! 💪