
Planting
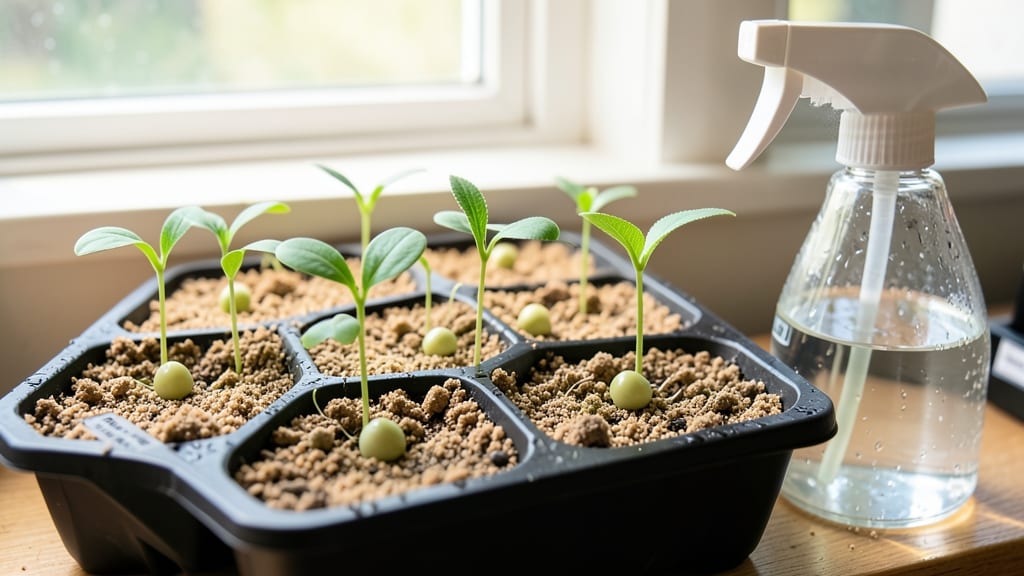
Sowing peas indoors gives you a two-week head start on spring harvests—no cold soil required. 🌱 I learned the hard way that peas hate soggy starts, so I developed a foolproof method that produces sturdy seedlings ready for transplanting when temps dip into the 40s. You’ll need small containers (like egg cartons or seed trays), well-draining potting mix, and a sunny windowsill or grow light.
The key is keeping soil consistently moist but never waterlogged—overwatering is the #1 killer of pea starts. A spray bottle works better than pouring, and a clear plastic dome (or ziplock bag) speeds up germination.
By the time your seedlings have two true leaves, they’ll be tough enough to handle outdoor conditions. The payoff? Sweet, tender peas 3-4 weeks earlier than planting directly in the garden. Plus, you avoid the risk of soil-borne diseases that plague direct-sown peas in cool climates.
This method works for sugar snap, snow, and shelling peas alike. Just avoid overcrowding—peas need space to stretch their roots. Ready to get started?
📚 In This Guide
- What you need
- Instructions
- Tips and common mistakes
- Wrapping up and next steps
What you need
- ● Pea Seeds: Choose cold-hardy varieties like Sugar Snap, Snow Pea, or Wrinkled Pea (1–2 seeds per cell or 3–4 seeds per pot). Aim for 10–20 seeds depending on your harvest goals.
- ● Seed Trays or Pots: Cell trays: 4–6" deep with drainage holes (e.g., 72-cell trays).
- ● Pots: 3–4" diameter (1–2 seeds per pot). Use biodegradable pots if transplanting directly.
- ● Seed Starting Mix: Lightweight, sterile, and well-draining (e.g., Pro-Mix or Fox Farm Seedling Mix). Avoid garden soil—it’s too dense!
- ● Grow Lights or Sunny Window: Grow lights: Full-spectrum LED (12–16 hrs/day, 6–12" above seedlings).
- ● Window option: South-facing with 6+ hours of direct light.
- ● Misting Bottle or Spray Nozzle: For gentle watering (avoid soaking the mix).
- ○ Plastic Wrap or Humidity Dome: Optional but helpful for first 5–7 days to retain moisture.
- ○ Thermometer (Optional): Monitor soil temps—peas thrive at 60–70°F (15–21°C).
- ● Fertilizer: Fish emulsion (diluted) or balanced starter fertilizer (e.g., 5-5-5) for nutrient boost after germination.
- ● Heat Mat: If your home dips below 55°F (13°C), a mat speeds up germination.
- ● Plant Labels: Mark trays with seed variety and date (trust us, it’s a game-changer!).
- ● Tweezers: For delicate seed placement (especially small varieties like Oregon Sugar Pod).
- ● Fungicide (Preventative): Neem oil spray to deter damping-off if humidity is high.
Step-by-step instructions for sowing peas indoors
Here’s my foolproof method for getting cold-hardy pea seedlings ready for spring—no leggy, weak plants here.
🌱 Step 1: Prepare Containers and Soil for Germination
Fill 4-inch deep pots with a sterile, well-draining seed-starting mix—never garden soil, which compacts and suffocates roots. I like to mix in a handful of perlite for extra aeration. Moisten the mix until it’s damp like a wrung-out sponge, but not soggy. Press it down lightly so the surface is firm but not compacted.
Peas germinate best in cool conditions, so avoid pre-warming the soil. Instead, place your containers in a spot where temperatures stay between 60-70°F during the day and 50-60°F at night. If your home runs warmer, move the pots to a cooler basement or garage for a few hours daily until sprouts appear.
🌱 Step 2: Sow Seeds at the Correct Depth and Spacing
Pea seeds are large and easy to handle—drop 2-3 seeds per pot about 1 inch deep. Planting too shallow risks drying out the seeds before germination, while burying them deeper slows sprouting. Use your finger to make a small hole, place the seeds inside, then cover lightly with soil.
Label each pot with the variety and date—pea seedlings grow fast, and you’ll want to transplant them before they get too crowded. Water gently with a spray bottle until the soil surface looks evenly moist. Avoid soaking the seeds; you’ll know moisture is right when the soil feels damp but not glistening.
💧 Step 3: Provide Moisture and Indirect Light for Germination
Cover the pots with a clear plastic dome or plastic wrap to retain humidity, but leave a small gap for airflow. Peas need consistent moisture to germinate, so check daily and mist the soil if it feels dry to the touch. Expect sprouts in 7-14 days, depending on your home’s temperature and humidity.
Once the first true leaves appear (not the initial seed leaves), remove the dome immediately. Trapped moisture encourages fungal diseases like damping-off, which can rot young stems overnight. Place the pots in a bright spot with indirect light—direct sun now will scorch tender seedlings.
☀️ Step 4: Harden Off and Prepare for Outdoors
Two weeks before your last frost date, start hardening off the seedlings by moving them outside for 1-2 hours the first day. Choose a sheltered, shaded spot to avoid sudden stress. Gradually increase their outdoor time by 1 hour daily, introducing them to more sun and wind over 10-14 days. This toughens their stems and leaves, so they’re ready for the garden.
Watch for leggy growth—a sign they’re stretching toward light. If stems look thin or pale, move them closer to a south-facing window or under a grow light for 12-14 hours daily. Strong seedlings have thick stems and deep green leaves, and they’ll transplant like pros into cooler spring soil.
Tips & tricks for perfect indoor pea sprouting
Avoid these common pitfalls—and watch your cold-hardy pea seedlings thrive from the very first sprout.
Soil Preparation Secret: The key to successful germination lies in that seed-starting mix. I can’t stress enough how important it is to avoid garden soil—its compacted texture suffocates tender pea roots. For best results, mix in a handful of perlite (about 1 part perlite to 4 parts seed-starting mix) to create that perfect airy environment. This prevents the dreaded "damping-off" fungus that can wipe out seedlings overnight.
Temperature Matters: Peas are finicky about warmth—too hot and they won’t germinate, too cold and they’ll take forever. The ideal daytime range of 60-70°F is non-negotiable, but here’s my trick: if your home runs warmer, create a temporary "cool room" by moving pots to a basement or garage for a few hours daily. This mimics their natural spring conditions and speeds up sprouting.
Lighting Strategy: Once those first true leaves appear, direct sunlight becomes the enemy. I’ve seen seedlings go from vibrant to crispy in hours under bright windows. Instead, place pots near an east-facing window where they’ll get gentle morning light, or use a grow light on a timer for 12-14 hours daily. The goal is to keep stems sturdy and leaves deep green—not pale and stretched.
Hardening Off Hack: The gradual outdoor exposure in Step 4 is where many gardeners fail. My pro move? Start with just 1-2 hours in a sheltered spot, then increase by 1 hour daily. But here’s the secret: always choose a shaded area for those first few days. Direct sunlight and wind will shock your seedlings faster than you think, even if they look tough.
Pro Tips for Sowing Peas Indoors
- Avoid these common pitfalls—and watch your cold-hardy pea seedlings thrive from the very first sprout.
- Soil Preparation Secret: The key to successful germination lies in that seed-starting mix. I can’t stress enough how ...
- Temperature Matters: Peas are finicky about warmth—too hot and they won’t germinate, too cold and they’ll take foreve...
Frequently asked questions
Got questions about sowing peas indoors? You’re not alone—growing cold-hardy peas can feel tricky at first! Below, we’ve answered the most common questions to help you get started with confidence.
When is the best time to start peas indoors?
Peas are one of the few veggies that don’t need indoor starts—most gardeners sow them directly outside 4–6 weeks before your last frost date. However, if you’re in a very short growing season or want a head start, begin seeds indoors 6–8 weeks before transplanting (around mid-February to early March for most U.S. zones). Use a heat mat if your home stays below 60°F (15°C) for faster germination.
Do peas need special containers for indoor sowing?
Peas thrive in small, shallow containers (like egg cartons or 2–3" pots) with drainage holes. Avoid deep pots—they’ll encourage leggy stems. Use a light, seed-starting mix (not garden soil) and plant 1–2 seeds per cell, 1" deep. If using trays, space seeds 2" apart to prevent overcrowding. Pro tip: Label containers—pea varieties look identical until they flower!
Can I transplant peas indoors if I miss the outdoor window?
Peas are cold-tolerant but hate heat—they bolt (go to seed) if temperatures rise above 85°F (29°C). If you miss the outdoor window, try these tricks:
- Hardening off: Move seedlings outside gradually (1–2 weeks) in partial shade, even if it’s chilly.
- Shade cloth: Use 30–50% shade to protect them from late-spring sun.
- Succession planting: Sow new seeds every 2 weeks for a staggered harvest.
Why are my indoor pea seedlings turning yellow or moldy?
Yellowing leaves or mold usually mean overwatering or poor drainage. Peas need moist (not soggy) soil—water only when the top inch feels dry. If mold appears (fuzzy gray spots), improve airflow with a small fan or reduce humidity. Leggy seedlings? That’s often from lack of light—move them to a south-facing window or use a grow light 12–14 hours/day.
What’s an easy alternative if indoor sowing feels complicated?
No stress—peas are one of the simplest veggies to grow directly outside! Just:
- Sow seeds ½" deep in well-drained soil when temps are 40–85°F (4–29°C).
- Plant in cool, shady spots (they thrive under trees or near fences).
- Use trellises or stakes to save space and improve airflow.
Wrapping up and next steps
Sowing peas indoors is a game-changer for early spring harvests—especially for those chilly climates! With the right setup, you’ll enjoy tender, cold-resistant starts that outpace outdoor planting. Whether you’re a seasoned gardener or just starting, this method saves time, space, and even a few extra weeks of fresh, homegrown goodness.
Ready to take the next step? Grab your seeds, set up your grow lights, and start sowing! Once your pea seedlings are strong and ready, transplant them outdoors (or keep them thriving indoors) for a bounty of sweet, crisp peas. Happy growing! 🌱✨