
Light Requirements
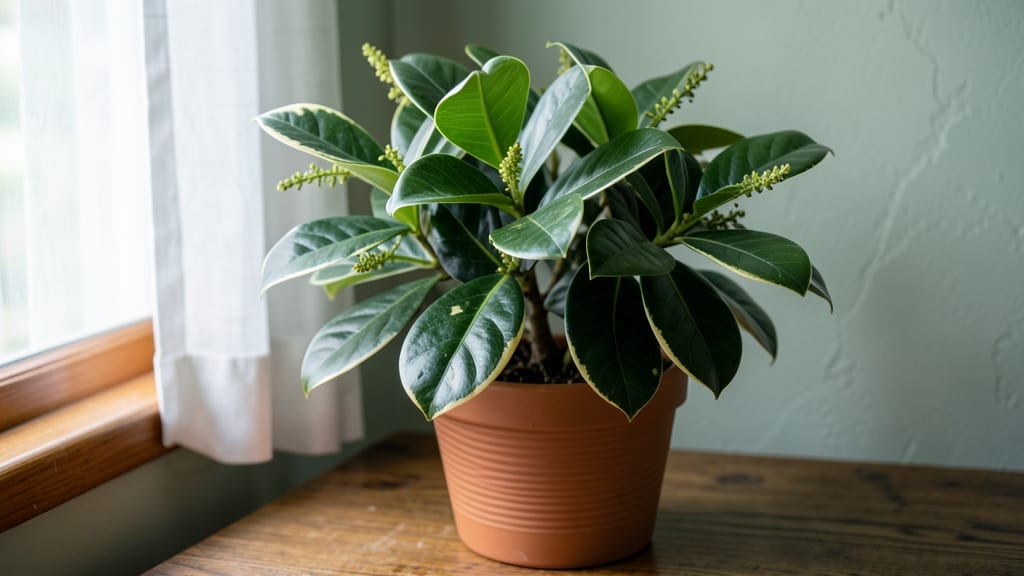
Growing Japanese laurel indoors brings that earthy, leathery fragrance into your home year-round—no yard required. 🌿 I’ve kept mine thriving for five winters now, and the secret isn’t complicated: it’s all about light, water, and a little strategic pruning to keep those glossy leaves looking their best.
The plant thrives in bright, indirect light—think east-facing windows or a few feet back from a south window. Too much direct sun scalds the leaves, while too little dims the color and slows growth.
Water when the top inch of soil feels dry, but avoid soggy roots, which lead to root rot. A peaty, well-draining potting mix keeps things balanced.
Pruning isn’t just about shaping—it’s about encouraging dense, fragrant foliage. Snip back leggy stems in early spring to promote bushier growth, and remove any yellowing or brown leaves as they appear.
With the right care, your Japanese laurel will reward you with deep green, leathery leaves that stay vibrant all winter long.
Common issues like yellowing leaves or slow growth usually point to overwatering or poor light. Adjust your routine, and you’ll see improvement within weeks. Perfect for beginners, this plant is nearly indestructible once you get the basics right.
📚 In This Guide
- What you need
- Instructions
- Tips and common mistakes
- Wrapping up and next steps
What you need
- ● Japanese Laurel Plant: A healthy, potted Aucuba japonica (variegated or solid green foliage). Size: 1–2 gallons (small to medium).
- ● Well-Draining Potting Mix: 1 bag (5–10 quarts) of a high-quality peat-based or organic blend with perlite or sand (e.g., 60% peat, 30% perlite, 10% compost).
- ● Pot: 1 container with drainage holes, 2–4 inches larger in diameter than the plant’s root ball. Material: Terracotta or plastic (terracotta helps wick moisture).
- ● Watering Can: 1 with a narrow spout for precise watering.
- ● Fertilizer: 1 bottle of balanced liquid houseplant fertilizer (10-10-10 or 20-20-20, diluted to half-strength).
- ● Pruning Shears: 1 pair of sharp, sterilized shears (for light pruning).
- ○ Humidity Tray (Optional but Helpful): 1 shallow tray + pebbles (to boost humidity in dry climates).
- ● Grow Lights: LED or fluorescent bulb (for low-light spots; 12–16 hours/day).
- ● Misting Bottle: For quick humidity boosts (especially in winter).
- ● Root Stimulator: 1 small bottle (e.g., seaweed extract) to encourage growth after repotting.
- ● Decorative Pot Sleeves: 1–2 (to hide plastic pots and add style!).
Instructions for pruning Japanese laurel indoors
Here's how I keep my Japanese laurel thriving year-round with minimal effort and maximum fragrance.
✂️ Step 1: Assess Growth and Determine Pruning Needs
Start by examining your Japanese laurel for signs of overgrowth or leggy stems. I look for branches that have grown too long, lost their dense foliage, or are crossing others. These are your targets for pruning. The best time to prune is in late winter or early spring, just before new growth begins.
Run your fingers along the stems to feel for the leaf nodes—these are where you'll make your cuts. Japanese laurel responds well to pruning, so don't be afraid to trim back up to ⅓ of the plant's height if needed. This encourages bushier, denser growth and more of that signature fragrance.
✂️ Step 2: Sterilize Tools and Make Clean Cuts
Before you start cutting, wipe down your pruning shears with rubbing alcohol to sterilize them. This prevents the spread of disease between cuts. I always sterilize my tools before and after pruning to keep my plants healthy. Use sharp, clean shears to make cuts at a 45-degree angle, about ¼ inch above a leaf node.
Making clean cuts is crucial—ragged edges can invite pests and disease. Avoid leaving stubs, as these can die back and create unsightly spots on your plant. If you're pruning larger branches, use pruning shears or small hand saws for cleaner results.
✂️ Step 3: Shape the Plant and Encourage Fullness
Step back and visualize the shape you want for your Japanese laurel. I like to maintain a rounded, bushy form, so I prune to encourage growth from the center outward. Trim back the longest branches first, then fill in any gaps by cutting back slightly older growth. This helps the plant fill out more evenly.
Watch for areas where new shoots are emerging—these are your plant's way of telling you where it wants to grow. Prune just above these shoots to redirect energy and promote fuller growth. If your plant is looking too leggy, focus on cutting back the top growth to encourage bushier sides.
🌿 Step 4: Clean Up and Monitor Recovery
After pruning, remove all the clippings from the area around your plant. You can compost them, but avoid leaving them near the base, as they can harbor pests or disease. Give your Japanese laurel a light misting with water to help it recover from the stress of pruning.
Place the plant in a spot with bright, indirect light for the first few days after pruning. You'll notice new growth emerging within 2-4 weeks, depending on the time of year. Keep an eye on the plant for any signs of stress, like yellowing leaves or wilting, and adjust care as needed.
⏰ Step 5: Maintain Year-Round with Light Pruning
Japanese laurel doesn’t need heavy pruning often—just a light trim every few months to keep it shaped and encourage new growth. In the warmer months, you can give it a light pruning to maintain its size and shape. Avoid heavy pruning in the fall or winter, as this can stress the plant when it’s already dormant.
I like to prune mine just before the growing season kicks into high gear, usually in late winter or early spring. This ensures that the plant has plenty of time to recover and grow back lush before the summer heat. With consistent, light pruning, your Japanese laurel will stay fragrant, full, and beautiful year-round.
Tips & tricks for perfect year-round Japanese laurel care
Pruning Japanese laurel feels like sculpting a living masterpiece—here's how to avoid common mistakes and get that signature lush, fragrant look.
Timing is Everything: The late winter/early spring timing in Step 1 is non-negotiable for Japanese laurel. This timing coincides with the plant's natural dormancy break, so it can recover quickly. I've learned the hard way—pruning in fall or winter can shock the plant when it's already conserving energy. If you miss the window, wait until just before new growth appears in spring.
The ⅓ Rule for Dramatic Results: When Step 1 mentions trimming up to ⅓ of the plant's height, I mean it! This aggressive approach might seem scary, but Japanese laurel responds beautifully to bold pruning. The key is making clean cuts at the leaf nodes—this redirects energy to create bushier, denser growth. Think of it like giving your plant a fresh start with more surface area for fragrance production.
Cutting Technique Matters: The 45-degree angle and ¼-inch above leaf node instructions in Step 2 aren't just technicalities—they're essential for healthy regrowth. I use a small paint marker to mark my cuts before making them, which helps maintain consistency. For larger branches, I make the initial cut slightly farther out, then follow with a second cut to prevent tearing. This prevents those unsightly stubs that can die back and leave ugly scars.
Recovery Monitoring: After pruning, the 2-4 week recovery window in Step 4 is your plant's way of telling you it's working hard. During this time, I place my laurel in the brightest indirect light spot I have (usually near an east-facing window) and increase humidity slightly with a pebble tray. Watch for new growth emerging from the leaf nodes—this is your confirmation that the pruning worked. If you don't see new shoots within 4 weeks, your cuts might have been too far from the nodes.
Pro Tips for Japanese Laurel Indoor
- Pruning Japanese laurel feels like sculpting a living masterpiece—here's how to avoid common mistakes and get that si...
- Timing is Everything: The late winter/early spring timing in Step 1 is non-negotiable for Japanese laurel. This timin...
- The ⅓ Rule for Dramatic Results: When Step 1 mentions trimming up to ⅓ of the plant's height, I mean it! This aggress...
Frequently asked questions
How much light does a Japanese laurel need indoors?
Japanese laurel thrives in bright, indirect light—think east or north-facing windows. Too little light? Leggy growth and sparse foliage. Too much direct sun? Leaf scorch. A spot near a sheer curtain works best. If your space is dim, supplement with a grow light 12–14 hours daily.
Why are my Japanese laurel leaves turning yellow?
Yellowing leaves usually signal overwatering or poor drainage. Let the top 1–2 inches of soil dry out between waterings. Check the pot’s drainage holes—if they’re clogged, repot into a container with holes or add perlite to the mix. Brown edges? That’s often underwatering or dry air—mist leaves or use a pebble tray.
How often should I prune my indoor Japanese laurel?
Prune lightly year-round to encourage bushiness, but avoid heavy cuts. Trim back leggy stems in spring/summer to shape it. Never prune in fall/winter—it stresses the plant. Use clean, sharp shears and sterilize them with rubbing alcohol to prevent disease. Aim for a rounded silhouette for balanced growth.
What’s the ideal temperature for indoor Japanese laurel?
Keep it cozy! Japanese laurel prefers 60–75°F (15–24°C). Drafts, AC vents, or sudden temp drops below 50°F (10°C) can shock it. Avoid placing it near heating/cooling sources. A humidifier nearby helps—these plants love 40–50% humidity. Brown leaf tips? That’s often dry air—group it with other plants or use a humidity tray.
Can I grow Japanese laurel from cuttings indoors?
Take 4–6 inch cuttings in spring/summer, dip the ends in rooting hormone, and plant in moist perlite or sand. Cover with a plastic bag to retain humidity, then place in bright, indirect light. Roots should form in 4–8 weeks. Once established, transplant to soil and care for it like a mature plant.
Wrapping up and next steps
Bringing the Japanese laurel (Aucuba japonica) indoors is a fantastic way to enjoy its lush foliage and subtle fragrance year-round—without the hassle of outdoor pruning! 🌿 With the right light conditions, soil, and occasional care, this resilient plant thrives even in cozy homes.
Whether you’re a beginner or a seasoned plant parent, its adaptability makes it a perfect low-maintenance addition to your indoor garden.
Now that you’re armed with the know-how, why not take the next step? Try placing your Japanese laurel in that bright, indirect spot you’ve been eyeing—your home (and nose!) will thank you. Happy growing! 🌟