
Tools
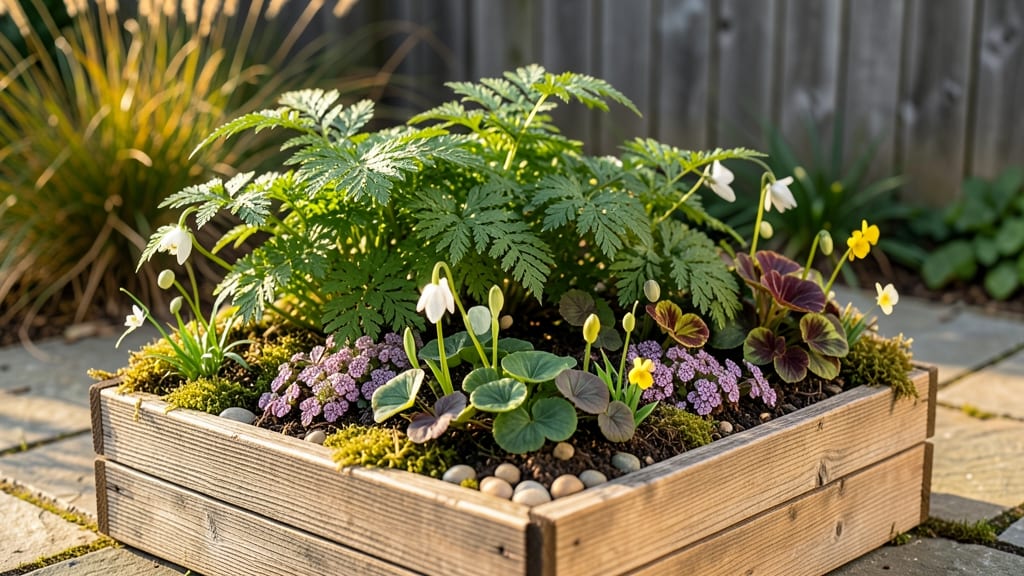
Creating an indoor fairy garden transforms any corner into a magical escape. ✨ The secret lies in balancing miniature plants, textures, and tiny details that feel alive yet delicate—like a hidden world tucked under a shelf or beside your desk.
Start with a shallow container (a ceramic bowl, glass tray, or even a repurposed teacup) and layer it with pebbles, moss, and soil. Succulents, tiny ferns, and air plants thrive in low light, while miniature furniture—think acorn stools, twig bridges, or pebble paths—adds charm without overpowering.
Budget-friendly finds like dried flowers, painted stones, or thrifted figurines bring personality to your scene.
Your finished garden should feel like a story waiting to unfold. The moss stays lush with occasional misting, and the succulents need light near a window but no fuss. Add a tiny lantern or wind chimes for movement, and suddenly, your space feels like a portal to another realm.
Perfect for cottagecore lovers, fantasy fans, or anyone craving a touch of magic indoors. The best part? You can start small—even a single terrarium counts—and expand as your green thumb grows.
📚 In This Guide
- What you need
- Instructions
- Tips and common mistakes
- Wrapping up and next steps
What you need
- ● Container: A shallow tray, ceramic pot, or glass dish (8"–12" wide, 2"–4" deep). Pro tip: Choose one with drainage holes or line it with pebbles!
- ● Soil: Well-draining potting mix (1–2 cups) or a pre-mixed succulent/terrarium soil blend.
- ● Miniature plants: 2–4 small plants like fittonia, moss, or miniature ferns (or air plants for low-maintenance magic).
- ● Decorative elements: 1–2 tiny rocks or pebbles (for drainage + texture).
- ● 1–3 small logs, twigs, or bark slices (for pathways or furniture).
- ● Fairy-sized "furniture" like acorn caps, pinecones, or tiny mushrooms (DIY or store-bought).
- ● Water source: A tiny glass bowl, seashell, or even a hollowed-out rock for a fairy pond.
- ● Basic tools: Small trowel or spoon, scissors, and a spray bottle (for misting).
- ○ Optional but fun: Fairy lights or LED tea lights (battery-operated for safety).
- ● Glitter or biodegradable confetti (for a magical touch).
- ● Miniature figurines (fairies, gnomes, or animals—check craft stores!).
- ● Twine or moss glue (to secure loose elements).
- ● A sunny or well-lit spot (indirect light works for most plants).
- ● Patience! Fairy gardens evolve—let your greens grow and adjust over time. ✨
- ● Creative freedom—no rules here! Mix textures, colors, and whimsy.
Step-by-Step instructions for creating your indoor fairy garden
Transform any corner into a magical world with these simple steps—perfect for beginners and creative gardeners alike.
🪴 Step 1: Choose and Prepare Your Base Container
Select a shallow container with drainage—think ceramic bowls, wooden trays, or even repurposed baking dishes. I like to use a 12-inch-wide ceramic planter because it gives plenty of room for pathways and tiny details. Line the bottom with 1 inch of small pebbles to ensure proper drainage and prevent root rot. This layer also creates a natural-looking base for your fairy world.
Next, add a 2-inch layer of well-draining soil mix. Fairy gardens thrive in lightweight, airy soil that mimics natural conditions. Mix equal parts potting soil and perlite to keep it loose and prevent compaction. Press the soil down gently with your fingers—just enough to create a firm surface for planting without smothering delicate roots.
🌱 Step 2: Design Your Fairy Garden Layout
Sketch a rough design on paper first—this helps visualize where paths, plants, and decorations will go. I often draw a simple winding path through the center, leaving space for a tiny "fairy house" (like a miniature mushroom or terracotta pot) and clusters of plants around it. Use a small stick or chopstick to mark where you’ll plant seeds or place pre-grown succulents.
Fairy gardens love succulents and mosses because they stay small and require minimal care. Plant 3-5 tiny succulents (like hens-and-chicks or sedum) along the edges of your paths. Space them 2-3 inches apart so they have room to grow without crowding. Press the soil lightly around each plant to secure them—this prevents wind or water from knocking them over.
☀️ Step 3: Add Pathways and Whimsical Decorations
Create pathways using fine gravel, sand, or even broken terracotta pieces. I like to use white pea gravel because it looks magical under fairy lights and stays in place better than sand. Sprinkle a thin layer along your sketched path, then gently pat it down with a spoon. For a more natural look, mix in small twigs or bark pieces to mimic a forest floor.
Now for the fun part—decorations! Add miniature furniture (tiny chairs, teacups, or mushroom stools), fairy doors, or even tiny wind chimes made from beads. Place a small water feature like a tiny pond (a shallow dish with a pebble "rock") or a dripping faucet (a bent wire with a bead at the end). Arrange decorations so they feel like they belong in the scene—nothing should look forced.
💧 Step 4: Water and Maintain Your Fairy World
Water your fairy garden gently but thoroughly—use a spray bottle for succulents and a small watering can for moss. The goal is to keep the soil moist but not soggy. I water mine once a week in the summer and every 10-14 days in the winter, adjusting based on how quickly the soil dries. Overwatering is the #1 killer of tiny gardens, so always check the top inch of soil before adding more water.
Place your fairy garden in bright, indirect light—a north or east-facing window works best to prevent scorching delicate plants. If using fairy lights, keep them on for 2-3 hours a day to create a cozy glow without stressing the plants. Dust decorations monthly with a soft brush to keep them looking fresh. With minimal upkeep, your fairy garden will stay enchanting for months!
Tips & tricks for perfect indoor fairy gardens
Turn your creative vision into reality with these insider tips that'll elevate your miniature world from charming to extraordinary.
Drainage is Everything: In Step 1, don't skip that crucial 1-inch pebble layer—it's not just for drainage, it's the foundation of your fairy world's health. I've seen too many tiny gardens suffer from root rot because of overlooked drainage. Use smooth river rocks or even aquarium gravel for a polished look while maintaining proper water flow. The 2-inch soil layer should sit directly on top of these pebbles, never touching the container's sides.
Plant Placement Precision: When arranging your 3-5 succulents in Step 2, think about their mature size. Place taller varieties like sedum toward the back of your container and shorter hens-and-chicks along the edges. This creates natural depth and prevents overcrowding as they grow. Press the soil gently but firmly around each plant—this creates a stable base that prevents them from toppling when you add decorations later.
Pathway Perfection: For Step 3's pathways, I recommend using white pea gravel not just for its magical look, but because it stays in place better than sand and looks more natural than colored gravel. Create your path by sprinkling a thin layer along your sketched lines, then gently patting it down with a spoon. For a woodland effect, mix in tiny bark pieces or crushed twigs—just make sure they're small enough to fit your fairy scale!
Lighting Strategy: The 2-3 hours of fairy lights mentioned in Step 4 is perfect for creating ambiance without stressing your plants. Use warm white LED lights for a cozy glow, and position them around the edges of your container rather than directly over the plants. This creates soft shadows and highlights the textures of your decorations without causing heat stress. I like to use battery-operated lights for flexibility in placement.
Pro Tips for Indoor Fairy Garden
- Turn your creative vision into reality with these insider tips that'll elevate your miniature world from charming to ...
- Drainage is Everything: In Step 1, don't skip that crucial 1-inch pebble layer—it's not just for drainage, it's the f...
- Plant Placement Precision: When arranging your 3-5 succulents in Step 2, think about their mature size. Place taller ...
Frequently asked questions
Got questions about creating your own indoor fairy garden? You’re not alone! Here are some of the most common queries—plus quick, magical answers to get you started.
What’s the best time of year to start an indoor fairy garden?
Anytime is perfect! Since it’s indoors, you’re not bound by seasons. Start in winter for a cozy escape or spring/summer for a burst of fresh, vibrant greenery. Just ensure your plants (real or faux) thrive in your home’s light conditions.
How do I keep my indoor fairy garden from getting moldy or damp?
Mold is no match for good airflow! Place your garden in a bright, well-ventilated spot (avoid bathrooms). Use a shallow tray with drainage holes, and mist plants lightly—never soak them. For faux plants, ensure they’re moisture-resistant materials like silk or plastic.
Can I use real plants in an indoor fairy garden?
Opt for low-light, low-maintenance plants like pothos, succulents, or ferns. Just match their care needs (e.g., watering frequency) to your lifestyle. Pro tip: Add a tiny watering can or pebble tray to complete the fairy-tale vibe!
What’s a budget-friendly alternative to expensive fairy garden kits?
DIY it! Raid your craft supplies for pebbles, moss, twigs, and mini figurines. Thrift stores often have vintage teacups, tiny furniture, or even dollhouse accessories. Get creative—fairies love upcycled charm!
Why isn’t my fairy garden looking “magical” enough?
Magic is in the details! Add glow-in-the-dark paint for pathways, tiny LED tea lights, or a mini wind chime. Play with textures (velvet moss, bark slices) and scale (mix big rocks with tiny mushrooms). Even a sprinkle of fairy dust (glitter!) works!
Wrapping up and next steps
Creating your own indoor fairy garden is a magical way to bring nature’s charm into your home—no green thumb required! 🌿✨ Whether you’re crafting a cozy woodland scene or a tiny desert oasis, the key is to start small, stay creative, and enjoy the process.
Your mini world will not only spark joy but also serve as a serene escape from daily life.
Ready to dive in? Grab your supplies, pick a theme, and let your imagination run wild! Share your fairy garden with us—we’d love to see your whimsical creations! 📸💖